Add MobilityArena as a preferred source on Google
A lot of people do not know that a SIM card can also be a big security risk. You need to be constantly aware of new security measures with all the security threats out there. Here are some ways your SIM card can be hacked and your information infiltrated.
The consequences of being a victim of a SIM hack are dire. The malicious actor gets access to your phone calls and messages, including banking notifications and access codes, leading to loss of money from your bank and investment vehicles. Full scale identity theft can happen as well, resulting in a messy, complicated situation with security agencies. You definitely do not want your SIM card hacked.

- 3 Ways your SIM card can be hacked
- How to prevent your SIM card from being hacked
- What to do if your SIM card is hacked
3 Ways your SIM card can be hacked
SIM Cloning : Once someone else gains access to your physical SIM card, they can use a smart card copying software to create a duplicate of the original SIM. Once they have created a duplicate of your SIM card, they will receive all SMS and phone calls meant for your line. They can also intimate calls and send SMS.
SIM Jacking : The second way your SIM card can be hacked is called SIM jacking. It was discovered in 2019 and this is when a hacker sends a spyware-like code through SMS messages to a device. If the device owner opens this message, the hackers gain access to your messages and calls. From your SMS messages they can gain access to your apps and password using two factor authentication or OTP (One-Time Password). Any of your accounts connected to your phone number is at great risk. The hacker may attempt to use it to change the passwords of your accounts, and gain access to anything which includes your email, bank account, and crypto-currency trading or Bitcoin.
SIM Card Hijacking : SIM Card Hijacking happens when an imposter gains access to your personal info through some mediums. The imposter proceeds to call your mobile carrier service, convinces the carrier service that they are the real SIM Card user and makes a request to switch the current sim to a new sim. Once the imposter gains control of the new number, he/she can log into your accounts using two factor authentication or OTP (One-Time Password). Once access is gained to your accounts, the imposter can use your account for nefarious purposes.
These are the three different ways your SIM card can get hacked. But prevention is better than cure, so let us look at the preventive measures you can take to ensure you do not fall victim.
How to prevent your SIM card from being hacked
People should be careful with the personal information they put online or share with other people. It can be used against you, so keep your personal information to yourself.
Also, be watchful for suspicious emails, text messages, or calls. Some people message or call you pretending to be mobile carrier service and ask for your personal information. Do not give out sensitive information e.g. PIN, passwords, and security codes to a 3rd party. Your bank won’t ask; your service provider won’t ask either.
Setting a SIM card lock is another way of preventing your SIM card from being hacked. I argue that it is the most effective way. It works similar to how your device password works, but instead of your device, it’s for your SIM card. Without a SIM lock, your SIM card can be hacked much more easily. So, it is important that you set up a PIN code; no one can hack into your SIM card without that code. Don’t use your date of birth or that of your child or partner. Generally avoid using anything that can be traced to you as password or PIN.
How to setup a SIM card lock on Android
For Android, you go to settings, tap on ‘lock screen’ then you tap ‘security’. Once you’ve tapped ‘security’, go to ‘other security settings’ and tap ‘ SIM card lock’. On some other Androids like mine, it’s quite different. Go to ‘Settings’ then look for ‘Security’ and tap it. Scroll down and tap on ‘SIM card lock’.
How to setup SIM card lock on iPhone
For iPhone users,go to ‘Settings’, click on ‘Cellular’ then tap ‘SIM PIN’. Then enter your existing PIN to confirm, and the SIM lock will be activated. In conclusion, you have seen the different ways your SIM card can be hacked and how you can prevent that from happening. Stay safe out there.
What to do if your SIM card is hacked
Author:Dun
Dun enjoys reading and writing, and is always on her smartphone. She currently uses a Google Pixel 3.
Add MobilityArena as a preferred source on Google
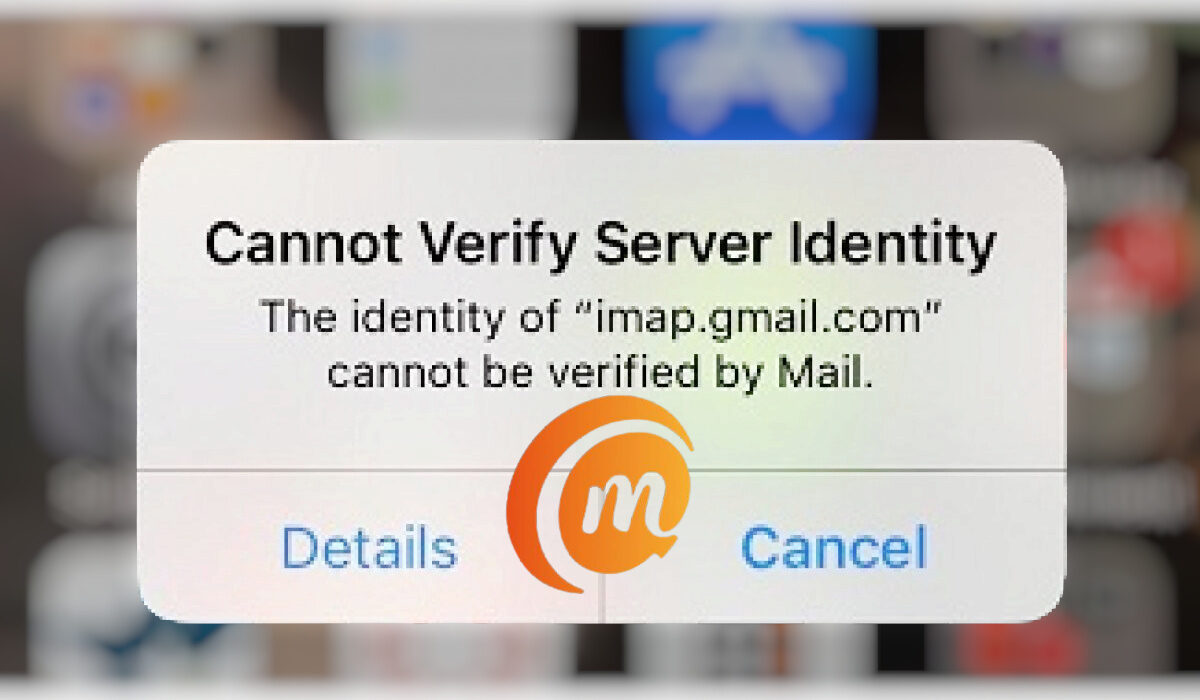
Not too long ago, while using my iPhone, I got a sudden “Cannot verify server identity” error message for imap.gmail.com, and another for mail.mobilityarena.com. It was my first time of seeing something like this and I wondered what was behind it. I could close the error pop-up, but they showed up again after a while. What exactly was wrong that the identity of google.com cannot be verified?
My experience immediately gave me the impression that the “Cannot verify server identity” error is not limited to google.com only. I got a similar error for mail.mobilityarena.com, after all. That is the mail server for my work email here at MobilityArena . Looking up the error, I found that there were other users who had gotten a similar error pop up for Hotmail.com.
What is the solution when the identity of google.com cannot be verified?
- Why does your iPhone say the identity of Google com Cannot be verified?
- 5 best solutions when the identity of google.com cannot be verified error on iPhone, iPad, and iPod
Why does your iPhone say the identity of Google com Cannot be verified?
“Cannot Verify Server Identity” is a common error in iPhone and other iOS devices like iPad and iPod. This issue is related to the status of the SSL certificate on the mail server in question. From my findings, the certificate is not matching the mail server settings in my iPhone. Let’s look at how to fix this problem.
5 best solutionswhenthe identity of google.com cannot be verified error on iPhone, iPad, and iPod
Here are a few fixes for the problem. One of the following will help fix it.
- Close and restart the Mail app . To close the Mail app, double-click the Home button, which will open up the App Switcher. Find the Mail app and swipe up on it to make it go away. You have now shut it down and can launch it again in a few moments.
- Restart your iPhone . Restarting a cell phone is one of the most basic things you can do to solve many problems, and that applies in this case too. In some cases, a user restarts the phone and the problem goes away. This didn’t work for me, though, in my case. But it just might work for you.
- Reset your iPhone settings . Resetting your iPhone’s settings can help fix the “Cannot verify server identity” error. To do this, open the Settings app, then tap General > Reset > Reset All Settings . If you have a passcode or a Restrictions passcode, you will need to type it in to proceed with this. Once you have done that, tap Reset All Settings when you are asked to confirm the action.
- Delete your email account and add it again . Removing the affected email account from your iPhone can force the phone to update its connection to the mail server and so get rid of the “Cannot verify server identity” error. To delete an email account on your iPhone, open the Settings app and tap Mail > Accounts. Under that, find the email account you want to delete and tap on it. Next, tap the red Delete Account button at the bottom of the screen, then tap Delete Account again to confirm the action. This was the solution that worked in my case.
- Factory Reset your iPhone . This is the most extreme action to take to fix the “Cannot verify server identity” error on your iPhone. You should do this only if every other option has failed to work and you absolutely cannot live with the problem. Note that it will wipe out everything you have on your phone – photos, settings, and files. Everything. So, be sure to backup your iPhone before going ahead with a factory reset. To reset, go to Settings > General > Transfer or Reset iPhone. Select, “Erase All Content and Settings”, and complete the procedure.
I am happy I was able to sort out the problem and use my iPhone again without being nagged by the pop up saying, “Cannot verify server identity”. Let me know if you were able to sort the situation out on your iDevice too.
Author:MobileChic
That motivated, gadget-loving geeky chic who tries to stay on top of things. Unapologetic iFan.
