Add MobilityArena as a preferred source on Google
Nowadays, more people watch movies and TV shows on streaming services like Netflix and Hulu. If you have a subscription and don’t need to be offline, this is a great option.
If you want to download movies for free on Android smartphones to watch later, you might consider switching from a streaming service to one of the following Android apps.
- YouTube
- KFlix
- Tubi
- Cinema HD
- Free HD Movies
- Vudu
- Crackle
- VidMate
1. YouTube
Best for using your smartphone to watch old movies. YouTube is one of the software that comes pre-installed on your Android device, so you won’t need to download and install any additional software to begin watching movies.
YouTube has a fantastic selection of films. The majority of these, however, are old films published to YouTube by production firms and films by indie filmmakers who upload their content to their own YouTube channels.
If you like movies that aren’t aimed at a broad audience, YouTube is a terrific place to start. While you may discover the most recent movies on YouTube, you must pay a rental fee to watch or download them. It is by far the most popular app you can use to download movies for free on Android devices.
2. KFlix
3. Tubi
Users who wish to watch movies and TV shows that aren’t offered on Netflix should use this service. Have you ever searched Netflix for a certain movie only to be disappointed when it wasn’t there? You can download movies for free on Android smartphones with Tubi, which has a section just for stuff that isn’t on Netflix.
4. Cinema HD
Although the movie is available in Cinema HD in HD quality, you can download it in whichever resolution you wish. There are also a lot of subtitled foreign language movies accessible. The primary drawback is that you might need to manually download the APK file and install Cinema HD on your smartphone because it isn’t always available for download through the Play Store.
5. Free HD Movies
Best for: A vast range of titles, and the app works reasonably well. This program contains a good selection of new and older movies, and the quality is excellent. You’ll also notice that the app has a lot of positive feedback, which is uncommon among free movie-watching apps on the Google Play market.
Importantly, you can save any of the videos to your smartphone and watch them later. There’s also a useful search option to help you find movies to watch. Almost all of the content on Free HD Movies is in HD resolution and features subtitles in a variety of languages.
6. Vudu
Best for: Streaming 5k resolution movies. You may stream and download movies for free on Android devices using the free Vudu app. You can download a lot of the movies and TV series from it to watch later on your Android device or watch them online. The software is free to download and use, but before you can download any content, you must first watch a few adverts.
But the video and audio quality that Vudu offers makes it all worthwhile. The nicest feature of this software is the chance to view your favorite movies in breathtaking 4K UHD. It offers Dolby Vision HDR sound quality as well, so you can watch television with ease.
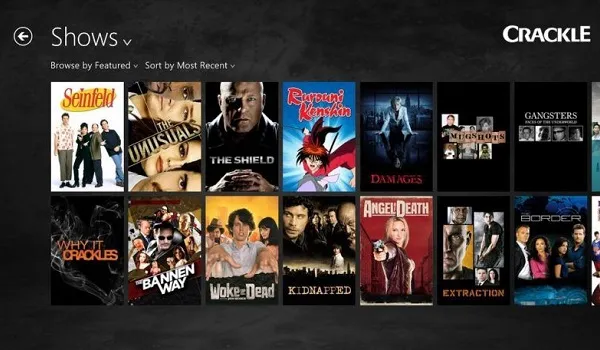
7. Crackle
Crackle is another good alternative for movie downloaders. All of the usual features are present, such as a user-friendly interface, a straightforward search tool, and a vast collection of free movies and TV shows to watch. Because the program is free to use, some advertising appears, but it is not intrusive in any way.
If you log in, the app will ask you a few questions before providing you with a list of personalised movie recommendations if you’re not sure what to watch next. Crackle also offers quick streaming and downloading speeds. This software may be great for you if you detest or cannot afford to spend time.
8. VidMate
You may view and download movies for free on VidMate, where you can find both new and classic titles. Regarding this app, bear the following in mind: Your location affects the title choices, and VidMate isn’t offered in the Google Play Store. As a result, you must first download the APK file from the website before you can use the service.
Integration with additional platforms like Soundcloud, YouTube, Vimeo, Dailymotion, and Instagram is great. VidMate stands out from the other apps on our list since it lets you watch and download content from other websites including YouTube, Vimeo, Dailymotion, Instagram, and SoundCloud.
Author:Moses Udah
Creative, teacher, web content writer, copywriter, and student.
Add MobilityArena as a preferred source on Google
When it comes to productivity, anything that lets you get a little hands off with tasks on your PC can be priceless. Thankfully, there’s a way to automate tasks on Windows 10 devices using a tool known as Task Scheduler. We’ve created this guide to show you how to automate tasks easily on your Windows 10 device using the Task Scheduler.
What is a Task Scheduler?
You can create and execute tasks automatically on Windows 10 devices by using the Task Scheduler application. The scheduler is typically used by the operating system and a few apps to automate maintenance procedures (such disk defragmentation, disk cleanup, and upgrades), but anybody can utilize it.
You can schedule the start of programs, the execution of commands, and the execution of scripts using this feature. You can also set tasks to be triggered when certain events happen.
How Do I Automate Tasks on My PC With the Task Scheduler?
You can automate tasks on Windows 10 PCs, using either basic or advanced settings. For the sake of simplicity, we’ll focus on getting this done using the basic settings in this guide. Use these steps to create a task in Windows 10 with basic settings:
- Launch Start .
- Click the first result from your search for Task Scheduler to launch the application.
- The “Task Scheduler Library” branch can be selected at this point by right-clicking it and choosing “New Folder.”
- Input a name for the folder in the text box, like “MyTasks.” (This step is optional, however it is advised so that you can keep your tasks distinct from system and app duties.)
- Click the OK option.
- Select the MyTasks folder by expanding the “Task Scheduler Library” branch.
- Pick Action from the menu.
- Choose “Create Basic Task” from the menu.
- Enter a brief, descriptive name for the operation in the “Name” section, such as “Notepad Launcher”. If you want, you can also make a descriptive caption for the task in the “Description” field. Then press the Next button.
- Click on the Monthly option. Note that when using Task Scheduler, you can choose from a variety of triggers, such as on a given date, at startup, or whenever you or a specific user signs in. You may need to adjust extra options based on your needs. Afterward, press the Next button.
- Set the time and date for the task to run using the “Start” settings (very important).
- For the months of the year during which you want to run the task, select them from the “Monthly” drop-down menu.
- To define the days that the job will execute, use the “Days” or “On” drop-down menu. Quick tip : If you want to run a task on a specific day of the week, using the “On” setting might be your best bet.
- Then press the Next button.
- To start an application, run a command, or run a script file, use the Start a program option.
- You can choose the Send an email or Display a message option, but these are deprecated features, meaning that Microsoft is no longer supporting them, so they may or may not function.
- Enter the application’s path in the “Program/script” field. Quick tip : Use the Browse button to locate the app if you don’t know its path.
- This is an optional step — you can provide arguments in the “Add arguments” area to run the task according to certain guidelines.
- Choose the folder where the program will launch by entering it in the “Start in” area (also optional). In most cases, you can keep this setting blank.
- Select Finish from the menu.
As soon as you finish the steps, Task Scheduler saves the task and sets it to automatically run at the appointed time. As you can see from the steps above, the process is pretty easy.
This next set of steps can be used to display, exit, or run the task whenever you want after you’ve created it using Task Scheduler:
- Launch Start .
- Click the top result after searching for “Task Scheduler” to access the experience.
- Branch out the Task Scheduler Library.
- Choose the folder containing your tasks.
- Right-click the job and choose Run from the menu to run it whenever you want.
- Right-click a task and choose the Properties menu to change it.
- Right-click a task and choose “Delete” from the menu that appears if you want to delete the task.
You may see a list of all of your tasks on this page, along with details like the triggers, the most recent run time, and the next run time. As an alternative, you may always choose the task and carry out operations like Run , End fast , Disable , and Edit the task using the Actions window on the right.
It’s a good idea to keep in mind that the same instructions in this guide apply to Windows 8.1, Windows 7, and earlier versions even though this guide focuses on Windows 10.
In summary , automating tasks using the Task Scheduler on your Windows PC is pretty easy. You just need to be equipped with the right instructions.
- Don’t miss our mobile phone reviews .
- Follow our news on Google News .
- Join our WhatsApp Group , to be notified of the most important articles and deals,
- Follow us on Instagram , Facebook , Twitter , and YouTube .
