Add MobilityArena as a preferred source on Google
The G2 Guardian is not your run-of-the-mill smartphone. It is targeted at professionals and enthusiasts in what we call the outdoor smartphone industry . It is called that because rugged phones initially targeted hikers, campers, search-and-rescue personnel, construction technicians and engineers, and the like. But it is also suited to certain indoors professionals and enthusiasts as well – all involving extreme physical conditions.
As such, the AGM G2 Guardian is designed and built to withstand impact shock, high temperatures, water, and dust. But that is not all; it also has specialised equipment to see and measure heat. One consequence of this, as is common to all rugged phones, is that the G2 Guardian is bigger and heavier than your average smartphone – by a lot.
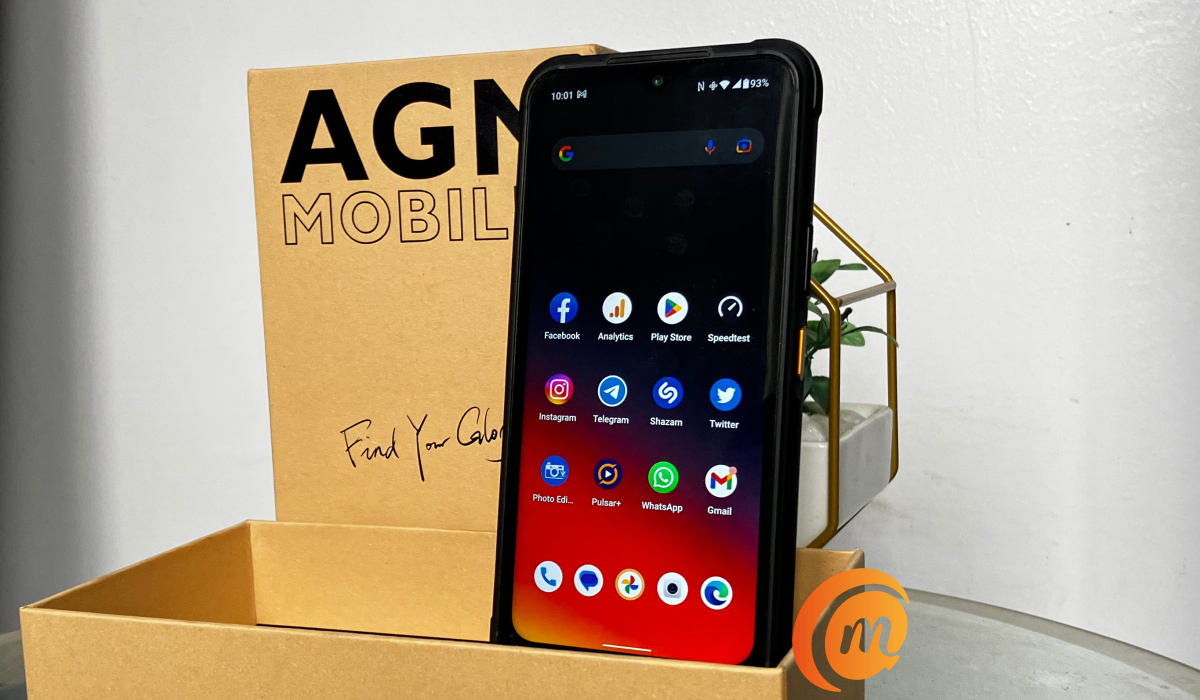
AGM G2 Guardian unboxing
- Unboxing: What Is In The Box?
- First Impressions
- Performance
- Battery Life
- Wireless Network
- Using The Thermal Monocular Camera
- Taking Regular Photos Selfie Sample Rear Camera Samples
- Our Verdict
- Video Review
- References
Unboxing: What Is In The Box?
The box contains a quick start guide and other paper documents, a dust absorber, spare flaps (should you lose the protective flaps that come covering the ports of the phone), a spare screen protector (there is one pre-applied on the display), a sticker, a USB cable, and an 18W charging brick, along with the phone itself.
This AGM G2 Guardian is based on the 12GB RAM version and was sent in by AGM Mobile. There are other variants, all of which are equipped with 8GB RAM. Key specs of the phone include the following:
- OS: Android 12
- Release Date: March 2023
- Network Type: 2G/3G/4G/5G, dual nano-SIM
- Display: 6.58-inch, 1080 x 2408 pixels resolution, Gorilla Glass, 120Hz refresh rate
- IP68/IP69K and MIL-STD-810H ratings: 1.5m drop proof, 1.5m waterproof for 30 minutes, and dust proof
- Processor: Qualcomm QCM6490 5G chip
- Selfie Camera: 32 MP
- Rear camera: 108 MP main lens + 20MP infrared night vision lens + 2MP macro lens
- Thermal Monocular camera with 500metres detection range
- RAM: 12 GB
- ROM: 256 GB
- External memory: microSD card support
- NFC, 3.5mm audio jack support, Lumens torch light, dual-frequency GPS
- Battery: 7000 mAh
- 18W fast charge
First Impressions
Picking it up from inside the sales box, the size and heft immediately registers. This big guy measures 25.3mm in thickness and weighs 405g. For context, the iPhone 14 Pro Max is 7.9mm thick and weighs 240g, but then the iPhone wouldn’t survive half the torture that the G2 Guardian can.
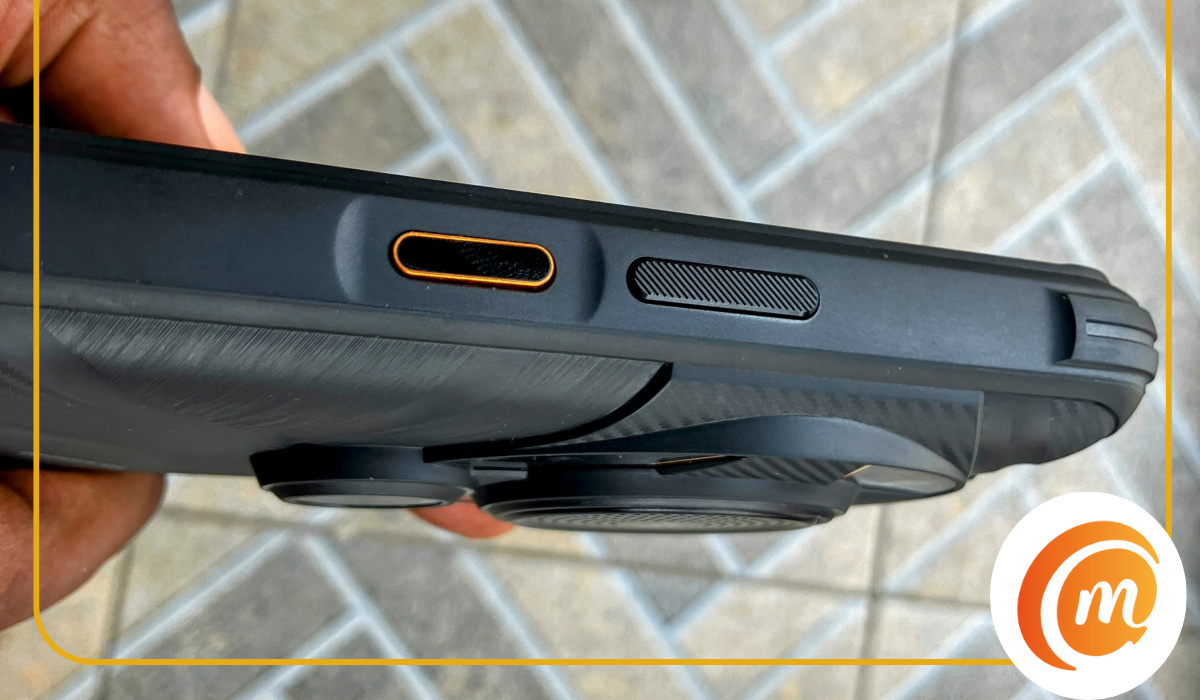
At the top end of the left side of the phone is a sealed compartment for two nano-SIM cards and a memory card. Some distance below that is an orange button – a programmable or user defined key that you can assign to one of 5 options, or you can keep it disabled. I assigned it to the LED torch located at the top end of the phone, a position it shares with a microphone hole.
On the right side of the phone are the volume keys and the Power button, which also doubles as a fingerprint sensor. The power button has a nice orange highlight.
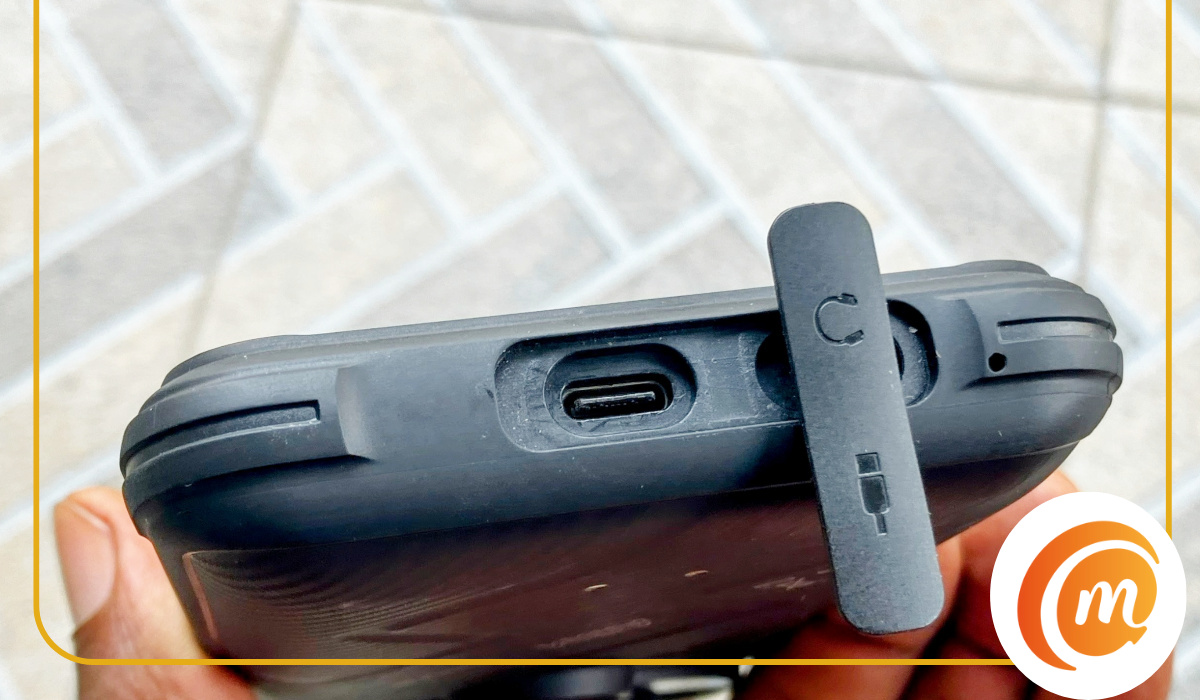
At the bottom end of the phone is a flap covering the USB port and the 3.5mm audio port. The flap is to seal these ports against water and dirt. The G2 Guardian is IP68/IP69K rated. There is also a microphone hole located next to the audio port.
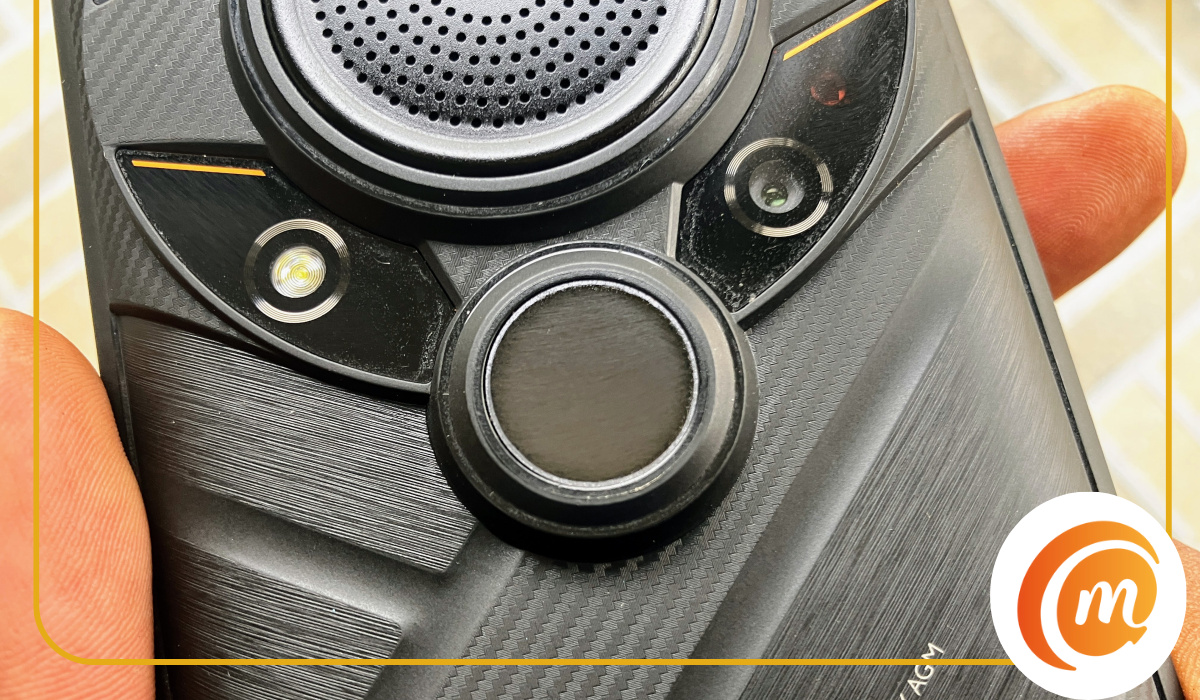
Turning on the G2 Guardian, the first thing that made a solid impression on me was the audio quality. I was immediately wowed by the sound from the single loudspeaker at the back. It is impressive. AGM says it is a 3.5W speaker. 3.5 watts is relatively high wattage for a smartphone speaker. The iPhone 15 Pro is said to have a 3W speaker.
The loudspeaker is the large round thing at the back surrounded by four camera lenses and an LED light. It has good depth and audio quality, as well as volume. One mild annoyance, however, is that because of the location of the speaker, when we place the phone on its back, the audio is impacted and loses some of its quality. The volume is hardly affected, though.
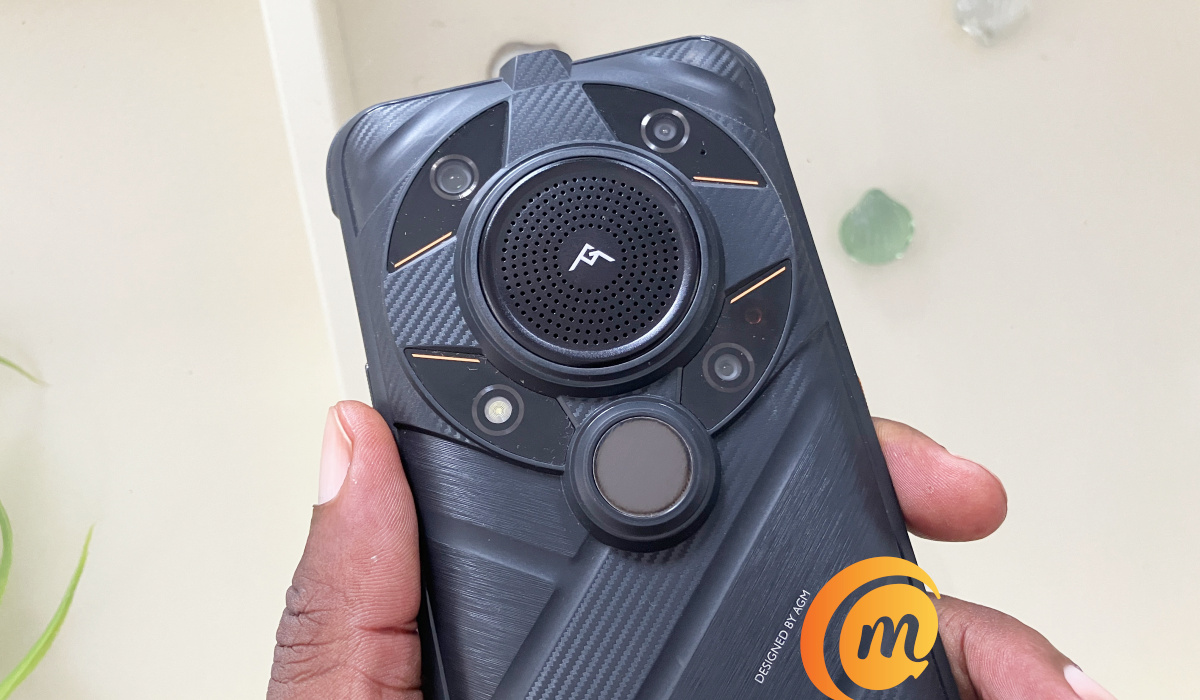
AGM G2 Guardian review: on the back are four cameras and a decent loudspeaker
The AGM G2 Guardian feels like it will take any beating – and it better do. This is a rugged smartphone, after all.
Holding the phone in one hand, your index finger or forefinger naturally rests where the thermal camera is located. That’s where rear fingerprint reader is usually located. Unfortunately, this means our index finger kept touching the thermal lens, smudging it, such that it constantly needed cleaning.
We couldn’t find any menu in the settings to modify refresh rate, so the screen refresh rate basically runs on auto all the time. Which translates to functioning at 120Hz most of the time – about 96% of the time, with very brief flashes down to 60Hz. The only app where the screen ran at 60Hz all the time was the camera app.
Performance
How powerful is the processor in AGM G2 Guardian? In everyday situations, including with heavy gaming, not once did we experience a pause or freeze. We downloaded Call Of Duty Mobile and gave it a spin. To get benchmark scores, we also downloaded and installed AnTuTu 3DBench. It got a score of 552101. Let’s see how that compares to a few other phones.
- Nothing Phone (1): 592789
- AGM G2 Guardian: 552101
- Samsung Galaxy A54: 506678
- Nokia X30: 403732
Performance in everyday tasks is top notch, with no issues. Outside of everyday situations, though, we experienced some pausing when using the thermal camera, and we will come to that in the thermal camera section of this review.
Battery Life
Having dependable performance is something, but does it come at the expense of battery life? With a capacity of 7000mAh, the G2 Guardian has a robust battery – certainly bigger than what the average smartphone has, though nowhere as beastly as what some other rugged smartphones have. For example, the Unihertz Tank has a 22000mAh battery that delivers 5-7 days of use.
But a quick one: I wish the G2 Guardian had at least 30W fast charging instead of the 18W it has. It would be swell. 18W is a bit slow in today’s world. I also wish it had an infrared blaster for use as a remote controller for home appliances.
Having said that, when fully charged, the G2 Guardian’s battery holds for one to two days of heavy use. By heavy use, I am talking about up to four hours of YouTube, Netflix, or Prime Video movies daily, some music playback, constant email, some Instagram, Twitter and Facebook, as well as Web browsing. Speaking of which, this is a 5G phone and it holds on to the network well.
Wireless Network
I had a SIM from the same network in the G2 Guardian as I had in an iPhone SE 2022. This was in an area with fringe 5G network coverage. While the iPhone spent most of its time on 4G and struggling to latch on 5G, the G2 Guardian admirably held on to the 5G signal all through.
Using The Thermal Monocular Camera
The thermal camera on the G2 Guardian is the most advanced on any smartphone as of today. It is a thermal monocular camera – the first in any smartphone. The big question is, Does it live up to the specs? Our team put it through its paces to find out.
What is a thermal monocular camera and what do you need it for? A thermal monocular uses a special infrared-sensitive lens to provide clear images in poor visibility, low light, or darkness . By detecting the heat energy radiating from objects, the monocular is able to create an image that you can see. Thermal monocular cameras are said to have a range of between 90 meters and 1.5km [1]. This is new territory for me and for everyone else on our team, so we had to go read things up a bit.
It also means that we had to fiddle a bit with the thermal camera in the G2 Guardian. There are lots of settings that will take time for us to master. So, take our results here as the first attempts of amateurs. As we get better at using a thermal camera, we will update our results and experiences in this review.
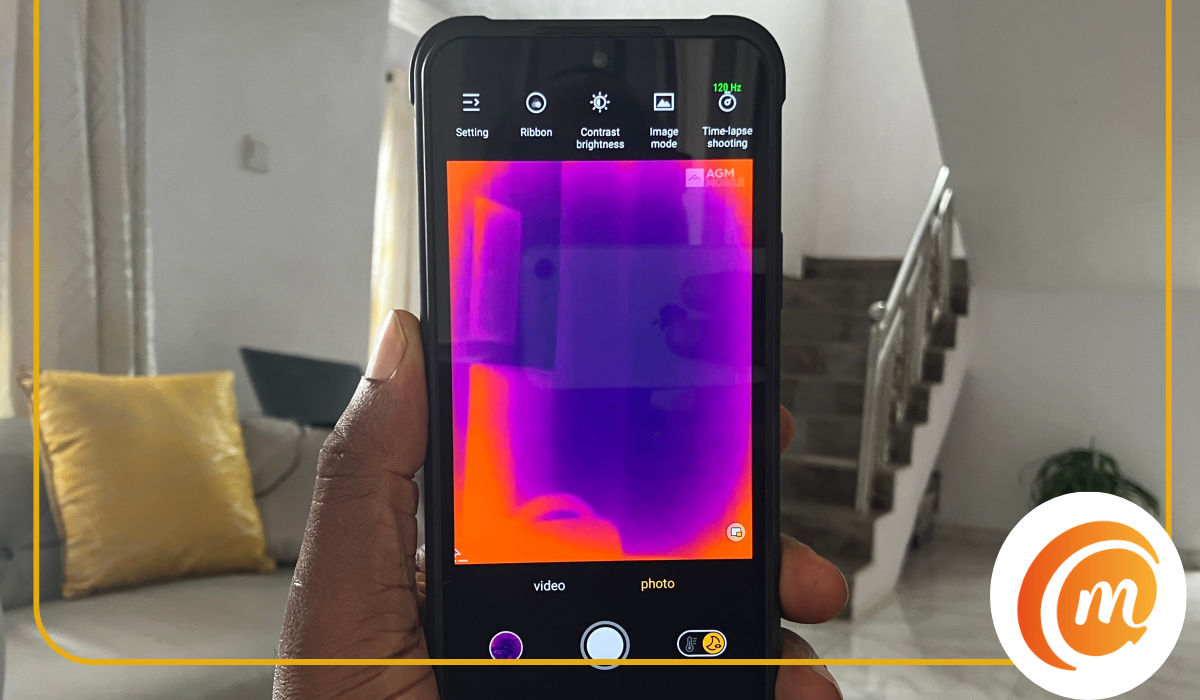
The thermal monocular camera works through an app named Thermal AGM. This is a camera app separate from the standard camera app. Unlike the standard camera app which takes light photos, the Thermal AGM camera app takes heat photos. This is what the Thermal AGM camera app looks like:
I sat outside for hours on a certain night to see what kind of images I could get out of it. Shared below are a few.
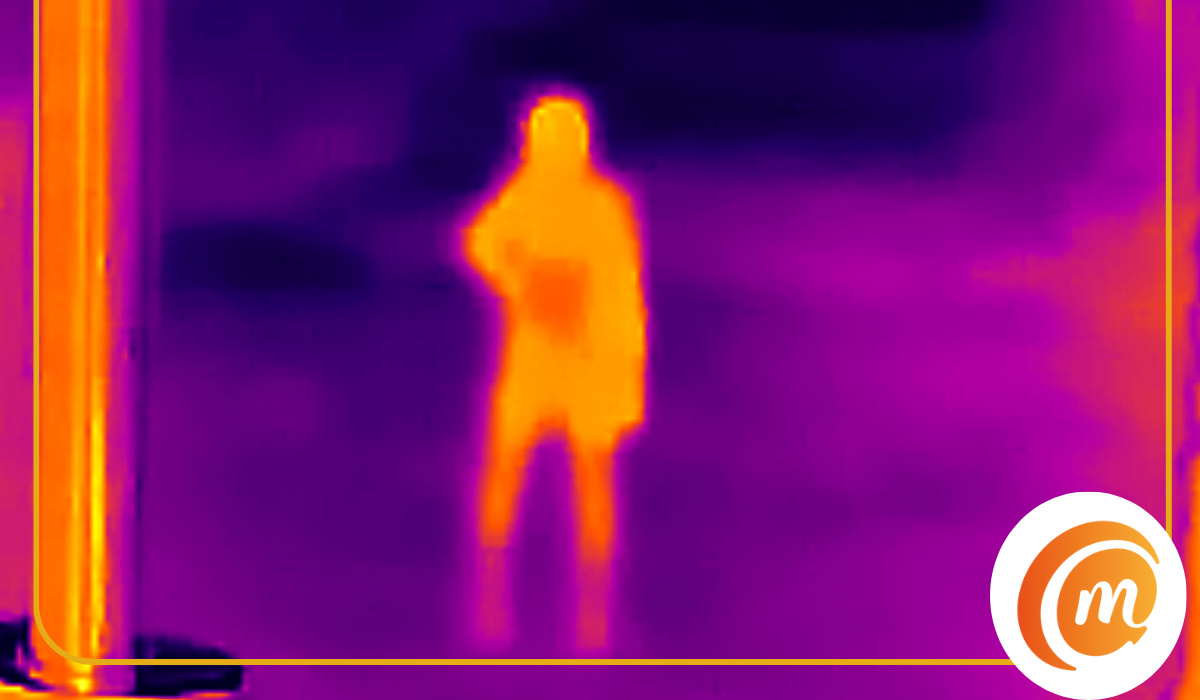
The above thermal photo was shot from a distance of about 10 metres from the guard.
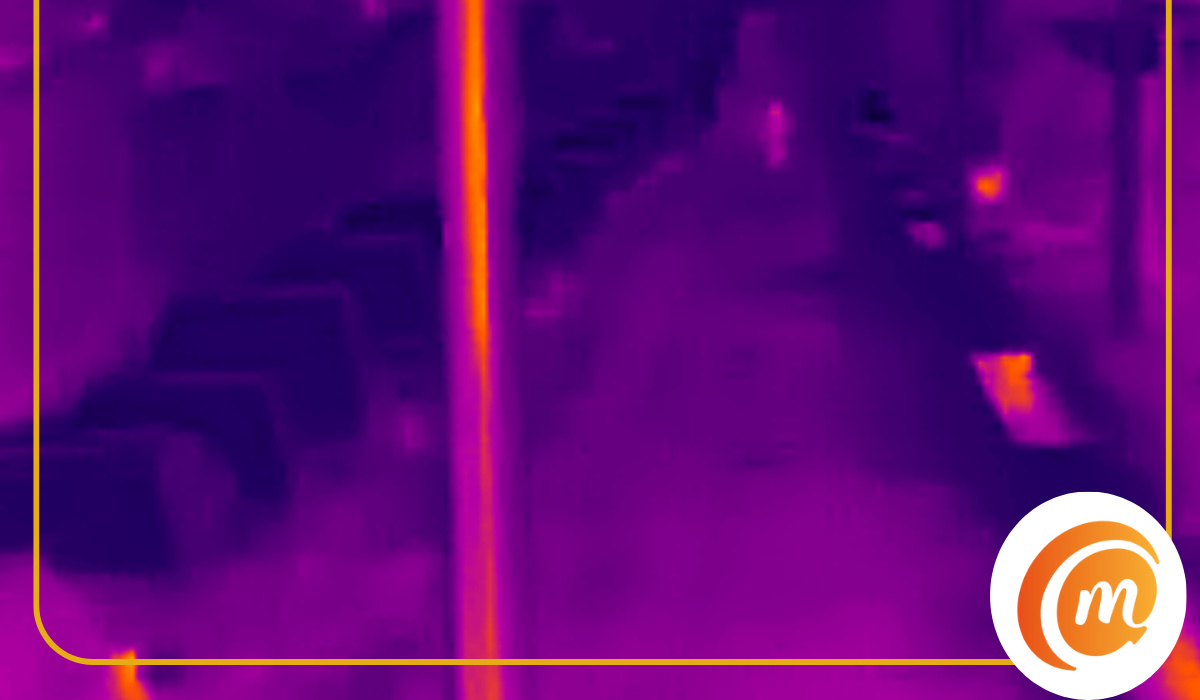
The above image may not look impressive to the average eye, but when you consider that this was shot in pitch darkness with zero visibility to the eye, the fact that the camera could pick the heat signature of that lone human in the background from a distance of about 200 meters is intriguing. Sitting out there that night, he was invisible to me and to regular cameras, but the Thermal AGM camera picked him out. Here is a regular photo of the same view:
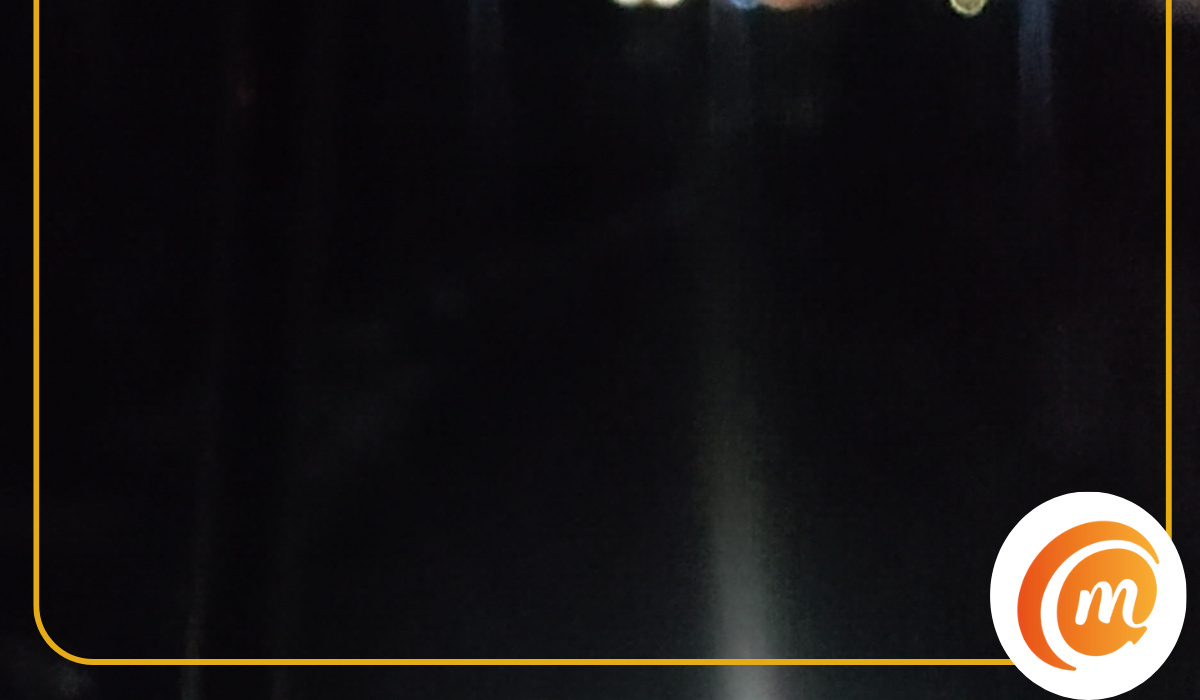
Pitch black. Nothing is visible to the eye, but the guard is in there somewhere walking towards me. Below is another thermal photo of him at a closer distance, and he was still not visible to the naked eye. But the Thermal AGM camera picked him out.
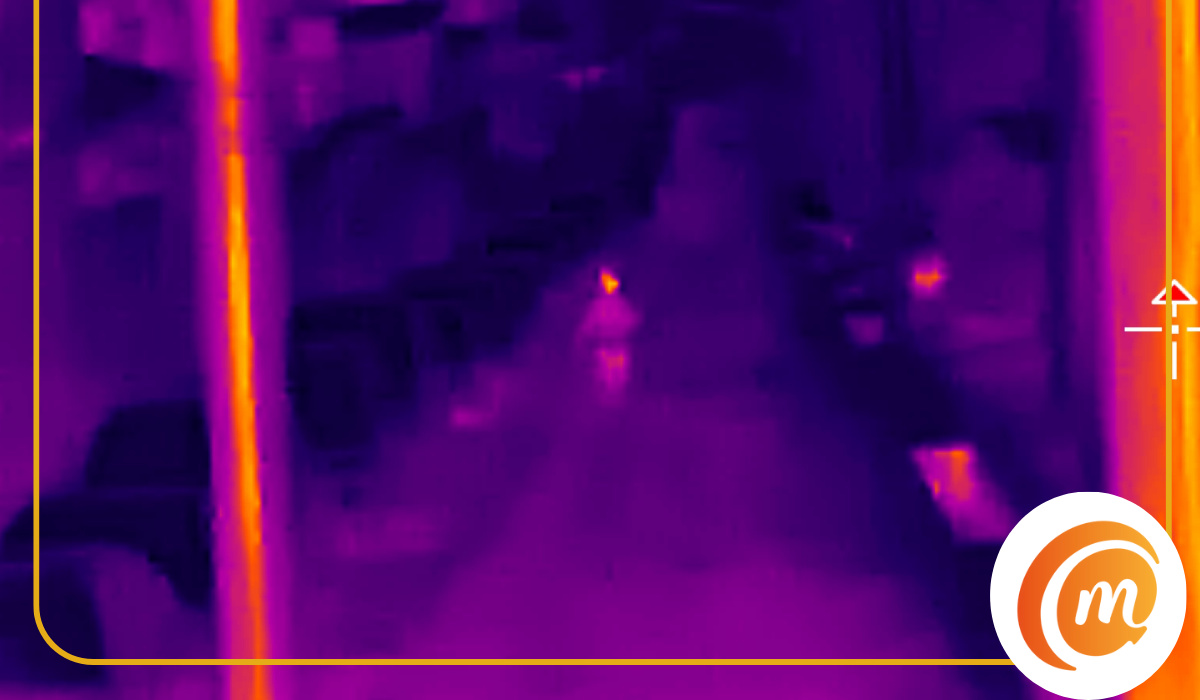
AGM says the thermal monocular on this phone is capable of picking human heat profiles from up to 500 meters. We were unable to confirm this figure. We can confirm that it works at around 180 to 200 meters, though, and even that is fantastic. We will find more opportunities to push its capabilities and update this review with any new information.
Earlier, I mentioned that while in use, the thermal camera app pauses sometimes. It is the only time that the G2 Guardian pauses at all, so we suspect this issue has to do with optimisation of the app. Perhaps AGM can fix this with a software update.
That aside, the Thermal AGM app has a catalog of extra features, including the ability to measure the temperature of objects you are capturing (you can set the temperature unit to Centigrade, Fahrenheit, or Celsius), the ability to set temperature parameters and measurement alarms, set isotherm colors, choose color profiles (Ribbons), as well as shoot thermal tine-lapse video. This is a Swiss-Army knife for the outdoor person who needs to capture images and video in the dark and wants to be able to tweak his tool for best results.
Taking Regular Photos
Besides the dedicated thermal monocular camera, the AGM G2 Guardian has the regular set of cameras you will find on any decent smartphone. There is a 32MP selfie camera at the front, and a 108MP main camera at the back, accompanied by a 20MP infrared night vision camera and a 2MP macro camera.
AGM G2 Guardian may cost a pretty penny, but don’t expect premium flagship photography from it; its focus is the thermal monocular camera (and rugged build). That is where its magic lies.
What kind of quality can you expect from the regular cameras? The person with average photography skills can expect good photographs; a person with more than average skills can get some sterling shots out of them. Let’s have a look at some samples that we took.
Selfie Sample

Natural lighting, indoor selfie
While usable for social media sharing, I am not quite a fan of the quality of the selfie photos. There seems to be too much processing and not enough details and sharpness. Perhaps AGM can improve the selfie camera with a software update? Please?
Rear Camera Samples
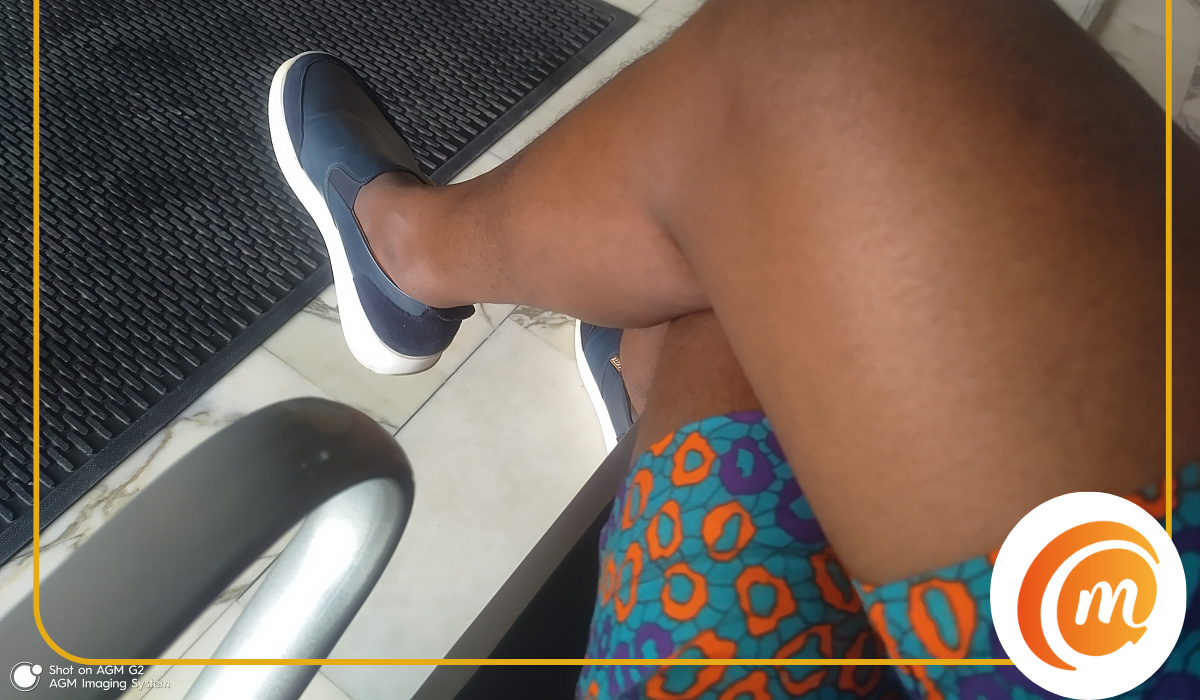
Natural lighting, indoors
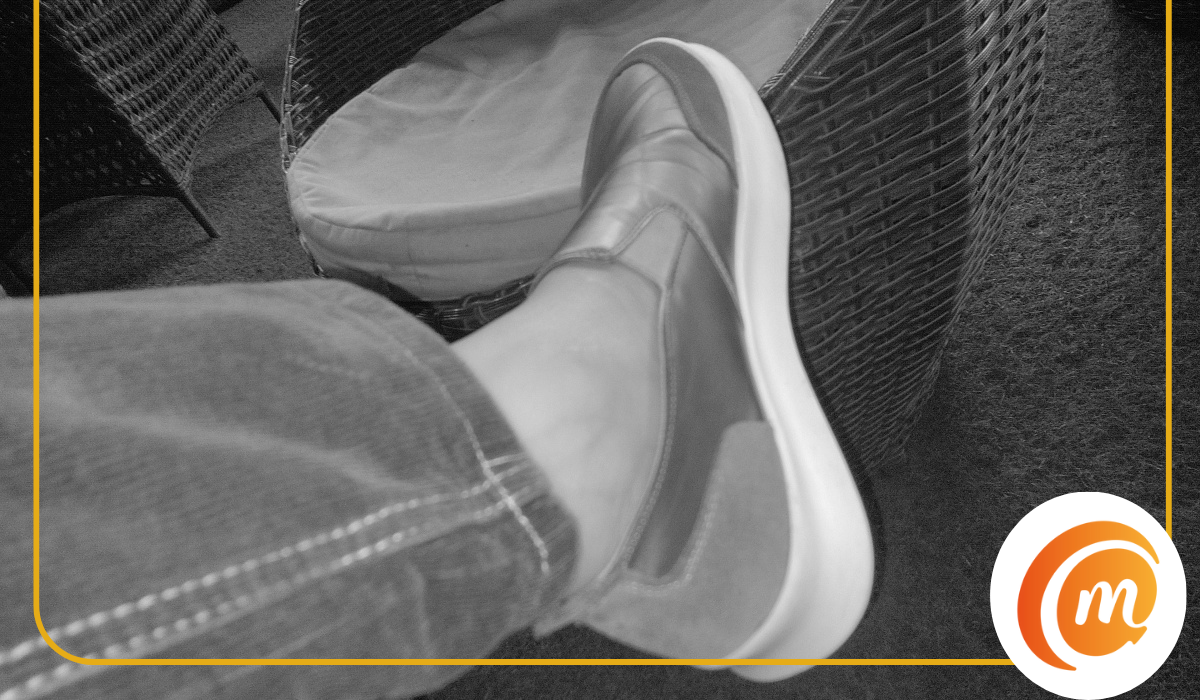
An infrared night vision photo
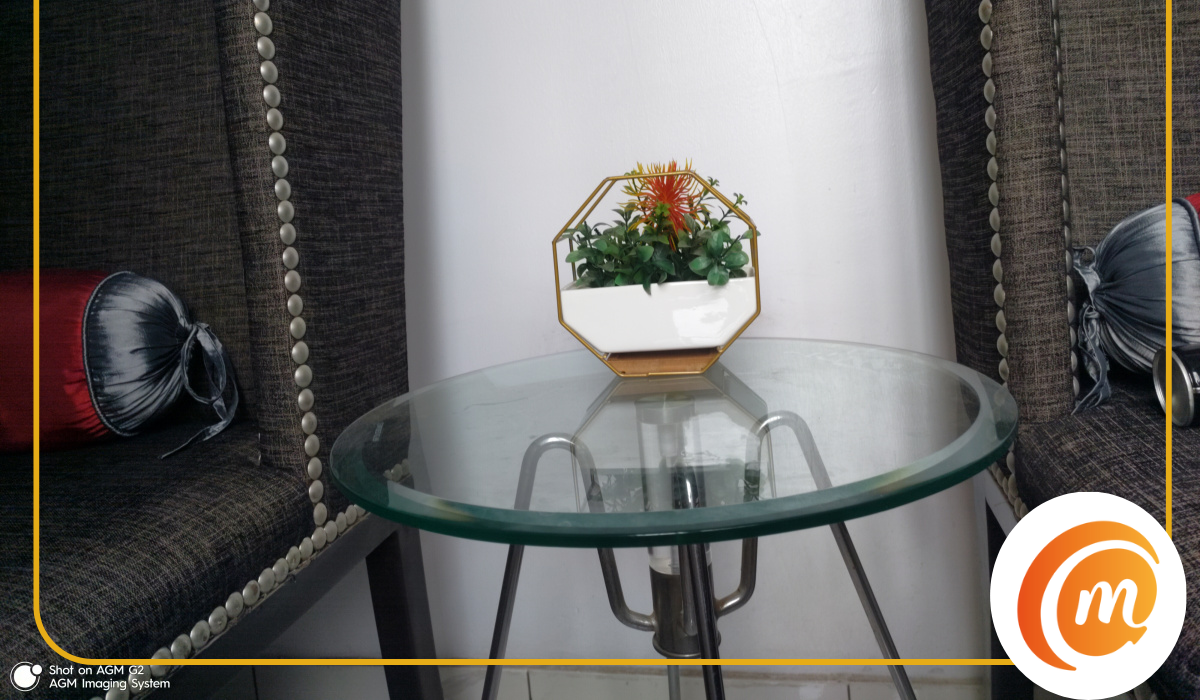
Indoor table flower decoration. Natural lighting.
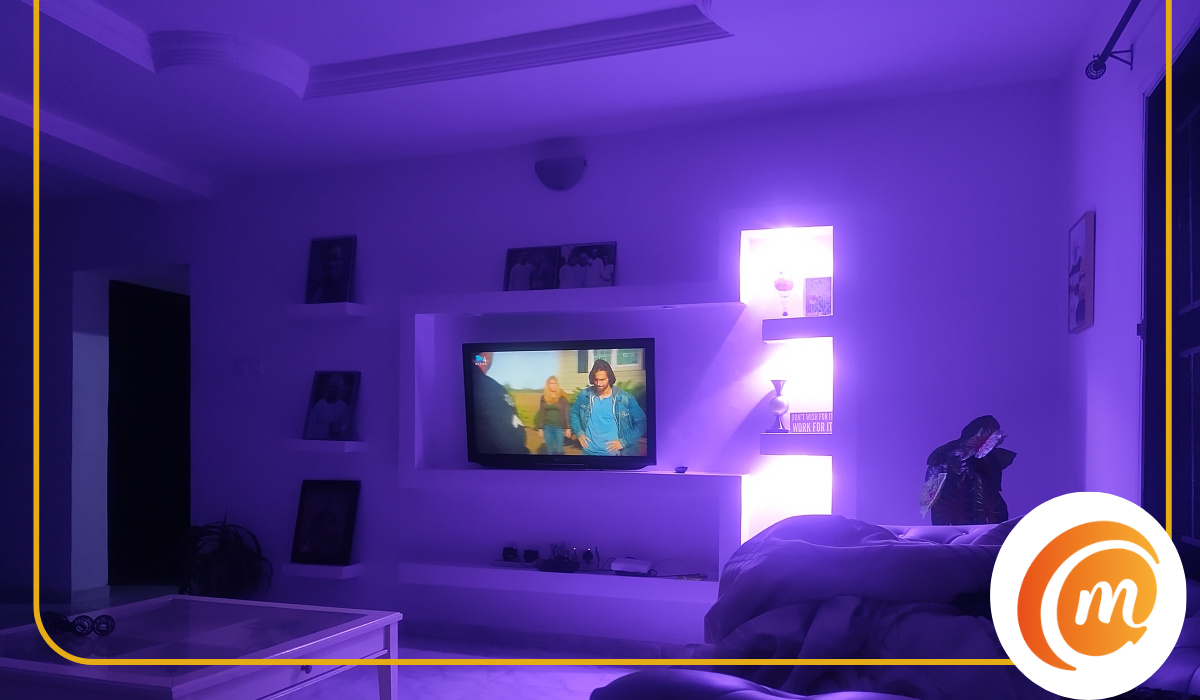
Indoor, lowlight camera sample
As you can see, the 108-megapixel main camera is quite good. In normal mode, it creates 12-megapixel images via pixel binning, a technique first introduced in camera phones by Nokia in 2012 in the legendary Nokia 808 PureView. Pixel binning is a technique where multiple pixels in a camera sensor are combined to form one superpixel. In this case, the technique produces 12MP from this 108MP camera.
So how good are the images shot by the G2 Guardian’s main camera in regular mode? Details are good, with sharpness and good color reproduction. It isn’t a camera to scoff at. I can also see some use cases for the infrared night vision camera. I wasn’t expecting much from the macro camera, and I wasn’t disappointed. In our tests, we got poor macro shots. 2MP cameras are generally no good, and no-one should be putting them in any phone. A 5MP resolution would have been much better for the macro camera.
You can also use the main camera to shoot 108-megapixel images by witching to High Resolution mode in the camera. This mode is great for capturing images with greater details for editing purposes. Other than that, for most other situations, you will likely not need 108MP images.
Our Verdict
The G2 Guardian is a technological marvel if you look at it from the angle of its target audience – hunters, hikers, fire officers, search-and-rescue personnel, and security personnel. It is tough and rugged and will keep going long after the regular phone has cracked or broken down.
The long distance thermal monocular camera holds up well and gets the job done. Being able to see (and capture both still and video media) in the dark is a feature that its target audience will find extremely useful.
It packs all of these, while offering the regular features that a modern smartphone user wants – good performance, good photos, large storage, long battery life, 5G connectivity, and a robust loudspeaker, among other things. It is easily our overall best rugged smartphone of 2023 .
AGM G2 Guardian sells for $899 for the 8GB RAM + 256GB storage trim, and $999 for the 12GB RAM + 256GB storage trim. The AGM G2 Pro is a more affordable variant with some trimmed down specs (it has a normal thermal camera) and sells for $799 (8/256GB). Lastly, for just $699 (8/256GB), you can buy the vanilla AGM G2 which also drops some specs and lacks a thermal camera completely. You can buy your unit from the AGM G2 webpage .
Video Review
Watch the video review on YouTube .
References
- What Makes A Good Thermal Monocular? ( source )
Author:Mister Mobility
Digital Skills and Communication Coach | Mobile Phone Connoisseur since 2001 | Tech Blogging since 2004
Add MobilityArena as a preferred source on Google
A smartphone’s basic functions are supported by several of its components, one of which is the proximity sensor. Without this component, your smartphone’s display won’t turn off during a telephone conversation or turn back on afterwards. It’s also responsible for identifying your face to unlock your smartphone.
This guide will help you fix an Android’s proximity sensor not working. Your device could stop recognizing your face to unlock the screen or stop performing other functions that depend on the proximity sensor. In that case, pay attention to the techniques I’ll describe below to fix an Android’s proximity sensor not working.
- How Can You Fix an Android’s Proximity Sensor Not Working? Clean Dirt and Dust Near the Sensor Remove the Case or Screen Protector Enable Accidental Touch Protection in Settings Update Your Phone Recalibrate the Proximity Sensor Reset Your Device
How Can You Fix an Android’s Proximity Sensor Not Working?
If the proximity sensor on your Android phone stops working, it can result in pocket dials or face unlock failures. Here are some ways to fix an Android’s proximity sensor and get it working fine again
Clean Dirt and Dust Near the Sensor
Dust and grime may not appear to be major issues at first, but if they begin to accumulate, they can be harmful to your phone. If dust gets in the way of your proximity sensor, it won’t be able to recognize your face properly.
To fix an Android’s proximity sensor not working, gently clean the top part of your phone that holds the sensor, using a clean cloth or ear swab. The proximity sensor is always situated alongside the top speaker, regardless of phone type.
After cleaning it, check to see if it works. Also check for cracks or scratches near it, as they might also prevent proper functioning. If these are present, take your device to a repair shop.
Remove the Case or Screen Protector
Cases and screen protectors could also prevent a proximity sensor from working properly. If the glass is too thick or not sized correctly for your phone, it may cause detection issues. If you recently installed a new screen guard, carefully remove it from your touchscreen and clean it down.
This suggestion may help fix an Android’s proximity sensor not working. Also, when purchasing screen accessories, make sure to get one that is designed exclusively for your phone model and test it thoroughly.
Enable Accidental Touch Protection in Settings
Your proximity sensor could also have its functionality disabled thereby causing accidental touch protection to stop working on your device. It’s easy to correct this to fix an Android’s proximity sensor not working.
On Samsung phones, you can enable this option by heading to Settings > Display , scrolling down, and selecting Accidental touch protection . When activated, your phone will ignore any accidental touch while in your pocket.
When the feature is activated, the screen will show “ Your phone is being protected from accidental touches .” When you take your phone out of your pocket, you’ll notice an option to to slide your device to dismiss the protection and continue using it normally.
Update Your Phone
Smartphones sometimes experience bugs or other issues due to incompatible software updates or short-term problems (these tend to go away on their own). It’s therefore necessary to constantly update your smartphone since phone manufacturers release updates to fix these bugs.
Go to Settings > System > Advanced > System Update to see if your phone needs any upgrades. You can locate it under Settings > Software update > Download and install on Samsung mobile devices. Check afterward to see if the update helps fix an Android’s proximity sensors not working.
Recalibrate the Proximity Sensor
Problems arising from the action of bugs or glitches can be fixed by recalibrating your phone’s sensors. Calibration is crucial since it ensures that the data being read by your sensors is accurate.
Recalibrations work like resets — they help ensure proper device operation. To recalibrate your Android’s proximity sensor, you’ll find the Proximity Sensor Reset/Fix app useful. You can download the app for free from the Google Play Store. Once you’re done, check to see if the recalibration worked to fix an Android’s proximity sensor not working.
Reset Your Device
Resetting your device deletes all your data and returns the device to its original state. This can get rid of any bugs that the other solutions could not fix.
Make sure to backup your data and sync all of your information to your Google account before the reset. You won’t lose any data this way, and Google will restore it all once the reset is complete.
Dealing with proximity sensor issues can be frustrating, but by following the easy methods outlined above, you can easily fix an Android phone’s proximity sensor not working. If everything else fails, I recommend taking your smartphone to an approved repair center for specialists to handle it.
