Add MobilityArena as a preferred source on Google
Why would you want to change default apps on Android smartphones? Because, sometimes, some default apps have better 3rd party alternatives. One of the things that makes smartphone usage seamless is when you can perform the right actions with the right apps. Sometimes, you may click on a file that you’d prefer to open with a specific app, but for some reason, Android keeps launching it with a different app that you don’t want.
This may be a problem you encounter frequently, and it happens because you’ve chosen the incorrect app for that particular file type. If you want such actions to be completed with a different app, you’ll need to change the default app on your Android phone.
How Can I Change Default Apps on Android Phones?
Changing default apps on Android phones used to be a much more difficult procedure, but Google has made it simple. It is now pre-programmed into the settings.
All you need to do is the following:
- On your Android smartphone, launch the Settings app
- Navigate to Apps
- Choose Default apps
From here, you’ll be able to choose your preference for default phone, SMS, home launcher, digital assistant, caller ID, browser, and call redirection apps. Additionally, you may access Opening links to change certain apps on your Android phone.
Change Default Apps on Android As You Go
Android’s operating system uses a concept known as “implicit intent”. In essence, the operating system searches for an app that can complete a task if the user or app asks the device to “take a picture” or anything similar.
Android will then prompt the user to choose their preferred app if more than one option is available and no default has been set (or if a new option has been added since the last default was set). This essentially facilitates a simple and intuitive approach for changing default apps on Android phones.
Here’s how to change default apps on Android as you go:
- First, click on a link to perform an activity or access a website, Android will prompt you to select an app that you’d prefer as the default app
- You can then select the app and choose to use it Just Once or Always . Select Always to make the app the default choice. Android’s operating system will remember your preference and use it for the activity henceforth.
The only drawback to doing this is that users may unintentionally set a default app sometimes. To alter your preference, simply follow the first set of instructions to change the default app. Click on Opening links once you’ve reached the Default apps section. Go into the app you want to change preferences for. There, you’ll find all the options you need to change the default app as you please.
Also, take note that Android 12 and later operating systems have removed this function. You will have to use the instructions in the preceding section to change your default apps if you have the more recent OS version. This approach is still usable on Android 11 and earlier versions.
Reset Default Apps
Another option you have to change default apps on Android phones is to reset default apps. This works if you can’t figure out which app default is causing you problems and no matter what you do, the option to choose a new default app doesn’t display.
Follow these instructions to reset default apps in order to change default apps on Android phones:
- Launch your Android phone’s Settings app.
- Enter the Apps section
- Select the option to “ See all apps “
- Press the menu button with three dots.
- Click on Reset app preferences
- Select Reset apps to confirm the action
It’s important to keep in mind that performing this operation will also activate all disabled apps, clear all app notification settings, erase any background data limits, and remove any permission restrictions put on particular apps.
You won’t lose any data, but if you mess with your app settings frequently, you might need to do a lot of tweaking to get everything back to the way you like it.
In summary , you can change the default apps on your Android phone if you’re unsatisfied with the ones currently in place to perform certain functions. Follow the instructions in this guide to make the process easier.
- Don’t miss our mobile phone reviews .
- Join our WhatsApp Group , to be notified of the most important articles and deals,
- Follow us on Instagram , Facebook , Twitter , and YouTube .
Author:Joan Agie
Add MobilityArena as a preferred source on Google
Taking screenshots and screen recording the display on your iPhone can be useful in a variety of situations. You can use it to collect any Instagram, Facebook, or WhatsApp video or images that you find interesting.
All screenshots and screen recordings will be saved to the Photos app, where you can freely edit or share them. So, whatever your reason for needing to so, making screenshots and screen recording on iPhones is easier than ever. However, if you don’t already know, we’ve created this easy guide to show you how to take screenshots and screen record on the Apple iPhone.
- How Can I Screenshot on an iPhone?
- How Can I Screen Record on an iPhone?
- How to Improve Your iPhone Screen Recording
How Can I Screenshot on an iPhone?
A screenshot is a single, still image of the screen of your device. Once you know how to take a screenshot on an iPhone, you’ll agree that it’s a pretty easy process. Here’s how to screenshot on an iPhone:
- On an iPhone with Face ID, press and hold down the Side and Volume Up buttons at the same time.
- On an iPhone with a Home button, press and hold the Side and Home button simultaneously.
- In the bottom-left corner, tap the screenshot, then tap Done .
- Select Save to Photos , Save to Files , or Delete Screenshot from the menu. depending on whether you want to save it to the Photos app or send it to someone directly.
How Can I Screen Record on an iPhone?
Screen recording is available for iPhones running iOS 11 and later. This is one of the best iPhone widgets; and it’s also great that this function is free and built into iOS. Below, we’ve described how to screen record on an iPhone:
The first step to take to record your screen on an iPhone is to enable the iOS screen recording feature in the Control Center . What you need to do specifically is as follows:
- Navigate to the Settings menu to access the Control Panel
- Screen Recording can be found in the Additional Settings
- Move the plus sign (+) to the top of the Included Controls section
After enabling the screen recording feature, do the following to start recording on an iPhone:
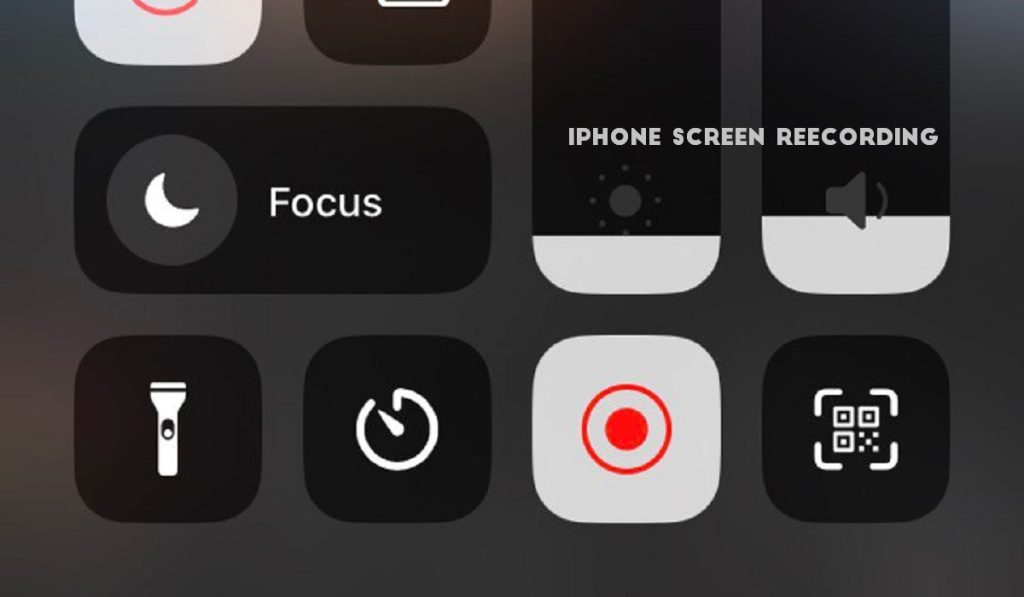
- Swipe down from the top-right corner of the screen to access the Control Center , or swipe up from the bottom of the screen if you have a home button
- Click the gray record button or gray record icon. Wait for the three-second countdown after pressing the record button
- The Record button will turn red after a three-second countdown, and everything you do will be recorded, even if you close the Control Center . You’ll notice a red bar at the top of your iPhone’s screen if you’re still recording
- To stop recording, either open the Control Center and tap the Record button again, or tap the red bar at the top left of the screen and then tap Stop in the pop-up
- When you finish recording, the prompt will notify you that the video has been saved to your device’s Photos album.
It’s that easy and straightforward to record your screen on an iPhone.
How to Improve Your iPhone Screen Recording
While it is simple to record the screen on your iPhone, you may want to take some additional steps to achieve the best results. Here are a few tips for improving your screen recordings:
- Turn on Do Not Disturb mode : Nothing is more annoying than receiving a call or message notification while you’re trying to record the perfect video. To prevent this from happening, open the Control Center and tap the half moon icon to enable Do Not Disturb mode. Keep in mind that the mode does not block calls or notifications; rather, it simply silences them.
- Close any apps that aren’t in use : Screen recording is a resource-intensive process that can degrade phone performance. So make sure to close any iPhone apps you’re not using to help relieve the strain on your phone’s processor and RAM so your screen recording runs smoothly.
In conclusion , we have detailed how to screenshot and screen record on the Apple iPhone in this article, which are quite simple. So simply follow the guidelines outlined above.
