Add MobilityArena as a preferred source on Google
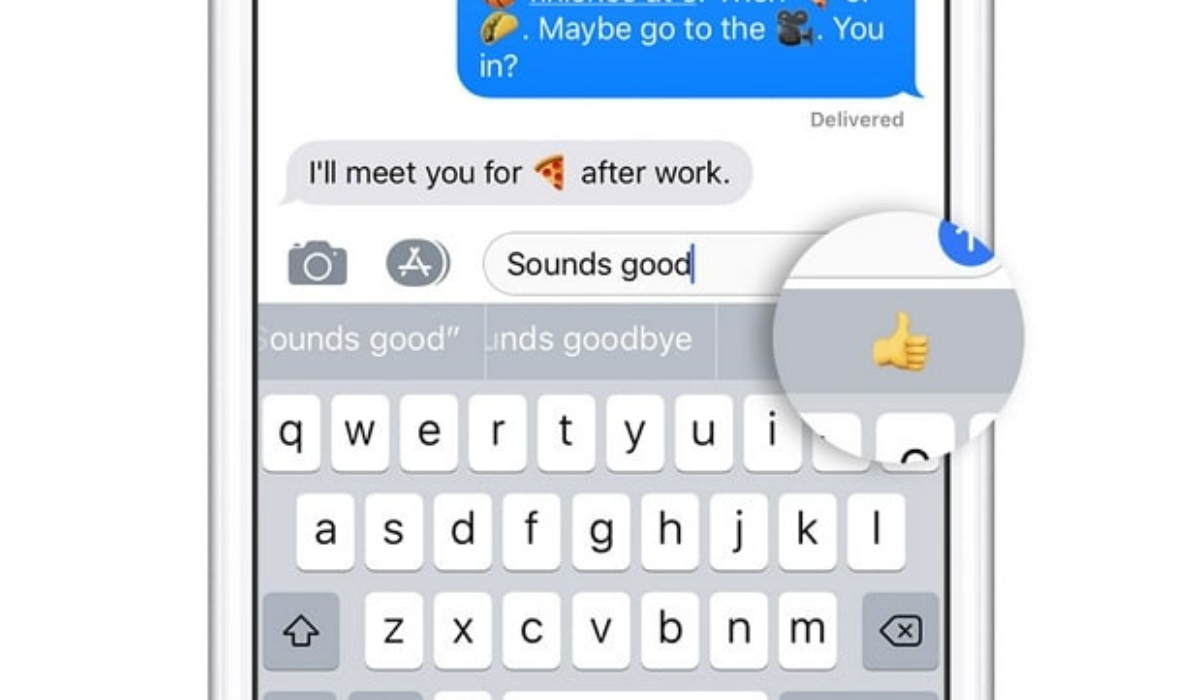
You know when you’re texting and an emoji you’re thinking of pops into the suggestions on your keyboard? That’s what the Predictive emoji feature does. In this article, I’ll show you how to fix predictive emoji not working on iPhones or iPads.
It is a useful feature of iOS and iPadOS devices that uses machine learning to suggest emojis as you type above your keyboard. So if this feature ever stops working to predict emojis while you type, here are some tips to fix it.
- How Can You Fix Predictive Emoji Not Working on iPhones or iPads? Ensure Predictive Emojis Are Turned On Switch to Apple’s English Keyboard Reconfigure Apps to Predict Emoji Delete and Re-add Your Emoji Keyboard Restart Your iPhone or iPad Reset Your Keyboard Dictionary Update Your Software
How Can You Fix Predictive Emoji Not Working on iPhones or iPads?
If your keyboard is no longer suggesting emojis for you to use while you text, it means the predictive emoji on your iPhone or iPad is no longer functioning. Not to worry though, the solutions described below will help fix predictive emoji not working on iPhones or iPads. Side note, if you’re looking for new emojis on Android, check out this guide .
Ensure Predictive Emojis Are Turned On
The first thing to do to fix predictive emoji not working on iPhones or iPads is to check if your device has the Emoji keyboard enabled. Navigate to Settings > General > Keyboard > Keyboards > Add a New Keyboard , then search for and select Emoji .
Now check to see if the Predictive function is turned on. Return to Settings > General > Keyboard and turn on the Predictive toggle.
Switch to Apple’s English Keyboard
Although you can use a ton of awesome third-party iPhone or iPad keyboards, not all of them have a predictive emoji feature. So, if you’re using a third party keyboard and want to fix predictive emoji not working on iPhones or iPads, try switching back to the official Apple keyboard.
To do this, click and hold the Emoji or Globe icon in your keyboard’s bottom-left corner, and then click the English keyboard.
The keyboard language must match what you are typing too, else it will remain unable to predict the right emojis.
Reconfigure Apps to Predict Emoji
Your iPhone or iPad uses the information you provide to make suggestions based on your typing style and previous usage. Keeping this in mind, it’s possible that the absence of predictive emoji suggestions in a given app is due to your infrequent use of emojis in that app. Fortunately, if this is the issue, it won’t be hard to fix predictive emoji not working on iPhones or iPads.
To do so, access the app in which the predictive emoji feature doesn’t work. Once in, click on the Emoji icon at the bottom-left corner to access the Emoji keyboard.
Now start typing emojis anyhow you like. It’s not necessary for them to make sense, but just include enough of them to show your device that you do enjoy using emojis when you type on the app.
Now, delete all the emojis you previously typed and test predictive emoji by typing a word like “angry,” “food,” or “funny.” Above the keyboard, you should now see emoji suggestions, meaning that you’ve been able to fix predictive emoji not working on iPhones or iPads.
Try this fix for any and every app on which predictive emoji doesn’t work, I’m sure you’ll get good results.
Delete and Re-add Your Emoji Keyboard
By deleting it and re-adding your emoji keyboard, you can also reset it to fix predictive emoji not working on iPhones or iPads. To do so, navigate to Settings > General > Keyboard . Click on Keyboards , next swipe left on the Emoji option, and select Delete .
To re-add Emoji, select Add New Keyboard and then Emoji .
Restart Your iPhone or iPad
Try restarting your iPhone or iPad if all other attempts to resolve the issue fail. A simple reboot can sometimes clear up issues and bugs, which may be sufficient to fix predictive emoji not working on iPhones or iPads.
Reset Your Keyboard Dictionary
Try resetting your keyboard dictionary if the predictive emoji feature still doesn’t work. Your iPhone or iPad will lose any words you’ve taught it as a result, so you might need to fix autocorrect mistakes on your Apple devices once more. However, it will also provide you with a blank canvas to re-teach the device that you enjoy using emojis.
To do so, navigate to Settings > General , then scroll down and choose Transfer or Reset iPhone . Now select Reset > Reset Keyboard Dictionary from the menu. You must enter your passcode and then confirm your intention to Reset Dictionary .
You can now feed emojis into your keyboard to re-teach your iPhone or iPad that you enjoy using emojis in all the relevant apps.
Update Your Software
With each update, Apple strives to improve the software on your iPhone and iPad. These updates address common bugs that irritate users, such as when the predictive emoji feature stops working. So, to fix predictive emoji not working on iPhones or iPads, go to Settings > General > Software Update to update your software to the most recent version of iOS or iPadOS.
If your software is out of date, you’ll notice a Download and Install button at the bottom of the screen. To finish the update, tap it and follow the prompts.
To conclude, emojis have become an integral element of our online communication. Apple’s Predictive Emoji function is a useful tool, and that’s why I hope that this guide has helped you to fix predictive emoji not working on iPhones or iPads. You can also get help from Apple if you need further guidance.
Author:Joan Agie
Add MobilityArena as a preferred source on Google
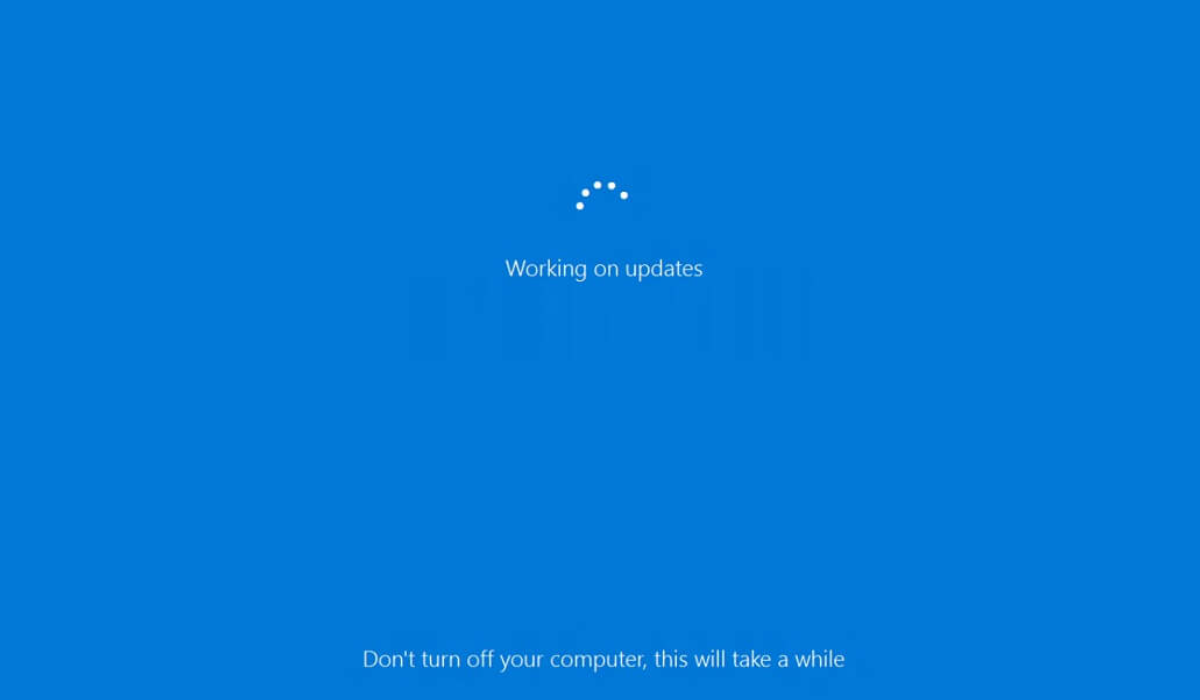
Microsoft releases updates for Windows frequently to introduce exciting new features and address known bugs. Windows will automatically install any updates that are available if you have enabled automatic updates on your PC. However, there are also options to update Windows manually on your PC so you can enjoy the latest Windows features.
In this article, I’ll explain all the effective methods you can use to update Windows manually on your PC to get the newest OS build.
- How Can You Update Windows Manually on Your PC? Use the Settings App Use the Windows Update Assistant Use the Microsoft Update Catalog Use Windows PowerShell
How Can You Update Windows Manually on Your PC?
It’s essential to keep your operating system updated because it not only adds new functionality but also fixes bugs, enhances security, improves system performance and shields your PC against danger. It’s easy to update Windows manually especially if you’ve already turned off automatic updates in the past. Here are four ways to update Windows manually on your PC.
Use the Settings App
The Settings app is the simplest and most preferred way to download any available Windows update. It is the primary location for managing system settings, configuring features, and updating Windows.
Follow these steps to manually update Windows on your PC through the Settings app:
- To open the Settings app, press the Win+I hotkeys. If this key combination does not work, you can open Settings using any other method.
- Select Windows Update from the left panel in the Settings app.
- To check for updates, press the Updates button.
Now, Windows will look for and download any updates that are available. You may need to restart your computer to finish installing the update.
You can also use the Advanced option to change settings such as downloading updates over a metered connection, changing the active hours, and changing the types of updates you receive.
Use the Windows Update Assistant
Your computer can download feature updates by using the Windows Update Assistant , a small executable file. It prevents you from having to wait for an automatic update.
Follow the steps below to use the Windows update assistant to update Windows manually on your PC:
- Visit the download website for Windows Update Assistant.
- Select the Update Now option. The update assistant will be downloaded to your computer.
- Launch the downloaded file.
- When the UAC prompt appears, select Yes .
- To allow the computer to verify compatibility, click the Update Now button.
- Click Next , followed by Restart Now .
The Windows Update Assistant will download and install the most recent update on your computer while safeguarding your private data. The “ Thank you for updating to the latest version of Windows ” message will appear once the installation is finished.
Please keep in mind that the update assistant is only compatible with computers with x86/64 processors. You can try any of the other methods listed below to update Windows manually on your PC if you have an ARM-based computer.
Use the Microsoft Update Catalog
Another place to update Windows manually on your PC (for Windows 10 and later versions) is the Microsoft Update Catalog. Here’s how to go about it:
In any browser, open the Microsoft Update Catalog .
Type in the KB number of the update you wish to download in the search field. Try searching for broad terms like Windows 11 and Windows 10 if you don’t know the KB number.
Next to the update you want to download, click the Download button. This will bring up a new window with a download link for the update.
As you would typically, click the link and select the location where you want to save it.
Check the update’s extension after it has been downloaded. If it is an MSU file, all you need to do to install it on your computer is double-click it. You will need to extract the file first using any file extraction software if the file has a CAB extension, which is usually a driver file.
You must manually update a driver after extracting it using the Device Manager. To do so, launch Device Manager and then locate and right-click on the driver you want to update. Click Update driver , then choose the Browse my computer for drivers option.
Restart your computer after installing the update so that the changes can take effect.
Use Windows PowerShell
You can also use Windows PowerShell to update Windows manually on your PC. Here’s how to do it:
- With admin rights, launch Windows PowerShell.
- Press Enter after entering this command:
“ Install-Module PSWindowsUpdate ”
- To confirm, enter Y and click the Enter option
- Type Y and hit Enter again to confirm if you get the message “ Unsupported repository “
- Enter the following command after typing it. It will alter the execution policy so that you do not see the import module error:
Set-ExecutionPolicy -Scope CurrentUser -ExecutionPolicy Unrestricted Import-Module PSWindowsupdate
- Enter the following command. Make sure the “ KB version ” is changed to the KB version of the update you want to install:
“ Get-WindowsUpdate
Get-WindowsUpdate -AcceptAll -Install -AutoReboot
Get-WindowsUpdate -Install -KBArticleID ‘(KB Version) ‘”
Any of the methods I’ve described above can help you to update Windows manually on your PC, but I recommend using the Settings app because it is the simplest method. If you are unable to access the Settings app, you can still download updates for your computer using any of the other methods.
