Add MobilityArena as a preferred source on Google
Why am I writing an article about how to block notifications from Twitter trolls? Let me tell you the story. A week or so ago, I tweeted on a subject that apparently triggered a number of people, who then went on to mob me. The interesting thing is that I was not aware of it until an associate mentioned it. All of that bile and none of it got to me. You see, I had configured my account earlier to mute or block notifications from Twitter trolls, and it worked excellently in this storm.
Besides being told by friends that I was being mobbed, it was just another peaceful day on Twitter for me. It was akin to being in a soundproof safe house while a mob chanted and ranted outside. My Twitter notifications setup proved effective.
While being rude, and being violent appears to be the norm on social media today, some of us optimise for peace and calm. We’d rather not be a part of that madness and ignore those who derive joy in being nasty and uncouth. It is not that we are incapable of engaging, but we choose to not waste our previous energy on mobs. If you are reading this article, you are likely one of us and want to know how to keep the mob away and secure your peace.

Stop or block notifications from Twitter trolls with just a few steps
In this article, I am sharing the simple steps you have to take to achieve that kind of Zen status for your Twitter account and shield yourself from angry mobs when they come calling, as they will from time to time. Let’s go.
Stop or block notifications from Twitter trolls with these few steps
Go to your Twitter notifications tab, and tap on the gear wheel at the top right corner. That will present you with the Notifications menu. Tap on the item that says, Filters (see screenshot below).
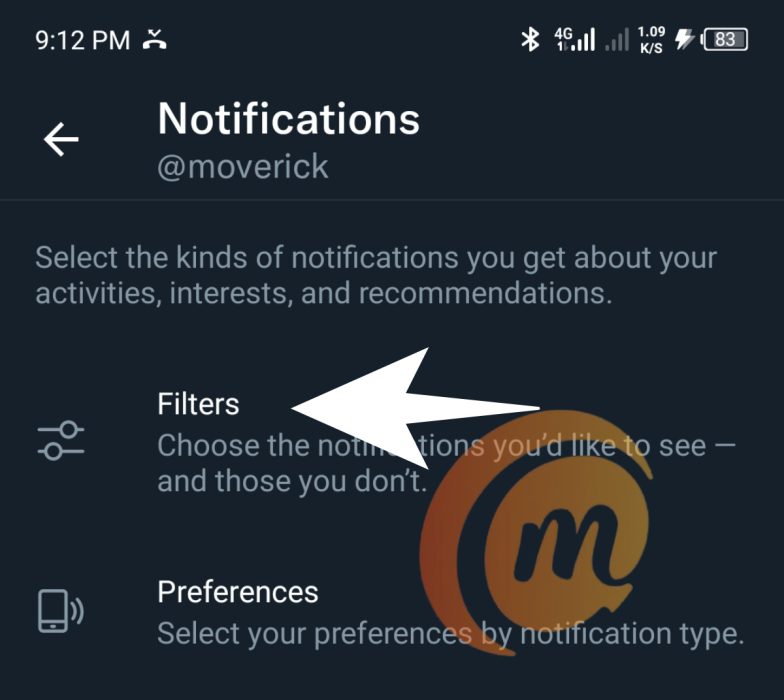
Tap on Filters
That will open the Filters menu, and you will see a number of options. The one you are looking for is Muted notifications (Screenshot below). Tap on that.

Tap on Muted notifications
In the Muted notifications menu that opens, tick all the boxes that I have ticked in the screenshot below.
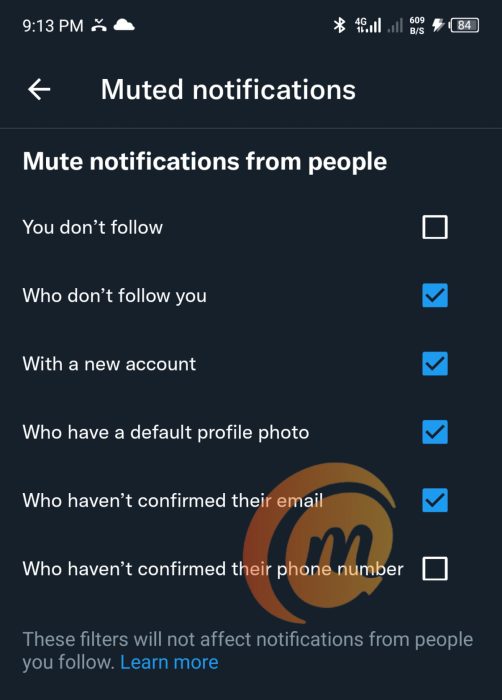
Check those checked boxes
Let me explain the rationale behind these choices. Most of the time, trolls are people who don’t follow you and so do not know you or know who you are. They are the ones who will most likely misinterpret your tweets and go on a tangent with it, and then turn on you with snide remarks. This category largely makes up mobs.
Mobs, by nature, are made up of irrationally angry people who often have not stopped to think properly about the matter they are responding to. I know you value communication, but effective communication requires thinking people at the other end. The mob does not think and so are not communicating, though it may suppose it is. You won’t be missing anything not getting notifications from the mob.
Oh, and if someone who follows you joins a mob in harassing you, in which case you will get a notification of that person’s action, there are two recommended responses: use the Mute button or the Block button, depending on how nice you are. Either way, they disappear from your mentions. Zen.
A lot of trolls and spammers too are new accounts, and also often have no profile photo. You will not be missing anything good in blocking notifications from these type of accounts.
Trolls and spammers are also likely to be not have confirmed their email accounts with Twitter. Useless. You won’t be missing anything not hearing from them.
Once you are done ticking those boxes, your Twitter account is now optimised for peace even through a nuclear war. Angry mobs can come at you and you won’t hear a sound. You have effectively muted, stopped, and blocked notifications from Twitter trolls and mobs. Welcome to the Zen experience. Buy me a bottle of rum.
- Don’t miss our reviews .
- Join our WhatsApp Group , to be notified of the most important articles and deals,
- Follow us on Instagram , Facebook , Twitter , and YouTube .
Author:Mister Mobility
Digital Skills and Communication Coach | Mobile Phone Connoisseur since 2001 | Tech Blogging since 2004
Add MobilityArena as a preferred source on Google
An easy way to to fix wireless connectivity issues on your Apple iPhone is to reset network settings. These issues may crop up in the form of an inability to connect to your carrier, and your WiFi hotspot.
But a connectivity problem might also be afoot if you do get a connection but doing anything with it has become slow. Sometimes, a slow network connection may not be the fault of your provider, but one with your iPhone’s network settings. And this is why resetting them may be necessary.
You can easily rest network settings on your iPhone
What Happens When You Reset Network Settings On Your iPhone?
Resetting your iPhone’s network settings will delete all network-related data or information on your device. Fear not: this does not tamper with your own personal information or files. All it does is wipe information like your carrier or operator’s APN settings, WiFi username and password, VPN settings, Bluetooth settings, and the like.
This means that you will have to re-enter some, if not all, of these information after the reset is done. Make sure you have the valid settings from your providers, so you can enter them. In some cases, your wireless carrier or network operator will automatically send in the correct APN settings. You can also get them off their website.
How to Reset Your Network Settings
Whether you are tech savvy or not, resetting the network settings on your Apple iPhone is a simple task that requires no more than five or six taps, so don’t get jittery. It is pretty easy.
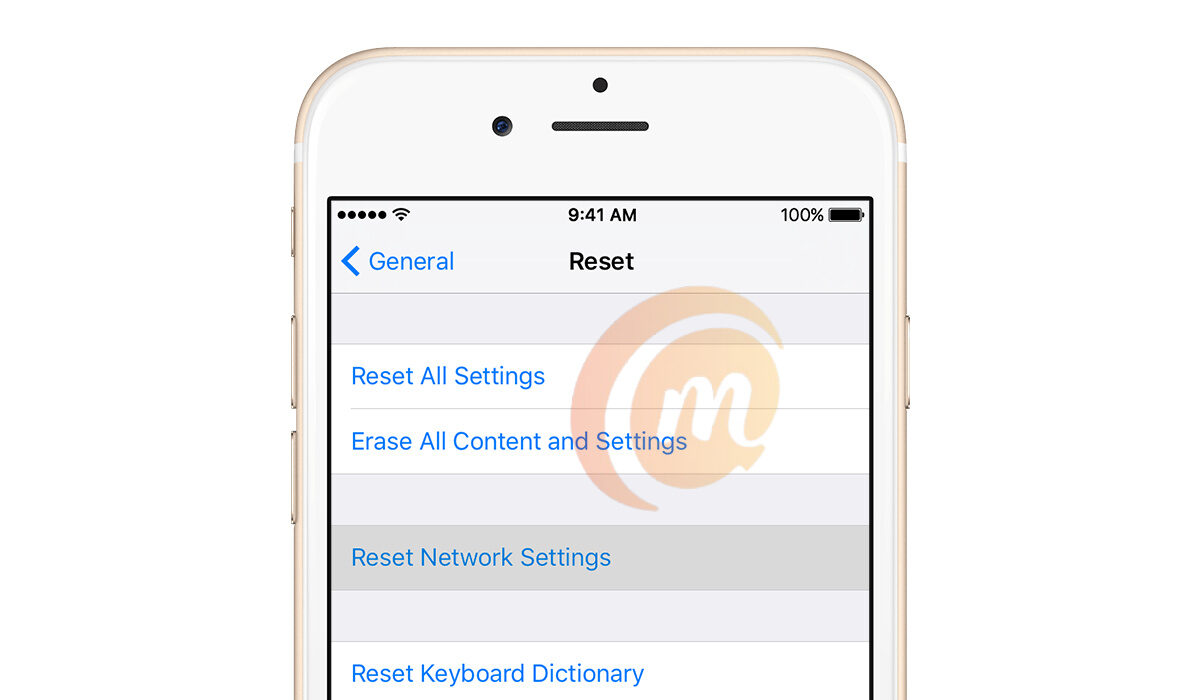
To reset network settings on your iPhone, go to Settings > General > Reset . Scroll down to the bottom of the page and select Reset . Of the next set of options displayed, choose Reset Network Settings .
You might be asked to verify yourself i.e. enter your passcode, to complete the process.
Once you have completed the process to reset network settings, you are good to go with a clean slate of wireless connectivity settings. You can then enter the valid settings for each kind of connectivity and enjoy using your iPhone again.
- Don’t miss our reviews .
- Join our WhatsApp Group , to be notified of the most important articles and deals,
- Follow us on Instagram , Facebook , Twitter , and YouTube .
