Add MobilityArena as a preferred source on Google
On Windows 11, you can set up separate accounts for yourself and other people. This allows you to create separate locations for your personal and professional tasks and also lets other people use your computer from a seperate personal space.
However, a need may eventually arise to prevent someone from accessing their user account without having to delete it totally. There is a block sign-in option on Windows 11 that should allow you to temporarily disable a user account on Windows 11, but you may sometimes need more than that.

We’ve therefore created this guide to show you several ways to disable a user account on Windows 11. Feel free to try any of our recommended options to get it done easily.
How to Disable a User Account on Windows 11 With Windows Powershell
PowerShell can is a quick option to enable or disable a user account on Windows 11 if you need to do so regularly. You can accomplish this by using the Disable-LocalUser cmdlet and providing the name of the user account you wish to disable.
Using PowerShell, you can disable a user account on Windows 11 as follows:
● To access the WinX menu , press Win + X.
● Select Terminal (Admin). PowerShell will be launched in Windows Terminal as the default profile.
● If not, choose Windows PowerShell by clicking the drop-down arrow in the Terminal tabs area.
● Next, use the command below to list every user account on your computer: “ Get-LocalUser ”
● Look in the Name column for the user account name.
● To disable the given user account, type the following command next: “ Disable-LocalUser -Name “NewUser “
● Replace “ NewUser ” in the command above with the name of the user account you want to disable.
Note that after you use Power Shell to disable a user account on Windows 11, PowerShell won’t produce a success message. To verify if the user account is disabled, check to see if the user account appears on the lower left side of your screen by clicking Win + L and double-clicking the resulting lock screen to view the login page.
How to Disable a User Account on Windows 11 Using Command Prompt
The Command Prompt is another option to disable a user account on Windows 11. You can disable Microsoft or local user accounts using this command-line tool.
To disable a user account on Windows 11 through Command Prompt, use these steps:
● Open Run by pressing Win + R .
● In the Run box, type cmd . The elevated Command Prompt will appear when you press OK while holding down Ctrl and Shift . When asked by User Account Control , select Yes.
● To find all the available user accounts on your PC, enter the following command in the Command Prompt window: “ net user ”
● Look in the return list for the user account name.
● To disable the given user account, type the following command next: “ net user NewUser /active:no ”
● Replace “ NewUser ” with the name of the user account you want to disable in the command mentioned above.
How to Disable a User Account on Windows 11 Using Computer Management
Using the helpful program Computer Management, you can access utilities like Event Viewer, Task Scheduler, Device Manager, and others from a single settings location. You can also use it to enable or disable a user account on Windows 11 in the Local Users and Groups section.
It should be noted that only computers running Windows 11 Pro, Education, and Enterprise editions can access the Local Users and Groups features. You’ll need to use one of the other techniques described above if you’re running Windows 11 Home.
To disable a user account on Windows 11 with Computer Management, use these steps:
● In the Taskbar, click the Search icon.
● To launch the app, search for “ computer management ,” then click the top result.
● Explore the following route next: Computer Management > System Tools > Local Users and Groups > Users
● Select the Properties option from the context menu when you right-click the User account Name.
● Next, select the General tab.
● Select “ Account is disabled” ,” afterward click Apply and Ok.
Now, until manually activated again, the selected user account will be disabled.
How to Disable a User Account on Windows 11 with the Settings App.
Windows is gradually replacing the Control Panel with the Settings app. You can create and manage each user account using the Settings app. Additionally, it now provides incredibly centralized control over the operating system and its configurations.
In the Settings app, follow these instructions to disable a user account on Windows 11 momentarily:
● Click on Settings .
● Next, select Accounts .
● Navigate to the Family page.
● Choose the account under “Your family” and press the Block sign-in button.
Note: Only user accounts that have been added to the Family group can be disabled from the Settings app. In the family groups in Settings , you can only prevent sign-in for Your family members.
By employing this technique, you typically won’t be able to disable a local or Microsoft account. The previously described PowerShell and Command Prompt techniques must be used if you want to disable a local user account.
Author:Joan Agie
Add MobilityArena as a preferred source on Google
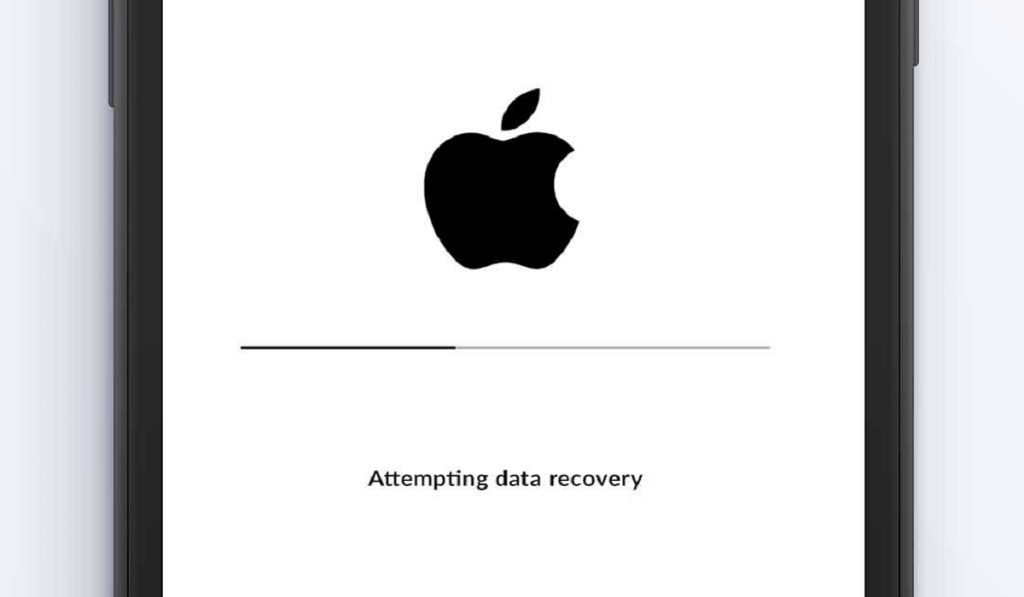
Having an iPhone stuck on Attempting Data Recovery c an be an unnerving experience, especially if it is your first time. You got an iOS software update notification and proceeded to download and install it. But during the reboot process, your darling phone got stuck at that point where it says, Attempting Data recovery.
The first time that happened to me, I freaked out. I had just purchased my iPhone 11 Pro and thought I had done something wrong to mess the phone up. It was not until later that I discovered that I was not a lone in that situation: apparently, many other iPhone users have experienced it, too. Even better, the solution was often not something complicated.
- What Does Attempting Data Recovery Mean?
- How Do I Fix iPhone Stuck on Attempting Data Recovery? 1: Use the Home Button 2: Hard Reset (Force Restart) Your iPhone To Force Restart iPhone 6 and earlier: To Force Restart iPhone 7 and 7 Plus: Force Restart iPhone 8 and later: 3: Use iTunes to Fix iPhone Stuck On Attempting Data Recovery 4: Use 3rd Party Software or A Service Center
What Does Attempting Data Recovery Mean?
As already explained, this message shows up on your iPhone screen when it attempts a reboot after a software update. It appears that the update process was interrupted in some way and the device is trying to fix that so your data doesn’t get lost. A scenario like this is one of the reasons why we recommend that you backup the data on your iPhone, so that should the attempted data recovery process fail, you can always reset your device and restore a backup to it. In the following section, I spell out a few things you can do to fix an iPhone stuck on Attempting Data Recovery.
How Do I Fix iPhone Stuck on Attempting Data Recovery?
Here, I detail a number of different ways to fix an iPhone stuck on attempting data recovery. The first three are all simple processes and tasks that anyone can carry out. If those three do not work, there is a last, more technical solution: if you are a techie person, you will be able to handle it yourself. If you are not, a service center technician will run it for you.
1: Use the Home Button
If you own one of the older iPhone models or even the iPhone SE (2022) with a Home Button, here is another one of those situations in which you have an edge. Pressing the Home Button is one of the things you can do to make your iPhone exit the Attempting Data Recovery screen. Just press it and wait a few moments. If it works, your phone will complete the boot process and start running as usual. If pressing the Home Button does not fix it, or your iPhone does not have a Home Button, move on to the next method below.
2: Hard Reset (Force Restart) Your iPhone
A soft reset is a universal “magic” tool, in that it can fix many issues. Where you have your iPhone stuck on Attempting Data Recovery, a soft reset is not possible, but a hard reset will do. A hard reset is a forced restart – a simple rebooting – of your iPhone. Ordinarily, it does not affect the files and data on your device. But because you are applying it in the middle of an attempt to recover data, there is a possibility that some data can be lost. Again, here is a reminder (for next time) that you should backup your iPhone before running any software update.
If you have a backup already, then you have nothing to fear: force restart your device right way. Here is how to do that, depending on the model you have.
To Force Restart iPhone 6 and earlier:
Press the Home Button and the power button at the same time, and hold them for a few seconds until the Apple logo pops up on the screen. Then let go of the buttons and restart the iPhone.
To Force Restart iPhone 7 and 7 Plus:
Press the Volume down button and Power button at the same time, and hold them for a few seconds until the Apple logo pops up on the screen. Then let go of the buttons and restart the iPhone.
Force Restart iPhone 8 and later:
Press and quickly release the Volume up button. Then repeat the same with Volume down button. Press the power button and hold it until the Apple logo appears on the screen, then let go and restart the iPhone.
If a hard reset solves the problem of your iPhone stuck on Attempting Data Recovery, Yay! Enjoy using your phone. If you lost any data, simply restore an existing backup. However, should the force restart attempt not resolve the problem, it is time to get your laptop or PC and attempt to use iTunes to fix it.
3: Use iTunes to Fix iPhone Stuck On Attempting Data Recovery
If you have an Internet-connected PC – it does not have to be an Apple PC; even a Windows PC will do – you can install the latest version of iTunes and use that to fix your iPhone stuck on Attempting Data Recovery. Note that this process will factory reset your iPhone, wiping everything on it. You will lose all data on the phone (if you have an existing backup, you can restore it later). Your iPhone will also be updated to the latest iOS version. Here are the steps to follow:
- Launch iTunes on your computer and make sure that you have the latest version.
- Connect your iPhone to the computer and put the iPhone in recovery mode by doing the following: Press and quickly release the Volume Down button, then press and hold the top button until it completely restarts and you see recovery mode on your screen.
- You will see a pop up saying an iPhone has been detected in recovery mode and asking to restore the device. Confirm the restore and update and wait for iTunes to complete the process.
If this works, your iPhone will restart and function normally again. If you have a backup, this is the time to restore it. However, if this process does not work, don’t give in to despair; this is not the end of the road for your iPhone. You just need a more technical solution.
4: Use 3rd Party Software or A Service Center
There are a number of available 3rd party tools that offer the ability to fix an iPhone stuck on Attempting Data Recovery. They include: EaseUS, uBackup, PhoneRescue, UltFone, among others. Using a 3rd party software can sometimes be daunting, especially if you are not a technical person. In this case, I recommend that you take the iPhone stuck on Attempting data Recovery to an official service center, so someone qualified can help you with the process.
Author:MobileChic
That motivated, gadget-loving geeky chic who tries to stay on top of things. Unapologetic iFan.
