Add MobilityArena as a preferred source on Google
Windows Defender is a security software that helps protect your computer against pop-ups, slow performance, and security threats caused by spyware and other unwanted software. In the event that you want to disable it, there are three ways presented below to doing so. This article walks you through different ways to disable Windows Defender on your Windows 10 PC.
Please note that turning off Windows Defender without an alternative security software running will leave your PC open to possible security threats. As such, we advise that you install another security software or Antivirus programme if you are turning off Windows Defender.

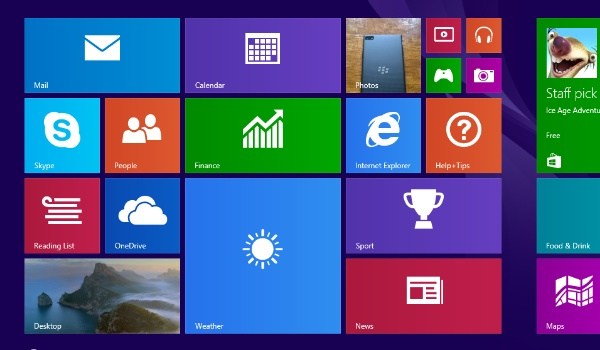
how to turn off windows defender
How to disable Windows Defender using the Security Center app
Difficulty Level : Easy. Every PC user can do this comfortably . Keep in mind that disabling Windows Defender will open your computer to security threats..
If you are not a techie person, this is the easiest way to turn off Windows Defender. It is straightforward and direct. The following process only disables Windows Defender Antivirus temporarily. The next time you restart your PC, Windows Defender will re-enable automatically.
To proceed and disable Windows Defender temporarily , follow these steps:
- Click the Windows logo in the bottom-left corner of the screen. The Start menu will pop up.
- Click on the Gear icon to open your PC’s Security menu.
- Click Update & Security .
- Click on Windows Defender in the upper-left side of the window.
- Open Windows Defender Security Center .
- Click on Virus & threat protection .
- Click Virus & threat protection settings .
- Turn off the Real-time protection toggle switch.
That is it. Windows Defender is disabled temporarily. Note that it will be active once again the next time you restart your PC.
How to disable Windows Defender using the Registry Editor
Difficulty Level : Fairly Difficult. This disables the software permanently but requires you having a knowledge of command line. Using the Registry Editor can harm or even brick your computer. You proceed with the steps below at your own risk. Preferably, make a backup of your PC at this point.
Here is how to disable disable Windows Defender permanently using the Registry Editor:
- Use the Windows key + R keyboard shortcut to open the Run command.
- Type regedit , and click OK to open the Registry .
- Browse the following path: HKEY_LOCAL_MACHINE\SOFTWARE\Policies\Microsoft\Windows Defender Quick Tip: You can now copy and paste the path in the new Registry’s address bar to quickly jump to the key destination.
- If you don’t see the DisableAntiSpyware DWORD, right-click the Windows Defender (folder) key, select New , and click on DWORD (32-bit) Value .
- Name the key DisableAntiSpyware and press Enter .
- Double-click the newly created DWORD and set the value from 0 to 1 .
- Click OK .
- Restart your computer.
Windows Defender Antivirus is now disabled.
How to re-enable Windows Defender using the Registry Editor
If you ever want to re-enable the service at any time, follow these steps:
- Go back to the Windows Defender folder in Registry Editor by following steps 1 to 4 above.
- Click on the “Windows Defender” folder.
- Open the “DisableAntiSpyware” value by double-clicking it.
- Change the “Value data” from 1 to 0.
- Click OK , then restart your computer.
How to turn off Windows Defender using Local Group Policy
Difficulty Level : Fairly Difficult. This requires you having a knowledge of command line. Using the Registry Editor can harm or even brick your computer. You proceed with the steps below at your own risk. Preferably, make a backup of your PC at this point.
The following steps detail how to disable Windows Defender permanently for Windows 10 Pro, Enterprise, or Education users using the Local Group Policy Editor :
- Use the Windows key + R keyboard shortcut to open the Run command.
- Type gpedit.msc and click OK to open the Local Group Policy Editor .
- Browse the following path: Computer Configuration > Administrative Templates > Windows Components > Windows Defender Antivirus
- On the right, double-click the Turn off Windows Defender Antivirus policy.
- Select the Enabled option to disable Windows Defender.
- Click Apply .
- Click OK .
- Restart your computer.
You have disabled Windows Defender Antivirus permanently.
How to re-enable Windows Defender using the Registry Editor
If you ever want to re-enable Defender at any time, follow these steps:
- Go back to the Windows Defender folder in Registry Editor by following steps 1 to 4 above.
- At step 5, select the Not Configured option.
- Click OK .
- Restart your computer.
That is it.
- Don’t miss our reviews .
- Follow our news on Google News .
- Join our WhatsApp Group , to be notified of the most important articles and deals,
- Follow us on Instagram , Facebook , Twitter , and YouTube .
Author:InfoDesk
Add MobilityArena as a preferred source on Google
Samsung Galaxy A9 Pro 2019 Android 9 Pie smartphone features a 6.4 inches Infinity-O display, 24MP + 10 + 5MP triple lens camera, 24MP selfie camera, Qualcomm Snapdragon 710 chipset, 6GB RAM, 128GB internal memory, 3400mAh battery.
Samsung Galaxy A9 Pro 2019 Specs and Features
Wireless Network and Software
- 2G mobile network : GSM, GPRS, EDGE 850 / 900 / 1800 / 1900 MHz
- 3G mobile network : UMTS, WCDMA, HSDPA 850 / 900 / 1700(AWS) / 1900 / 2100 MHz
- 4G mobile network : LTE bands 1(2100) / 2(1900) / 3(1800) / 8(900) / 34(2000) / 38(2600) / 39(1900) / 40(2300) / 41(2500)
- SIM Type : Nano-SIM, Single and Dual SIM options
- Software / OS : Android 9 Pie + One UI
Design, Form Factor and Appearance
- Dimensions : 158.4 x 74.9 x 7.4 mm
- Weight : 173g
- Display : 6.4 inch, 1080 x 2340 pixels, 19.5:9 aspect ratio, IPS LCD curved glass screen
- Sensors : Fingerprint (rear-mounted), Accelerometer, Ambient Light sensor, Gyro sensor, Proximity sensor, Compass
- Colours : Blue, Gray, Black/Green.

Samsung Galaxy A9 Pro 2019
Internal Hardware
- Processor Type : 64-bit Octa-core 2.2 GHz ARM Cortex-A53
- Processor Name : Qualcomm Snapdragon 710
- Graphics Processor : Adreno 616
- RAM : 6 GB
- Internal Storage : 128 GB
- External Storage : microSD, up to 512 GB
Photography and Video Recording
- Rear Camera : 24 + 10 + 5 megapixels triple lens camera, 2x optical zoom, LED flash, 1080p@30fps video recording
- Front-facing Camera : 24 megapixels, f2.0 Aperture, Face Recognition, 1080p@30fps video capture
Audio and Video Playback
- Music Support : PCM, AAC / AAC + / eAAC + / MP3 / AMR – NB / WB / APE
- Audio : No 3.5mm audio jack
- Loudspeaker : Mono
- Video Support : H.264/MP4/MPEG4 player
- FM Radio : Yes
Connectivity Features
- Bluetooth : v5.0, A2DP
- WiFi : Wi-Fi 802.11 a/b/g/n/ac, hotspot
- GPS : Yes, A-GPS, GLONASS, BDS
- USB : microUSB v2.0; Type-C 1.0; USB-OTG
Miscellaneous Features
- Battery Charging : Adaptive Fast Charging
- Battery Type and Capacity : Non-Removable Lithium-Ion 3,400 mAh
- Announced : January 2019
- Market Availability : February 28 , 2019
Samsung Galaxy A9 Pro 2019 Price and Availability
Price : KRW599,500
Country Availability : Korea. The Galaxy A9 Pro 2019 is also known as the Samsung Galaxy A8s in China.
Don’t miss our mobile phone reviews .
Follow our news on Google News .
Join our WhatsApp Group , to be notified of the most important articles and deals,
Follow us on Instagram , Facebook , Twitter , and YouTube .
