Add MobilityArena as a preferred source on Google
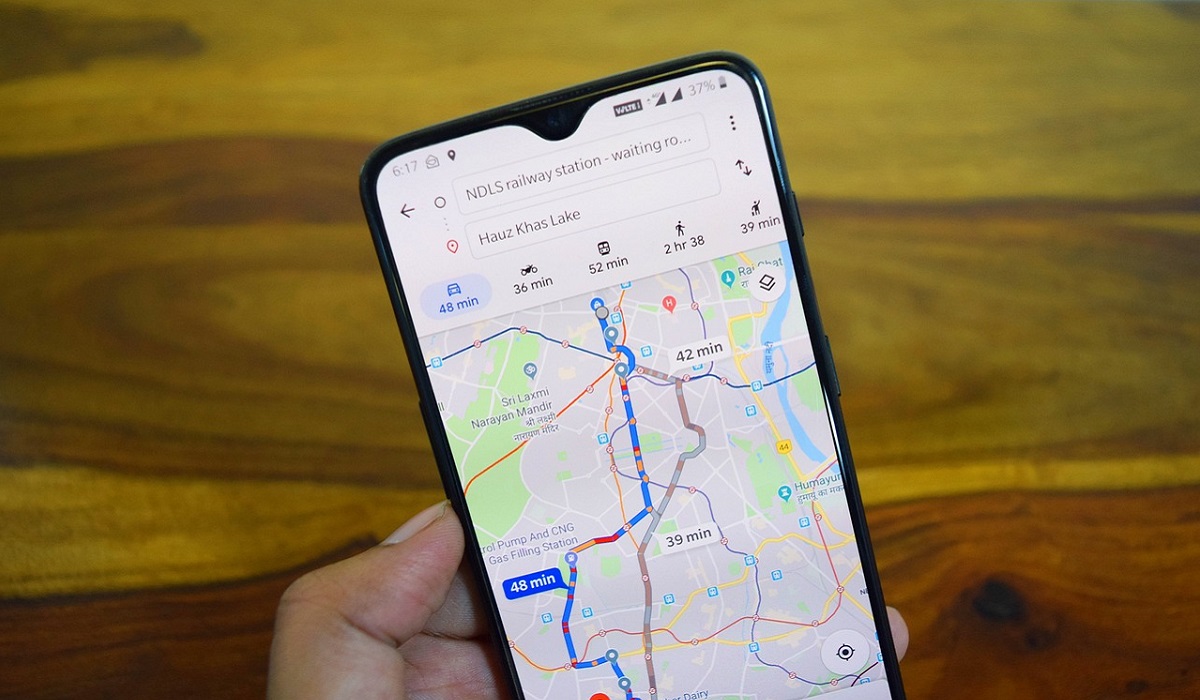
Google Maps is a helpful software for getting about, but even the best programs malfunction sometimes. As such, there are occasions when Google Maps just doesn’t function properly. This could happen for a number of reasons, including cache problems, using an outdated Google Maps version, or accidentally disabling the location accuracy, among other causes.
Not to worry though, there are some practical solutions to any problems that arise with Google Maps. This guide will teach you different options to fix Google Maps not working on Android devices.
How Can I Fix Google Maps Not Working on My Android?
When technology doesn’t work the way it’s supposed to, it takes all the fun out of using it. Below are our helpful troubleshooting tips to fix Google Maps if it’s not working on your Android, so follow our suggestions to get you back on track.
Check your Internet Connection
Before you can download and update maps, Google Maps requires an online connection. So if the software is not working properly on your phone or there’s no real-time data, the internet is either too slow or unconnected.
You’ll need an active internet connection to fix Google Maps not working on your Android device. To check if the page loads properly, try browsing a website on your phone. If it doesn’t work, try restarting your phone or contact your internet service provider.
Alternatively, Google Maps could just be unavailable generally. The platform status page for Google Maps allows you to check and confirm this.
Turn Off Wi-Fi Only Mode
Maps will only download new data when you’re connected to a Wi-Fi network if you have it set to Wi-Fi-only mode. So when you’re using cellular data, Google Maps won’t function on your device.
You’ll need to disable Wi-Fi only in the Maps app to fix Google Maps not working on your Android, so follow these steps:
● Launch Google Maps, tap your profile image, and then choose Settings .
● Disable the Wi-Fi-only setting.
● Then return to the main Maps screen after closing Settings .
After you finish with the above steps, try using Google Maps. It should be using your mobile data at this point. As such, if you plan to use the app frequently, make sure you have a sufficient data allowance.
Activate Location Accuracy
The most frequent causes of Google Maps malfunctioning are problems with location accuracy. When you activate the setting, it should offer precise location information, allowing Maps to identify where you are in real-time. So here’s how to do it and fix Google Maps not working on your Android:
● Open Google Maps on your device. At the upper-right corner of the screen, click on your profile image.
● From the menu, choose Settings . Click Location services under Google location settings .
● Next select Improve Location Accuracy from the slider menu under Google Location Accuracy .
● Reopen Google Maps at this point. It should now be capable of pinpointing your precise position.
Re-calibrate the Google Maps app
Google Maps typically indicates your location with a blue dot. You’ll be able to tell if Maps is having some trouble locating you if the beam of this dot is too wide. If this is the problem, you’ll need to recalibrate the app to fix Google Maps not working on your Android.
To do this, launch the app and tilt your phone in the direction from which the number 8 is drawn. Repeat this action a few times. When you recalibrate the app, the blue dot’s beam should get more focused.
Clear Google Maps Cache
The cache and system files of Google Maps could also be why it won’t work. On your Android device, the Maps app stores certain temporary information. While this typically improves performance, over time the data can start to accumulate and start to cause problems with the program.
You can safely clean away the app’s cached data to fix Google Maps not working on an Android. Keep in mind that wiping the cache and data from your device does not remove the Maps app itself. Follow these steps to delete data from the Maps app:
● Go to Settings > Apps & notifications > View all apps on your device (not in the app). Note that the terms may differ between devices.
● Choose Maps from the list of apps. Click on the Storage & cache tab on the Maps screen.
● After selecting Clear Cache , click on Clear Data .
● Reopen the Maps application. Now it should function properly without issues.
Summarily , these helpful tips and suggestions should help you successfully fix Google Maps not working on an Android. Ensure to follow the instructions correctly to get the right results.
Author:Joan Agie
Add MobilityArena as a preferred source on Google
If you’re using an iPhone and a website requires you to view content in a pop-up window but your browser won’t let you, this guide is for you. This article will show you how to enable or block different browser pop-ups on the iPhone in order to access a website’s content.
How to Enable or Block Pop-Ups in Your iPhone’s Browser
Safari is the iPhone’s default web browser, but you can also download and use a variety of other browsers from the App Store.
Most browsers include a built-in pop-up blocking feature that by default, blocks all pop-up windows. This feature, however, is optional, and you can turn it off to see website content in pop-up windows.
The steps you must follow to enable or block browser pop-ups on iPhone may differ depending on the browser you use. Nonetheless, we have covered the procedures for the most widely used browsers.
How Can I Enable or Block Pop-Ups in Safari on the iPhone?
Enabling or blocking pop-ups in Safari on the iPhone is simple, and you can do so directly from the Settings app.
You should do the following:
● Navigate to the Settings menu.
● Scroll to the bottom and select Safari .
● The toggle switch for Block Pop-ups can be found under General . It can be used to enable or disable pop-up blocking.
Return to Safari and reload the website that requested pop-up access. It should now be able to display the content in a new pop-up window in Safari.
How to Enable or Block Pop-ups in Chrome on the iPhone
Chrome, like Safari, by default blocks pop-ups. However, you can enable pop-ups in Chrome on iPhones by following these steps:
● Open Chrome.
● Select Settings by tapping the ellipsis button in the bottom-right corner of the screen. Swipe left on the quick-access tabs at the top if it isn’t visible.
● Select Content Settings from the drop-down menu.
● On the next screen, tap Block Pop-ups and use the toggle next to Block Pop-ups to either enable or disable them.
How to Enable or Block Pop-Ups in Edge Browser On the iPhone
The Microsoft Edge browser, which also by default blocks all pop-ups, is quite popular among Windows users who also own iPhones. Here’s how to enable or block pop-ups in Edge on the iPhone:
● On your iPhone, launch Edge .
● Select Settings from the menu after clicking the ellipsis button at the bottom of the page.
● On the next screen, tap Privacy & Security and then Block pop-ups .
● Click on the Block Pop-ups toggle to enable or disable them.
How to Enable or Block pop-ups in Brave Browser on the iPhone
Those who value their privacy more than others frequently use the Brave browser. If you use it on your iPhone and want to enable or block the browser’s pop-ups, follow these steps:
● On your iPhone, launch Brave .
● Select Settings from the ellipsis button at the bottom.
● Under Features , select Brave Shields & Privacy , and then scroll to the Other Privacy Settings section.
● Turn off the button that blocks pop-ups. Alternatively, you can turn it on to stop pop-ups from appearing whenever you decide otherwise.
How to Enable or Block pop-ups in Opera Browser on the iPhone
If you are using Opera, you can block or enable pop-ups and allow websites to show content in pop-up windows by following these steps:
● Launch Opera .
● Choose Settings from the hamburger menu.
● To enable or block browser pop-ups, go to Ad Blocking and use the toggle next to Block Pop-ups .
How to Enable or Block pop-ups in Firefox browser for iPhone
Finally, if you use Firefox, you can allow it to display pop-ups on the iPhone by following these steps:
● Launch Firefox .
● Select Settings from the hamburger menu in the lower-right corner.
● Block pop-up windows can be enabled or disabled by using the toggle switch under General .
In conclusion , the process for enabling or blocking browser pop-ups on an iPhone is straightforward. The same steps apply regardless of the browser you use, and once you’ve finished accessing the necessary content, you can toggle the switch to disable pop-ups again.
