Add MobilityArena as a preferred source on Google
iPhones are commended for their dependability and high performance levels, but sometimes something as simple as sending text messages can be a problem. When your messages don’t get through, it can be annoying and you risk missing vital communications.
I’ll show you in this guide how to fix an iPhone not sending text messages. This issue could arise due to several factors, but regardless, there are several simple techniques to troubleshoot and fix the issue.
- How Can I Fix an iPhone Not Sending Text Messages? Examine Your Network Signal Ensure MMS and SMS are enabled Check Your Message Recipients Refresh and Delete Your Messages Check Your Carrier Plan Restart Your iPhone Update Your iPhone Reset Your Network Settings
How Can I Fix an iPhone Not Sending Text Messages?
There are several reasons why your iPhone isn’t sending text messages. It could be an unstable network connection, an expired carrier plan, an incorrect network setting, or a problem with your local carrier.
Below are some things you can try to fix an iPhone not sending text messages. And if the issue is that your iPhone doesn’t receive text messages from Android, check out this guide .
Examine Your Network Signal
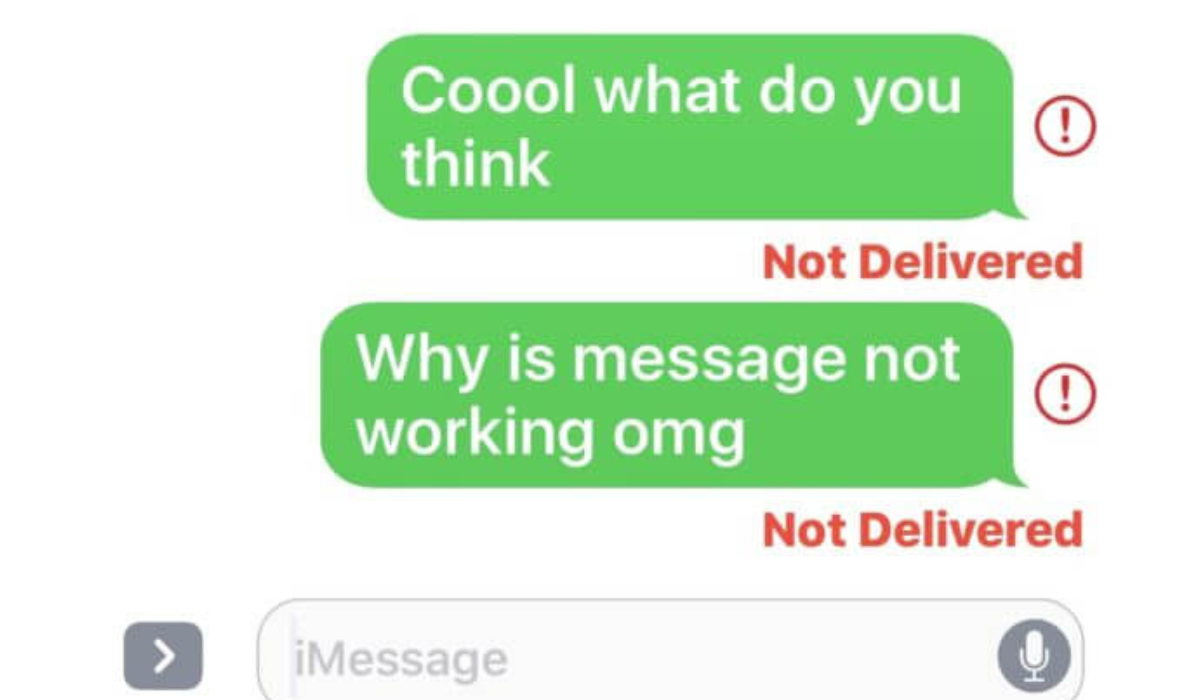
SMS and MMS send in green text bubbles, whereas iMessages send in blue text bubbles on the iPhone. To send a text message, SMS and MMS require a cell phone network and enough airtime remaining in your cell phone plan, whereas iMessage requires an internet connection via data or Wi-Fi.
As such, to fix an iPhone not sending text messages, first make sure it’s the right type of message you’re sending. If it’s an SMS or MMS, check the number of network bars in the top-right corner of your iPhone’s status bar, next to the battery icon, to see if your cell signal is weak. Contact your mobile network operator if you are in an area that usually has a good signal. For iMessages, confirm that your internet connection works well.
Ensure MMS and SMS are enabled
Your iPhone automatically sends messages via iMessage if the person you’re sending a message to is using an Apple device.
However, since iMessage texts can fail sometimes even if you’re sending them to other iPhone users, your iPhone can send SMS (Short Message Service) messages instead. To use this feature to fix an iPhone not sending text messages, however, you must enable it in Settings .
- Navigate to the Settings menu
- Scroll down and select Messages
- Turn on the Send as SMS slider
Also you can send MMS (Multimedia Messaging Service) messages using your iPhone. These are text messages with media attached, such as images or video clips. Before you can send these messages, you may need to enable them in Settings .
Here’s how to enable MMS messages to fix an iPhone not sending text messages:
- Navigate to the Settings menu.
- Scroll down and click on Messages .
- Toggle the MMS Messaging toggle to the green “ on ” position.
Please keep in mind that your personal cell plan may not cover MMS messaging. Any text message sent with multimedia will fail to send in this case.
Check Your Message Recipients
When you’re trying to fix an iPhone not sending text messages, make sure you’re entering the correct number when sending the message.
When messaging a contact stored on your iPhone, this should be no problem, but you need to be more careful if you’re entering a new number. Always take your time to type in the correct details.
If the problem persists, contact your intended recipient through some other method (if possible) to confirm the number.
Refresh and Delete Your Messages
Another way to fix an iPhone not sending text messages is to try closing and reopening the Messages app. Although this approach isn’t the most logical, some users claim it works. Often, refreshing the app will clear out the action, allowing the app to function normally again.
Additionally, you might try deleting any Message conversations with failed texts. To see if this helps to fix an iPhone not sending messages, do the following:
- Open Messages .
- Swipe to the left on the conversation you want to delete.
- To confirm, tap the Delete icon and then Delete from the pop-up menu.
- Finally, click the Compose icon to try again in the top-right corner of the Messages screen.
If a message tries to send but is unsuccessful several times, this method can be very helpful.
Check Your Carrier Plan
To fix an iPhone not sending text messages, also check to see if you currently have an active mobile service plan. You won’t be able to send texts, especially SMS and MMS messages, if you don’t have one.
While the vast majority of phone plans include standard unlimited texting, you may have exceeded your monthly text message limit if you have a limited plan. This is something to verify when looking to fix an iPhone now sending text messages.
You should also contact your network provider to ensure that there are no problems with your account services.
Restart Your iPhone
You can restart your iPhone after attempting everything provided above to fix an iPhone not sending text messages. Restarts clear temporary memory, so they can be a good way to fix any problems that are preventing your iPhone from functioning properly.
Restart the iPhone X and later by holding down the Side button and one of the Volume buttons. Next, you move the slider to turn off the device to the right. To bring up the shutdown screen on earlier iPhone models, hold either the Top or Sleep/Wake button.
Alternatively, you can completely shut down your phone and restart it manually by following the steps below:
- Open Settings > General > Shut Down .
- Swipe to the right on the button.
- Wait one minute for the phone to completely shut down.
- Simply press and hold the Side button to turn on your iPhone.
You should be able to enter Messages and easily resend the problematic text when the phone turns back on.
Update Your iPhone
The most recent iOS update for your iPhone should always be installed. iOS updates can help to resolve software issues and bugs. Therefore, an update is a good idea to fix an iPhone not sending text messages.
To update, you must have your iPhone connected to a Wi-Fi network and plugged into a power source. Then you should do the following:
- Navigate to the Settings menu.
- Proceed to General .
- Select Software Update .
- If a pending update is available, you’ll see a Download and Install button. Select it to download and install the most recent version on your iPhone.
When your iPhone displays the message “ iOS is up to date ,” it means you already have the most recent version installed and don’t need to do anything else.
Reset Your Network Settings
Resetting the network settings on your iPhone is not something you should do casually. Network settings save data such as Wi-Fi networks and passwords, so deleting them is not recommended.
However, if you’ve tried everything else and your iPhone still won’t send text messages, it’s worth a shot. Before trying a reset, make a backup of your data.
Network settings can be cleared to fix an iPhone not sending text messages as follows:
- Navigate to the Settings menu.
- Go to General .
- Scroll to the bottom and select Transfer or Reset iPhone > Reset .
- Select Reset Network Settings.
- Enter your passcode.
- To confirm, tap Reset Network Settings .
The solutions I’ve suggested above are the most effective ways to fix an iPhone not sending text messages. If your iPhone still can’t send messages after attempting all of the above options, contact your mobile operator. If they’re unable to assist you, it is most likely a hardware issue, and you should contact Apple or an authorized service provider for expert assistance.
Author:Joan Agie
Add MobilityArena as a preferred source on Google
The AirPod experience is a fantastic one, but the battery life has become a common issue for many users. Having your AirPods die in the middle of a meeting or phone call can be incredibly annoying. Fortunately, there are several ways to keep AirPod batteries from draining too quickly.
In this article, I’ll go over some of the best things to try if you’re looking to keep AirPod batteries from draining too quickly. These tips range from simple maintenance tips to more advanced usage adjustments. So, keep reading to find out.

How Can You Keep AirPod Batteries From Draining Too Quickly?
The battery life of an AirPod is roughly six hours on a single charge. However, you could notice that the battery does not last as long as the official release claims due to a few variables.
The following tips will help you get the most out of your AirPods and keep AirPod batteries from draining too quickly.
Keep your AirPods in the case
If you’ve been using wired earbuds for a long time, you might think it’s safe to remove your AirPods from your ear and set them aside until your next use.
Obviously, the risk of losing your AirPods is a downside to this habit. The fact that your AirPods will continue to lose battery life if you don’t keep them in the case is another problem and is a major factor in why the batteries on your AirPods wear out so quickly. This is due to the earbuds still being connected to your device’s Bluetooth.
Your AirPods continue to be active and always ready to connect for your convenience even if Bluetooth is turned off.
So, to keep AirPod batteries from draining too quickly, always remember to put them back in their case after use.
Avoid Opening and Closing the AirPods Case Lid Repeatedly
Every AirPods owner is probably guilty of repeatedly doing this. However, every time you open and shut the charging case, your AirPods’ Bluetooth turns on before abruptly turning off again. Sending ceaseless instructions like this drains the battery life of your AirPods.
This will happen whether or not the AirPods are in the case. So to keep AirPod batteries from draining too quickly, place the case somewhere your hands can’t reach. You can do this once you’ve successfully paired and connected your AirPods.
Don’t Drop Your AirPods
You’ve most likely dropped your AirPods or AirPods case at some point. Even though the AirPods are fairly resilient, frequent hits into hard surfaces will inevitably cause some damage and affect battery life.
Although you cannot reverse the damage, you can be more careful about where you put your AirPods and AirPods case when not in use. This will help keep AirPod batteries from draining too quickly.
Turn off Automatic Ear Detection
Have you ever noticed how your AirPods perfectly pause songs or videos when you take the earbud out of your ears and resume playing when you replace them?
The useful feature that enables this function is Automatic Ear Detection . However, it drains the batteries in your AirPods.
You can disable Automatic Ear Detection to keep AirPod batteries from draining too quickly if it isn’t a must-have feature for you:
- Navigate to Settings and select Bluetooth .
- Ensure your AirPods are paired with your iPhone.
- Click on the More Info ( i ) button beside your AirPods.
- Turn off Automatic Ear Detection using the toggle.
Disable Noise Cancellation
Noise cancellation improves your listening experience by blocking out background noise. However, the feature drains the battery of your AirPods.
This feature is only available on the AirPods Pro and AirPods Max; the standard AirPods do not have it. So, figure out which AirPods you have, and if you have those two models, turn off noise cancellation to keep AirPod batteries from draining too quickly.
Go to Settings > Bluetooth once your AirPods Pro or AirPods Max are connected to your device. Beside your AirPods, tap the More Info ( i ) button. Select Off under Noise Control .
Reduce the Volume of Your AirPods
It’s a satisfying feeling to turn up the volume so you can hear a song in its entirety. But even though your AirPods have just been fully charged, you might notice that they are running low if you’re listening to a 3-hour playlist at close to maximum volume.
Therefore, reducing the volume can help extend battery life and keep AirPod batteries from draining too quickly. This practice also protects your ears; continuously blasting the volume is harmful in the long run. It might also benefit you to achieve better sound quality from your AirPods.
Develop Good Charging Habits
Using our AirPods’ batteries until they are completely dead is probably a habit that many of us have. However, if this happens frequently, it will quickly drain your battery. As a result, your AirPods may not be charging as well as they used to.
When it falls below 40 or 50 percent, place your AirPods back in their case to charge. The same goes for your AirPods case. Avoid waiting until the battery is completely down before charging it, and if you’re having trouble charging your AirPods apply these techniques.
In addition, don’t overcharge your AirPods. While it’s safe to keep your AirPods in their case when not in use, it’s easy to forget you’re charging your AirPods case after plugging it in. Set a reminder to unplug the AirPods and avoid charging both AirPods and the case through the night.
Turn on Optimized Battery Charging
The optimized battery charging feature on the AirPods (3rd generation) and AirPods Pro learns from your charging routine. Because your AirPods will only charge past 80% when you’re about to use them, this feature protects the battery’s health.
Maintaining the battery will help prevent additional wear that would otherwise make your AirPods less capable of holding a charge. So to keep AirPod batteries from draining too quickly in this manner, go to Settings > Bluetooth , select More Info ( i ) beside your AirPods, then turn on Optimized Battery Charging to enable the feature.
Update Your AirPods Firmware
This may help to keep AirPod batteries from draining too quickly because firmware updates frequently include bug fixes and performance enhancements.
When new firmware is available, your AirPods should automatically update when connected to your Apple device. In any case, it’s worthwhile to check and update the firmware on your AirPods.
Reset Your AirPods
Resetting your iPhone is a good option if you’re experiencing excessive battery drain. The same applies to your AirPods.
Follow these steps to reset and keep AirPod batteries from draining too quickly
- Close the lid after placing your AirPods into the case.
- Wait 30 seconds before opening the case lid.
- Navigate to the Settings app on your device and select Bluetooth .
- Click on the More Info ( i ) button next to your AirPods.
- Choose Forget This Device .
- To confirm, tap Forget Device .
- Press the round Setup button on your AirPods case for 15 seconds while the lid is still open. The status light should begin to flash amber and then white.
- Finally, to use your AirPods again, simply reconnect them to your device.
AirPods, like all technological devices, have hiccups now and then, but they are often easily resolved by the user. By following the steps outlined above, you should be able to keep AirPod batteries from draining too quickly.
If nothing works, it’s possible that your AirPods need to be repaired. In this case, you can go to an Apple Authorized Service Provider to repair or replace the batteries.
