Add MobilityArena as a preferred source on Google
The Motorola Moto G Pure is one of Motorola’s latest entry-level smartphones that was released in October 2021. The device has a 6.5″ max vision HD+ display, a 13MP main camera, a 5 MP selfie camera, and a 4,000mAh battery that lasts for up to 2 days. The processor on the Moto G Pure is the MediaTek Helio G25. It also has 3GB of RAM and 32GB of internal storage.
Now, if you are looking to make your Moto G Pure run faster and smoother, here are some ways to make that possible.

Delete Unused apps
Any smartphone user would love to have all their desired apps installed. This might lead to large amounts of apps piling up on the device, over time. It is important to form a habit of uninstalling unused apps and games. Having lots of these apps will hinder and slow down the performance of your device.
Especially when you have some of them running in the background. They also become so many and have so much data on each one of them, that there is barely any storage space left for your device to run as smoothly as you may have liked.
Clear App Cache
Cleaning the cache of the app on your Moto G Pure is important in terms of sending up your phone. Clearing the cache of an app can make that particular app run faster and smoother than it did before, and reduce possible lag. Clearing cache is also very important for entry-level devices too to help them improve their performance. As they are not as powerful as high-end devices. You can clear the cache of any app by long pressing the app icon, selecting App info , and then Storage . There will be an option to Clear the cache . Select that and you’re good to go.
Updates
It is important to keep your Moto G Pure updated. This is because, with every new update, there might be security enhancements (which are crucial) but there might also be performance improvements added to the update that can make your overall experience, and device speed, better.
Restarting your Device
It is well known that any device can perform faster and better simply off of a restart. The same holds for the Moto G Pure. Doing this should address most of the performance issues, as it deletes temporary files to speed up the phone and clears the phone’s memory.
Use the Lite Version applications
Lite versions of apps are the shortened versions of these said apps. Apps Tit Tok, Facebook, e.t.c. The lite versions are usually limited in comparison to the actual applications and don’t offer as many features. These lightweight apps, that do not work your device as hard as the main ones, are designed for entry-level smartphones and designed for users who want to keep their apps simple or use something simple. They help boost the performance of your device and lower your data and charges.
Hard Reset
If you are looking for a simple method on how to Make Moto G Pure Run Faster, it may be the most effective. If you do a hard reset on your Moto G Pure, then all the phone data will be deleted, and the phone’s storage will be clean. At the same time, the random-access memory of your Moto G Pure will start working like new again. However, you need to back up all the data before performing a hard reset.
The main reason for this is a hard reset because all the data in your Moto G Pure storage will erase. This will increase the performance of your Moto G Pure phone compared to its previous state before the reset. But it bears too much of a cost for some. If you are fine with having all your data lost, you can go for this option. It will certainly improve the phone’s performance and feel like you just bought a new phone.
- Don’t miss our mobile phone reviews .
- Follow our news on Google News .
- Follow us on Instagram , Facebook , Twitter , and YouTube .
Author:Flamez
Flamez loves basketball, art, gadgets and cars.
Add MobilityArena as a preferred source on Google
This probably happens to you a lot: you have a lovely Android phone that functions flawlessly, but you keep unintentionally activating the built-in voice assistant. The Google Assistant tool can surely be helpful in many situations, but it can also quickly become incredibly aggravating when it offers assistance at unsuitable times.
Perhaps – for instance – you’ve noticed that Google Assistant appears when you use a particular term in conversation or when someone speaks in a TV show or commercial. This tool has a tendency to just suddenly appear out of nowhere and interfere with your work or entertainment.
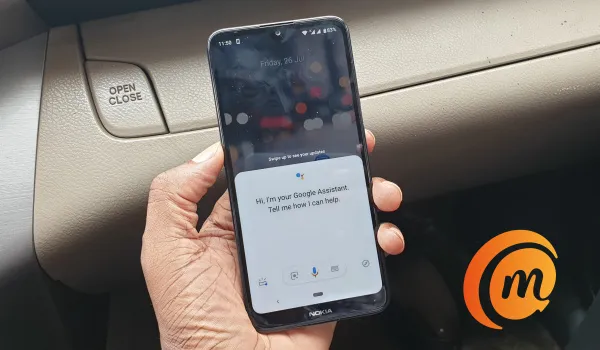
It is pretty easy to disable Google Assistant on your Android phone.
Not to worry, however — it is pretty easy to disable Google Assistant. As always, you just need to be equipped with the right instructions, and that’s exactly why we’re here. In this easy guide, we’ve provided you with the necessary steps to successfully turn off Google Assistant and keep this tool from being a nuisance on your device.
ToDisable Google Assistant Completely
You can always choose to totally disable the Google Assistant if you are convinced that you don’t want it to bother you anymore. Remember that if you decide to, you can activate it once more whenever you like.
There are two methods to use in disabling the Google Assistant tool completely on an Android device. Below are instructions for the first method:
- Launch the Google app on your Android smartphone or tablet.
- The Menu icon (three tiny dots), which is typically found in the bottom-right corner of the screen, should be selected.
- You should then navigate to Settings .
- Go back to the menu and select the Google Assistant option.
- Locate the General option by scrolling down.
- Toggle Google Assistant by tapping the slider adjacent to it. Ensure that it’s set to Off .
- Finally, tap Turn Off to confirm your action.
Follow these instructions and turn the switch back on if you decide to change your mind and want to use the Google Assistant tool once more.
The instructions below are for an alternative method to entirely disable the Google Assistant tool:
- Press and hold the Home button.
- You should tap on the box-shaped icon in the bottom left corner when the Google Assistant appears.
- In the top-right corner, tap the profile symbol to continue.
- Pick General from the drop-down selection that opens.
- Finally, to turn off Google Assistant, press on the slider switch next to it.
No longer will the Google Assistant show up without permission. If you desire to activate it again after changing your mind, follow these instructions again to turn it on.
Disable Google Assistant byTurning Off the Activation Button
When you least expect it, the Google Assistant tool has the annoying habit of intruding. In a similar manner, many individuals tend to unintentionally press the Home button on their smartphones and tablets, and this action frequently activates the Google Assistant tool.
Android smartphones give you the option to turn off Google Assistant”s appearance when you hit the Home button if you don’t want to see or hear it. For those who wish to get rid of the Assistant but are hesitant to entirely turn it off, this is an excellent solution. This is how you do it:
- From your Android device’s Home screen, open the Settings app.
- Navigate to the menu’s Applications section. It could be referred to as Apps on some models.
- Visit the Default apps/Applications section next.
- Open Assistance & voice input after that.
- You’ll need to click on the Assist app tab at this point.
- You will then get a list of the available assistance apps on your Android device. It will typically offer Google and None as choices. Choose None by tapping it.
By following the same steps as with every other approach in this guide, you can return to the default settings. In this instance, you should choose Google as the assistant app rather than None .
Disable Google Assistant By Uninstalling Google Updates
The updates for the Google app can be removed, and the Google app can be reset to its factory settings, which will rid your phone or tablet of the annoying assistant prompts.
Keep in mind that this is the most drastic action you can take in this scenario. It is also important to note that other Google features and services could be impacted. If they were recently added, you might notice a change in their behavior, and some of them might even vanish with the Google Assistant tool.
You can follow the instructions below if you’re positive you don’t want the Assistant anywhere on your phone. Both mobile devices and tablets can use this technique:
- Launch the Settings app once more from the Home screen of your device.
- Visit Applications or Apps next.
- You’ll need to select the Application Manager at this point. Alternatively, you should tap on Apps if there isn’t an Application Manager option.
- The list of all installed apps on your phone or tablet will then appear.
- Now, find Google and tap on it.
- You should press on the three dots icon in the top-right corner of the screen when the Google app’s details page appears.
- Then select Uninstall updates from the menu.
- When Google notifies you that all data will be deleted and that the app will be replaced with the factory version, press OK to confirm your decision.
Your phone or tablet won’t have the Google Assistant tool on it anymore, so it won’t annoy you. The Assistant will, however, return the next time you update the Google app or when your device does so automatically.
In conclusion , although a useful tool, Google Assistant can be quite intrusive so it’s normal if you’ve been looking for a way to disable it. Luckily, the process is easy and we’ve provided instructions to that effect in this article. Make sure to follow the instructions closely to keep Google Assistant from being a nuisance on your Android smartphone and tablets.
- Don’t miss our mobile phone reviews .
- Follow our news on Google News .
- Join our WhatsApp Group , to be notified of the most important articles and deals,
- Follow us on Instagram , Facebook , Twitter , and YouTube .
