Add MobilityArena as a preferred source on Google
Apple typically requires you to check in with your Apple ID before you can access all of its goods and services, so having mistakenly created multiple Apple IDs can get very messy. Even worse, you might discover that some purchases are not accessible on all of your devices because the accounts are not in sync.
Now, even though Apple doesn’t offer a simple way to combine multiple Apple ID accounts, it’s still possible to manage multiple Apple IDs in a way that lets you transfer data across devices and prevent any issues.
In this guide, we’ll show you the steps to successfully manage multiple Apple IDs and access all of Apple’s services on your devices.
How Can I Manage Multiple Apple IDs I Created By Mistake?
Usually, every user should only have an Apple ID per email account. If you have multiple Apple IDs, there’s the downside that separate data will be locked to separate accounts. Contacts, calendars, and other iCloud data will also not be readily synced between Apple ID accounts.
To manage multiple Apple IDs if you’ve mistakenly created them, you will need to manually move data from one Apple ID to another.
Follow the instructions we’ve created below to manage multiple Apple IDs:
- Select a Main Apple ID
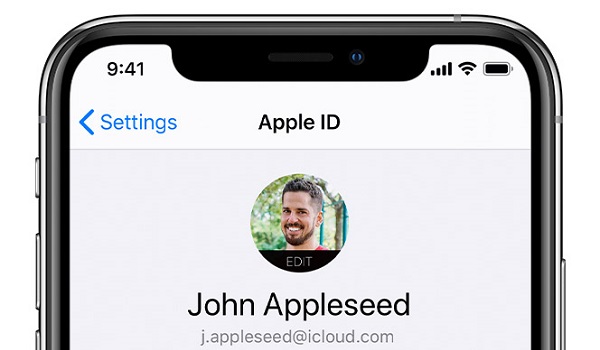
First, it’s important to decide on which of the Apple IDs you wish to use going forward. Since purchases cannot be transferred to another account, choose the ID with the largest value of purchases linked with it.
When you click your name in the App Store on a Mac, a list of your purchases will show up. To determine which Apple ID account that is, click Account Settings next. View your Apple ID account by opening the App Store on an iPhone or iPad and tapping the profile symbol. Next, click Purchased to see your purchases.
Do the same thing for any other apps where you’ve made purchases, including Apple TV, Books, Music, and Third-Party Apps connected to an Apple ID.
By visiting the Apple ID page in Settings or System Settings and selecting Subscriptions , or by heading to Media & Purchases > Subscriptions , you should also verify your active subscriptions.
This is the first step to managing multiple Apple IDs. If you’ve never made any purchases, then you’re free to choose the account you’d prefer to maintain going forward.
- Move your iCloud Content to the Main Apple ID
The second thing to do in order to manage multiple Apple IDs is to move your iCloud content from the second account to the main Apple ID account you selected in the first step.
Sign in to the secondary account and download any iCloud Drive files or folders before transferring them to the main Apple ID account. In Finder or the Files app, you can download files by touching or clicking the cloud symbol next to iCloud Drive files. Similarly, download and move the photos in your iCloud Photo Library to your main account.
You can try syncing all of your data to your email address if you already have data in other iCloud apps, including Contacts, Calendars, Reminders, and Notes.
On an iPhone, go to Settings > Mail > Accounts , and on a Mac, go to System Settings > Internet Accounts .
When you choose your email address and turn on all the necessary options, that information will be uploaded to your email account and remain there even when you log out of your second Apple ID.
- Enable Family Sharing for Content You Can’t Transfer
When attempting to manage multiple Apple IDs, there may be some content you’re unable to transfer. However, by configuring Apple Family Sharing, you can maintain access to any purchases made using your second Apple ID account that you are unable to move to your primary account.
Family members can exchange content using this function, but you can also use it to connect your own Apple ID accounts. You can access every purchase made on both accounts if you activate Purchase Sharing in the Family Sharing settings.
You can use Family Sharing to access any active subscriptions on your second account through your primary account. When the time for renewal comes, just cancel the current subscription and start a new one from the main account.
- Delete the Second Apple ID Account
The final step to managing multiple Apple IDs is to delete the second account. Do this as soon as you’ve transferred everything you want to keep from it, and you aren’t using Family Sharing to share any purchases.
By doing this, you’ll prevent logging into the wrong account and repeating the same mistake. To delete your Apple ID account, go to the Apple ID website.
Take note though, if you still need to use Family Sharing to retrieve your previous purchases, don’t delete your second Apple ID account just yet.
In summary , you can easily manage multiple Apple IDs if you’ve created and used them mistakenly. Follow our instructions in this guide for the best results.
- Don’t miss our mobile phone reviews .
- Follow us on Instagram , Facebook , Twitter , and YouTube .
Author:Joan Agie
Add MobilityArena as a preferred source on Google
Google Translate is among the most popular online translation tools. It supports dozens of languages, more than most of its competitors, and it does so with impressive accuracy.
Even though most people associate Google Translate with a text-only interface, it is capable of much more. You can quickly translate audio files or live speech from one language to another with Google Translate.

If this is your first time doing so, this guide will show you how to successfully translate audio with Google Translate on mobile and desktop devices.
How Can I Translate Audio with Google Translate on a Mobile Device?
One of the best features of Google Translate is that it is available on all major platforms. You can easily translate audio with Google Translate whether you’re using a desktop, tablet, or mobile device, regardless of brand or operating system, as long as it has a browser.
To begin translating audio with Google Translate, go to Google Play or Apple’s App Store on your mobile device and download the Android or iOS version of the app. Next, follow these steps:
- Open the Google Translate app.
- At the bottom of the screen, you’ll see two languages — one on the left and one on the right. If your target language is not the default, tap on the language on the left and select the one from which you want to translate. Then, on the right, tap the language and select the language you want to translate to.
- Play the source audio file with another phone or media player or begin speaking after the sound.
- When you’re finished speaking or playing the audio file, a screen will appear with an interpretation and transcription of your audio file or voice recording in both languages.
- To listen to your voice recording in the new language, tap the tiny speaker icon above the interpreted text.
To get the best results when attempting to translate audio with Google Translate, we suggest holding your phone as close as you can to the source of the audio. Also, consider slowing the audio file for results to be more accurate.
To change the speed of your audio on Android devices:
- Navigate to the Translate app.
- Tap Menu , then Settings , and finally Speed .
- Choose from Normal , Slow , or Slower.
You can also adjust other speech settings on Android, follow these steps:
- Launch the Translate app on your Android phone or tablet.
- Tap Menu , then Settings , then choose a setting. As an example, to have the translated text spoken automatically, select Speech input . Then, enable Speak output .
- Tap Region to see a list of available dialects. Then, choose a language and dialect.
- To select a gendered tone, tap Tone . Then, choose between Male and Female . Note that this function is only available in a few languages.
To change the speech settings on your iPhone
If you’re using an iPhone or iPad to translate audio with Google Translate, you can also change your iPhone and iPad’s speech settings to get the best results. To change the speed of the audio on your iPhone.
Navigate to the Translate app.
Tap Settings and then Speed at the bottom right.
Click Normal , Slow , or Slower .
Navigate to the Translate app.
Tap Settings and then Speech region in the bottom right corner.
Change the language by tapping it.
Tap the region associated with the desired dialect. Note that not all dialects of a language will be available.
To block offensive words:
- Navigate to the Translate app.
- Tap Settings and then Speech input in the bottom right corner.
- Enable the option to Block offensive words
How to Translate Audio Files with Google Translate on Desktop
You should be able to translate most audio files with Google Translate from your desktop browser, regardless of whether you’re using a Mac, Linux, Chromebook, or Windows PC. Here is how to translate audio with Google Translate on a desktop; these instructions are for audio files or live speech:
- Allow your browser to use your microphone and check your browser’s microphone settings.
- On a Mac, microphone settings can be found in System Preferences . On a PC, you’ll find microphone settings in the Control Panel .
- On your desktop browser navigate to translate.google.com.
- When the page loads, there will be two boxes, one for the source language (on the left) and one for the translation (on the right). Click on the language that corresponds to the language of your audio file in the left box. Press the dropdown button to show more if you can’t find your preferred language among the default options.
- Click the language you want the audio file translated to in the right box. Similarly, if you can’t find your preferred languages by default, click on the drop-down icon to open a longer list of languages.
- Then, in the bottom left corner of the first box, click the microphone button.
- Play the audio file from your smartphone or other media player that you want to interpret.
- Click Listen to hear the translation spoken aloud.
- Click Listen again to playback audio at a slower rate . Note that when you click “Listen ,” the audio alternates between normal and slow speed.
In summary , translating audio with Google Translate is pretty easy, simply follow the step by steps guidelines provided above, depending on your device.
- Don’t miss our mobile phone reviews .
- Join our WhatsApp Group , to be notified of the most important articles and deals,
- Follow us on Instagram , Facebook , Twitter , and YouTube .
