Add MobilityArena as a preferred source on Google
These days that touchscreen smartphones are what almost all individuals make use of, the tendency of them scratching are quite high. There are different types of scratches which vary from a full-blown wreck of your smartphone to just a cosmetic grievance, which depends on the placement and severity of the scratch. Even though the scratches that are worst normally need one to change the screen, you can solve moderate and mild scratches at home.
For scratches to be removed from the screen of a phone, you can attempt buffing the scratches out using glass polish (if the screen is glass), and toothpaste (if the screen is plastic). After you’ve handled the issue, you’re also required to check out precautions for you to prevent scratches in the future.

Making use of toothpaste (for plastic screens)
Step 1 . Get your toothpaste ready Your morning routine or medicine cabinet should already have toothpaste as a standard part of it. Made to have an abrasive nature, you can fix plastic scratch using toothpaste in the same manner that it cleans the teeth. Since it’s home-based and should not need you to buy again, the recommended way of fixing plastic scratches is with the use of toothpaste.
To get rid of scratches, your toothpaste is required to be abrasive. Check the box of your toothpaste if you aren’t sure about the type of toothpaste you use. Similar abrasive features can also be seen in a baking soda mixture. If you would rather you made use of baking soda, simply stir into a paste, then make use of it in a similar manner.

Step 2 . Use an applicator to dab the toothpaste Since this remedy is home-based, there are not any set rules of application that you’re required to make use of. A toothbrush, cotton swabs, paper towel, or a soft cloth can all be used for this. Anytime you dab the toothpaste; you’re only required to make use of a pea-sized amount. If you use more, it will make a mess that’s unwieldy on your phone.
Step 3 . Apply the toothpaste to the scratch As soon as you have gotten your toothpaste dab, rub the dab around your screen in a circular, gentle manner. Do this continuously till you can barely notice the scratch. Since the toothpaste has an abrasive nature itself, you would not require applying a lot of pressure. Continue scrubbing till you begin to notice its progress. Even if the scratch on the phone is too visible than you can totally do away with, the scratch should be reduced by the abrasion. If the scratch is too obvious, toothpaste would not be sufficient to get rid of it. At least, it should reduce how most scratches look.
Step 4 . Clean your phone As soon as the scratch has been reduced to your satisfaction, cleaning the toothpaste is a very easy process. Taking a slightly damp, soft cloth then wiping off the excess toothpaste is a great beginning. From there, you can pick a polishing cloth then wipe away any oil or dirt which have built up on the screen of your phone. Doing this will make you renew how your phone looks, and most likely make your phone have a better look than it was even before it had a scratch.
Making use of glass polish (for glass screens)
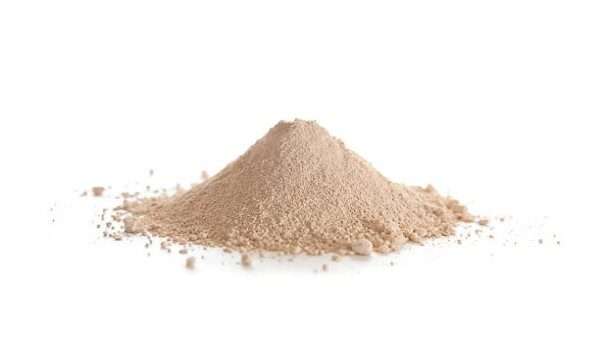
Step 1 . Buy a cerium oxide polish If the screen on your phone is made of glass, you will need to make use of a solution that is more heavy-duty compared to baking soda or toothpaste to get rid of scratches from your phone. In a situation like this, it is recommended you make use of a cerium oxide polish. You can buy this polish in a pre-mixed form or as a soluble powder. Obviously, a more convenient option is the pre-mixed polish, as you will get a higher value when you purchase it in its powdered form.
Cerium oxide powder of 100 grams should be sufficient when it has to do with polishing the screen of your phone. You’ll likely want to purchase more amount so you can also use it if there are any future scratches.
Step 2 . Mix the powder into a slurry. In case you purchased a powdered cerium oxide, you will initially be required to prepare the mix yourself. Fortunately, the process is straightforward, and most likely worth the money you will be saving. Pour a volume of powder (about 50-100 grams) into a little container. Carefully add water until the solution you’re making has the consistency of dairy cream. Continue mixing as you’re pouring the water to ensure you have a correct measurement.
You don’t have to make the measurement perfect when it has to do with this polish, as long as you ensure that there is enough water that can make the polish soak into an applicator. You can skip this step in case you bought a pre-mixed polish.
Step 3 . Block off every spot that is vulnerable using tape A polish made of cerium oxide will do a number of things on your smartphone if it enters into any of the holes on the phone, and that included the charger input, headphone jack, or the speaker. It also has the potential of endangering the camera lens of your phone. Having that in mind, you’re required to initially cover off the area that you would like to use the polish by making use of tape.
If you tape your phone before you clean it, it may seem quite overzealous, but it is greatly recommended that you do this step prior to moving forward. In situations like foul-up, there can be quick wreckage of your phone by the polish.
Step 4 . Apply the polish to the area that’s scratched Dab a polishing cloth that’s smooth in your mixture, then use it to rub the area that’s scratched in a circular, vigorous manner. Constantly check to see the look of the scratch as you tender the area. In a 30 seconds interval or thereabouts, it is a great idea for you to wipe off the mixture using the opposite end of the cloth, dab the cloth in new polish, then repeat this process for you to get the best effectiveness.
Step 5 . Do a follow up clean on your phone As soon as you have applied the polish and cleaned it off, giving your smartphone a swift one-over using a polishing cloth won’t hurt. This will wipe off any excess debris which was caused in the polishing process. Get rid of the tape you used before polishing, then wipe your phone. Doing it thoroughly shouldn’t take more than one or two minutes, but you’ll most likely be impressed on the much nicer look on your phone as soon as you have wiped off the excess musk.
You’re also required to wipe your screen regularly. Wiping it two times in a day can sound too much, but the process only takes a second and will make sure your screen is healthy.
Preventing scratches on the screen of your phone
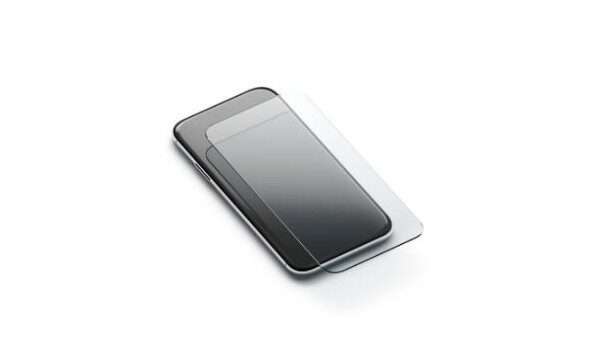
The best way you can prevent scratches on your phone’s screen is to get a screen protector. Cellphones these days are fragile, and they can get scratched. Using a screen protector is advised, and you’re required to purchase one if you are quite worried about damaging your phone.
Screen protectors are not generally too costly, and it will be way more affordable for you to get a screen protector compared to replacing the screen or your phone if the damage is severe. Protectors of the higher end are virtually unbreakable, while the brands that are affordable will at least be the one that gets damaged, and your phone itself wouldn’t have to.
Author:Victor Ehijiator
Add MobilityArena as a preferred source on Google
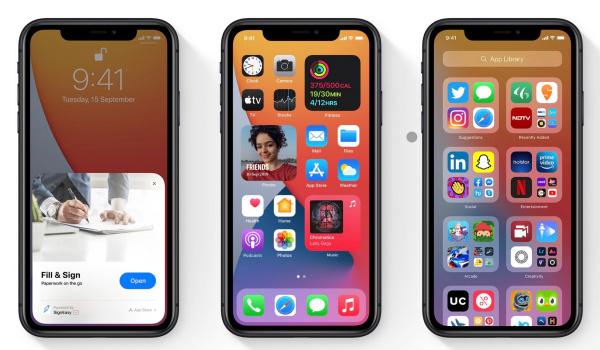
One of our regulars here at MobilityArena got bored after using Android smartphones for about ten years and decided to give Apple’s iPhone a try. I could relate with this. Sometime last year, I contemplated the same too. In my case though, I am not sure whether I was bored with Android phones or I was just bored from spending so many months recovery from surgery.
Anyway, I also contemplated a switch, but I remembered the frustration that I experienced the last time I made such a switch to iOS that I promptly got rid of the idea. But our fellow Mobilista went through with is plan to switch and got himself an Apple iPhone XR .
Why are iOS apps larger than Android apps?
While setting up the smartphone and installing apps, he was shocked at how much bigger iOS apps are than their Android equivalent. The difference in app sizes is huge. I was taken aback too as I compared apps in the App Store with their equivalent in Google Play Store.
Let’s pull up a comparison table to make it easy to compare.
- Android apps vs iOS apps: Size Comparison Why are iOS apps bigger than Android apps?
Android apps vs iOS apps: Size Comparison
| App Name | Size on Android | Size on iOS |
|---|---|---|
| 29MB | 112MB | |
| 17MB | 113MB | |
| Swiftkey | 13MB | 110MB |
| 52MB | 231MB | |
| Gmail | 14MB | 176MB |
| 25MB | 167MB | |
| Chrome | 34MB | 66.8MB |
| Messenger | 32MB | 143MB |
| 22MB | 237MB |
As you can see from the above table, the difference in size between iOS apps and their Android equivalent ranges from about 4 times the size to 10 times the size, depending on the app. So, off the bat, iPhone users are burning more data to download apps and will likely burn more to keep those apps updated as well.
To install all the above-listed apps on Android requires only 238MB of your data subscription. If you were to download the same list of apps on an iPhone, you would need 1.36GB. That is about 6 times more data. Mad; right?
Of course, this also means that iOS apps take up more of the phone’s internal memory for storage. If you are an app junkie, that is a lot of space you will be using up for your iOS apps.
PS : Note that the size of some of these apps vary with the device it is being installed on, but regardless of that, there is always a big difference between the sizes of apps from both platforms..

Why are iOS apps bigger than Android apps?
At this point, it is only natural to ask why iOS apps are that much bigger than Android apps. There are a number of answers to the question and they all have to do with the development. For one, iOS apps require multiple versions of images and artwork for different display sizes. Thesa all add up and contribute to why these apps are much larger.
Also, the binary codes for iOS apps are encrypted, which makes for poor compression. The programming language for iOS apps also requires multiple libraries (coders will understand this). Most of the issues are technical and beyond the scope of everyday users. What is important is that you realise that there is a huge difference in the sizes of apps across both platforms.
Switching from an Android phone to an iPhone is not only expensive in terms of cost of acquisition, it is also expensive in terms of daily usage. You will burn more data downloading and updating apps. One way to go about it is to do your app downloads over a WiFi network or an unlimited data plan, if you can afford one of those.
Thanks to Mobilista, Olusheenor , for sharing his initial experiences with iOS apps with me. I look forward to getting more feedback about his experience and sharing here on MobilityArena. WHo knows? I just might still make the switch myself.
If you do want to buy an iPhone, we helped you answer the question, Which Apple iPhone should you buy? .
Author:Mister Mobility
Digital Skills and Communication Coach | Mobile Phone Connoisseur since 2001 | Tech Blogging since 2004
