Add MobilityArena as a preferred source on Google
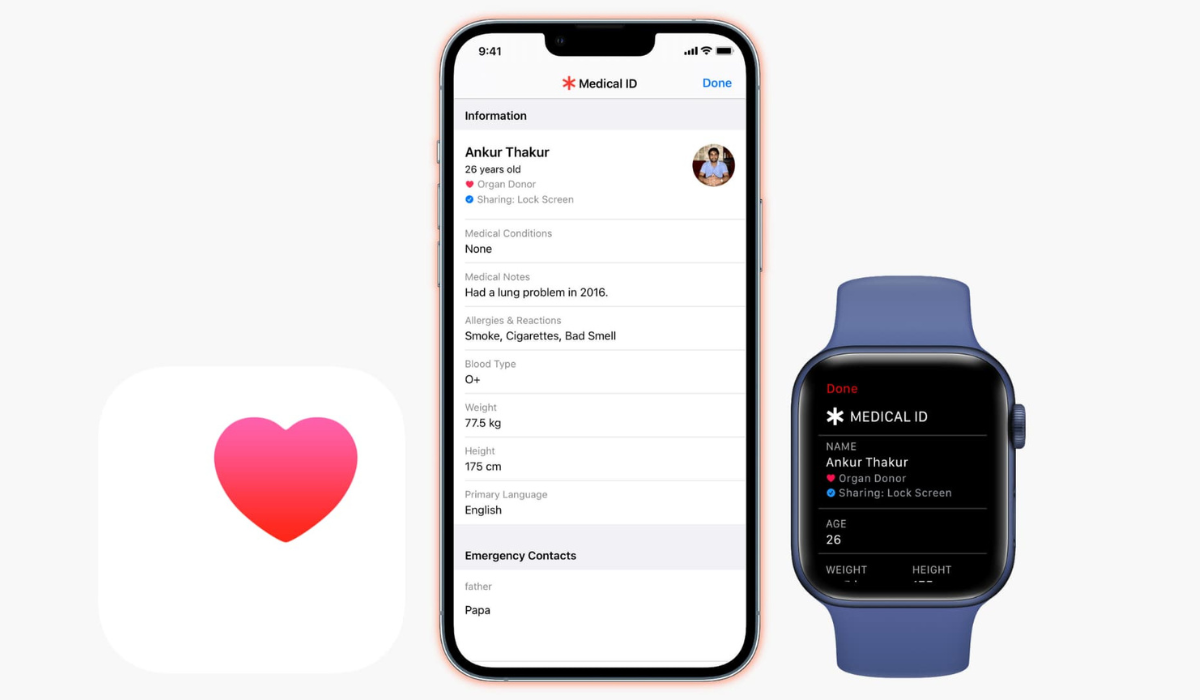
Apple Watches and iPhones have a medical ID feature that provides useful details about you and your health. Anyone who has physical access to any of these devices can quickly learn about your medical conditions and will be able to reach your emergency contacts if necessary.
However, this is only possible if you’ve already set up a medical ID on your device, and set it to appear on your device’s lock screen. So, if you don’t already know how to set up a medical ID, I’ll show you how to do so on your iPhone or Apple Watch device.
- What is the Medical ID Feature?
- How Can You Set Up A Medical ID on iPhone or Apple Watch? How to Set Up A Medical ID on your iPhone How to Set Up A Medical ID on Your Apple Watch
What is the Medical ID Feature?
The Medical ID feature on your iPhone or Apple Watch is a safety feature that provides vital medical information about you in the event of an emergency. When you set up a medical ID on your device, the following are the details you can include:
- Name, age, and picture
- Any existing health issues like heart problems, asthma, or diabetes
- Medical notes, such as indication of pacemaker or other prosthetic use.
- Allergies and adverse reactions
- Current medications
- Donor status and blood type
- Body mass index and height
- Your first language
- Emergency contacts
All these information bits are useful in an emergency, and can mean the difference between life and death. So, you’ll agree that it’s a smart idea to set up a medical ID if you have an iPhone or Apple Watch.
How Can You Set Up A Medical ID on iPhone or Apple Watch?
Here’s everything you need to know to set up a medical ID that contains all of the information that someone might require to help you in a medical emergency
How to Set Up A Medical ID on your iPhone
Take note of these steps to set up a medical ID on your iPhone device:
- Find the Health app and launch it.
- At the bottom of the screen, click the Summary tab.
- In the top-right corner, tap the profile icon, then choose Medical ID .
- Select Get Started , go through the list, and enter any details you want to.
- Make sure to include at least one emergency contact. If you use the Emergency SOS feature, this person will receive a message with your location.
- Turn on Show When Locked at the bottom by scrolling down. This is necessary if you want emergency personnel to be able to find and view your medical ID without having to unlock your device. If you’d like your medical ID to be automatically shared with emergency services when you call them, you can also enable Share During Emergency Call .
Please ensure that all of the information you enter on your medical ID is correct. Also, keep in mind that anyone with access to your iPhone can see any data you include, so don’t include anything too personal.
How to Set Up A Medical ID on Your Apple Watch
The medical ID on your Apple Watch is linked to the details on your iPhone, so make sure you first set up a medical ID on your iPhone. After that, do the following:
- On your iPhone, launch the Apple Watch app and navigate to the My Watch tab.
- Scroll down and select the Health app, followed by Medical ID .
- Check that all of the information is correct, then select Edit to make any necessary changes, including those to the Show When Locked and Share During Emergency Call options.
Please keep in mind that getting this right is critical because many emergency professionals are trained to look for medical bracelets while treating patients, making the Apple Watch’s Medical ID more useful in an emergency than the iPhone’s.
How to Add or Edit Emergency Contacts on your iPhone
Apart from being able to set up a medical ID, a need may arise to add, remove, or change an emergency contact. In that case, follow these steps:
- Go to the Summary tab in the Health app on your iPhone.
- Tap your profile photo in the upper right corner, then select Medical ID .
- Select Add Emergency Contact .
- Select the contact and their relationship to you from the list.
- Tap the red minus sign to remove a contact from your emergency list.
- Then, to confirm, tap Delete .
Ultimately, you’ll agree that the right information can increase your chances of survival in an emergency, so it’s smart to set up a medical ID on your Apple devices. I hope you’ve found this guide helpful to do just that.
Author:Joan Agie
Add MobilityArena as a preferred source on Google
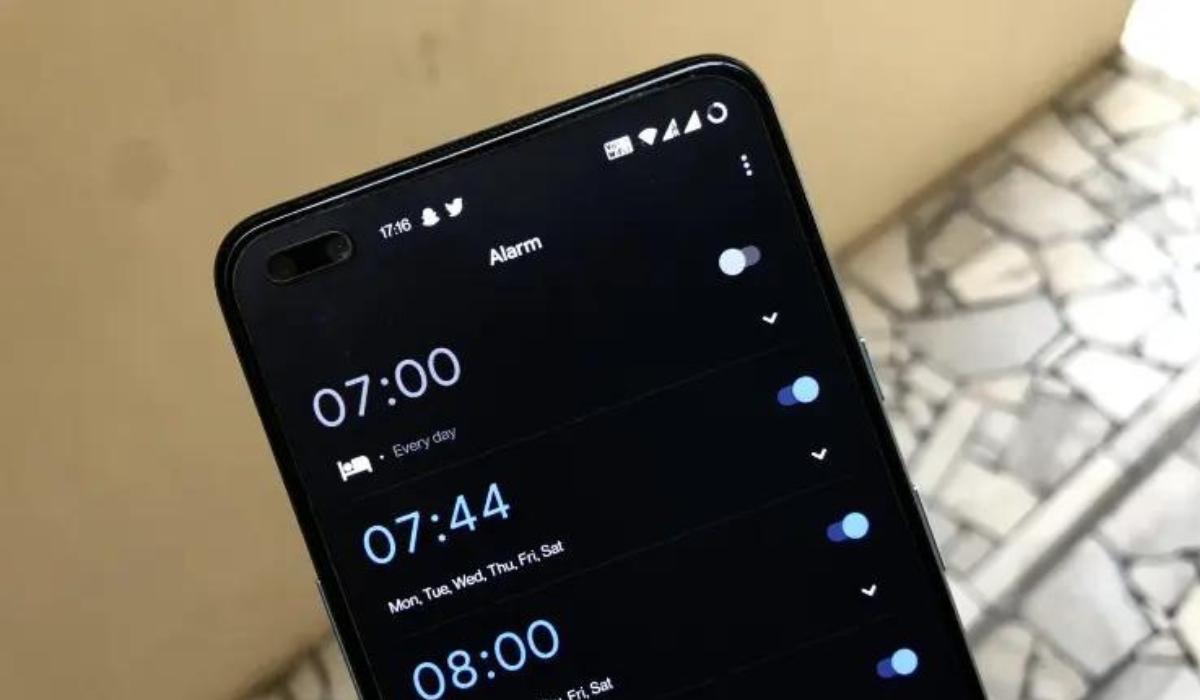
The built-in alarm on smartphones is one useful feature, whether you’re trying to be timely with work or prevent missing an appointment. Regardless of how much of a morning person you are, you’ll need an alarm at one point or the other. It can thus be upsetting if for any reason, your smartphone’s alarm does not go off, ring, or work.
In this guide, I’ll walk you through a few ways to fix an Android alarm not going off when you need it to. Pay attention to the instructions in this guide so you don’t miss anything crucial because of a faulty alarm.
- How Can You Fix an Android Alarm Not Going Off? Restart Your Phone Increase the Alarm’s Volume Check Do Not Disturb (DND) Settings Clear the Cache and Storage Data for the Clock App Check the Notification Settings in the Clock App Reset the Clock App’s Preferences
How Can You Fix an Android Alarm Not Going Off?
If your Android’s alarm clock doesn’t go off despite taking care to set it, this could be due to different reasons. Luckily, you don’t have to be a technical guru to troubleshoot your Android phone’s Clock app. All you need is to know which settings to change to get your alarm clock working again.
Here are some possible ways to fix an Android alarm not going off.
Restart Your Phone
The temporary cache clears whenever you restart your device. As such, any slight modifications are restored when your phone turns back on. A restart cycle also clears the RAM, which stores the data that you used while your phone was malfunctioning.
Restarting your smartphone resolves many common problems, so it’s the first recommended fix for many smartphone issues. I’ll therefore recommend that you try this to fix an Android alarm not going off, then proceed to other fixes if it doesn’t work.
Increase the Alarm’s Volume
Sometimes, there’s no issue with your alarm, its volume could just be too low to hear. One advantage of the alarm app on smartphones is being able to personalize it to fit your needs. So you can easily adjust the ringing volume or change the alarm sound to a more disruptive tone.
Simply check the sound settings on your phone, turn up the level, and give the alarm a good, loud sound to fix an Android alarm not going off. Here’s how to go about it:
- Open your Android’s Settings app and to view the volume sliders for Media , Call , Alarm , and Ringtone .
- Adjust the alarm volume (slide to the right) until you hear a loud enough sound to wake you up from your sleep.
- If the alarm sound you hear isn’t very good, scroll down and click Default Alarm Sound .
- Choose your desired alarm sound and press OK .
Check Do Not Disturb (DND) Settings
Do Not Disturb (DND) is a great feature that allows you to turn off unnecessary notifications and focus for a certain period of time. However, if you do not use the correct DND settings, your phone alarm may not ring out loud.
Follow the instructions below to work around DND restrictions and fix an Android alarm not going off:
- Open your phone’s Settings app and select Do Not Disturb . If you can’t locate it there, return to the Settings page and select Notifications , then Do Not Disturb .
- Then, click View all exceptions to see all functions or apps that are permitted or prohibited from sending notifications while DND is enabled.
- Several DND exceptions will appear; make sure “ Allow alarms ” is enabled.
Clear the Cache and Storage Data for the Clock App
It’s also beneficial to clear the cache for your phone’s Clock app. This may be what works to fix an Android alarm not going off. To do so, open your phone’s main Settings app and navigate to Apps > Clock > Storage > Clear Cache .
If your Android’s alarm still doesn’t work, select Clear data from the Manage Storage menu to the left of the Clear Cache option. As is customary, the option may differ slightly depending on the phone you’re using.
The disadvantage of deleting your Clock app’s storage data is that you’ll lose any existing alarms and need to create them again. You can always take a screenshot or make a note of your alarms.
Also, try forcing the Clock app to close or stop if the problem persists after clearing the cache and storage data. To get to the Clock’s App Info screen, follow the steps outlined above, and then select the Force Stop option. This option may be labeled Force Close depending on your Android device.
Check the Notification Settings in the Clock App
There’s a setting on some Androids’ clock app that can be toggled to turn off alarms when the system’s sound is off. When this feature is enabled, alarms and timers will vibrate instead of sounding when your phone is set to Mute or Vibrate .
If you find yourself needing to fix an Android alarm not going off, this is something worth investigating. So, check and reactivate notifications for your clock app by following the steps listed below.
- On your phone, click Apps & Notifications in the Settings app.
- Click App Info or the option to View all apps from there.
- Locate and launch Clock from the list of applications.
- When you click here, you will see all of the Clock app’s notification channels.
- Check that “ Show notifications ” is enabled. You can also check the notification channels to see if they are configured to emit sounds.
Reset the Clock App’s Preferences
You can try to reset your app options if none of my earlier suggestions have worked to fix an Anfroid alarm not going off. Personal information (such as the alarms you have set) won’t be deleted by this. Instead, it will return all of your phone’s settings—across all of your apps—to their original defaults.
With this procedure, you should be able to correct any settings that were interfering with your Clock app’s regular operation. Open the main Settings on your phone and enter “ Reset ” in the search bar to reset the preferences. Then select Reset settings > Reset all settings .
It’s easier to just look through the settings on your phone to find this reset button because different phone manufacturers have it tucked away in different menus. This should hopefully provide a permanent solution, but it should only be tried as a last resort to fix an Android alarm not going off.
I hope the above tips I’ve provided in this guide help you successfully fix an Android alarm not going off. If all else fails though, you can download an alarm app, which may have more functionality than your phone’s native alarm.
