Add MobilityArena as a preferred source on Google
The Pixel Pass is a subscription to the Google Pixel that gives you access to so many features and privileges as a Google Pixel user, for a monthly fee. The subscription includes a new Pixel every 2 years device protection, premium Google services like Cloud storage and content without ads, and more.
- What does the Pixel Pass offer?
- How to Subscribe to Pixel Pass
- If you already have a YouTube Premium or YouTube Music Premium subscription
- If you have a Google One or Play Pass account
- How to Subscribe through Google Store
- How to Subscribe through Google Fi
What does the Pixel Pass offer?
A Pixel phone, with the option to upgrade every 2 years.
Automatic phone backups and 200 GB of cloud storage through Google One.
Protection for your Pixel phone, which entails repairs and replacements for your device.
Videos without ads and non-stop music streaming through YouTube Premium and YouTube Music Premium.
•This only applies to individual YouTube plans, not family plans.
- Two phone plan options.
Head to the Google Store or Google Fi.
You have to reside in the United States to subscribe to Pixel Pass. It isn’t available in other countries yet.
You can only have one active Pixel Pass subscription per Google Account.
You have to use a personal Google Account to buy Pixel Pass.
You can’t use an account for someone under 13 years old, a work or school account, or a Brand account.
You can not add Pixel Pass to a Pixel phone you already own. If you purchased a new Pixel phone and are still within the return window, you can return your phone for a refund before you purchase Pixel Pass.
You can’t purchase Pixel Pass if you already have an active Google Fi phone subscription.
If you subscribe to Google Fi, you receive a $5 discount on your monthly bill.
You need to be eligible for:
•Confirm Google One eligibility.
•Confirm YouTube Premium eligibility.
•Confirm Google Play Pass eligibility.
If you already have a YouTube Premium or YouTube Music Premium subscription
If you have an active YouTube Premium or YouTube Music Premium subscription billed through YouTube Billing, your service will automatically transfer to your Pixel Pass subscription when it starts. Canceling your membership is not necessary.
If you have an active YouTube Premium or YouTube Music Premium subscription billed through another platform like Apple Billing or Google Play Billing, your service won’t transfer automatically. An email will be sent to you after your device with more information on your possible options to manage your YouTube Premium subscription.
If you are the family manager of a current YouTube Premium paid membership before you purchase Pixel Pass. Your family members, on the other hand, will lose access to the paid subscription.
When you subscribe to Pixel Pass, your Premium service is transferred along with your music library and playlists.
If you have a Google One or Play Pass account
Just like the YouTube Premium and YouTube Premium subscriptions, your services will transfer to your Pixel Pass, if you signed up for Google One or Play Pass before getting Pixel Pass.
If you aren’t the owner of your Fi group plan and have an existing Google One subscription that is more than 200GB, you need to downgrade your Google One subscription to 200 GB or less before you can subscribe to Pixel Pass.
If you signed up for Google Ome or Play Pass through some other company, you need to cancel your existing subscription to avoid paying for that subscription and Pixel Pass at the same time.
If you’re a member of a Google One family plan, you can’t buy Pixel Pass in your Store. You can:
•Buy with a different Google Account.
•Buy through your Google Fi account.
•You can also leave your Family group.
Head to your Google Play Store.
Tap on Subscriptions at the top of the screen.
Scroll till you see Pixel Pass , and tap on Learn more .
If available, you can choose your device options and configurations.
•You can trade in your old phone for credit to use toward your Pixel Pass subscriptions.
Select Continue to checkout and complete the financing application.
You can finish your purchase once it is approved.
Sign in to your Google Account.
Head to Google Fi .
Tap on Learn more under Meet Pixel Pass .
Choose a Fi plan and a device.
•You can trade in your old phone for credit to use toward your Pixel Pass subscription.
- Review your order, then tap Confirm Purchase. You will get a confirmation email when the purchase has been confirmed.
Note: To complete the checkout on Fi, you can’t have more than 2 Pixel phones in your order, including any phones that come with a Pixel Pass Subscription.
Author:Flamez
Flamez loves basketball, art, gadgets and cars.
Add MobilityArena as a preferred source on Google
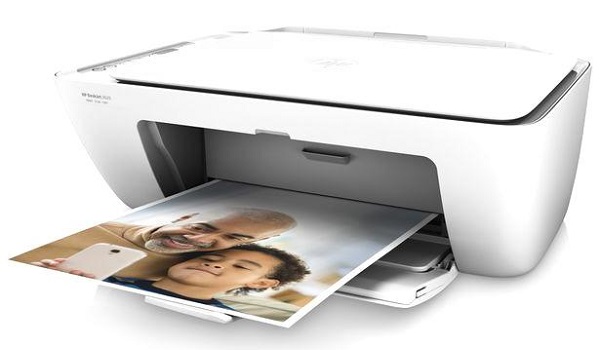
Despite the fact that we mostly live paperless lives, there are still times when we’ll need to print something. Fortunately, printing wirelessly from your iPhone or iPad is as simple as sending a text message.
Apple’s AirPrint printing technology, along with a few useful third-party apps, makes printing from an iPhone or iPad quick and easily accomplished. This article will show you some extremely useful tips to print from your iPhone or iPad with virtually any printer.
- How Can I Print from an iPhone or iPad?
- How to Print from an iPhone or iPad Using AirPrint
- How to Print Pictures From an iPad or iPhone
- How to Connect a Printer to an iPhone or iPad
- How to Print from an iPhone Using a Dedicated App for Your Printer
- How to Print From An iPhone Using Third-Party Printing Apps
- PrintDirect
- Use Smart Air Printer App
How Can I Print from an iPhone or iPad?
Are you curious about how printing from your iPhone or iPad works? Here’s how to do it with AirPrint and a few other options.
How to Print from an iPhone or iPad Using AirPrint
There are numerous methods for connecting a printer to an iPhone. The simplest one is to use Apple’s AirPrint feature. There is no need to download an AirPrint app because it’s built-in and ready to use.
Simply look at Apple’s list of AirPrint-compatible printers. If yours in on the list, just make sure it’s linked to the same Wi-Fi network as your iPhone or iPad. There’ll be no need to add the printer because it should appear on your device automatically.
To print from Safari,
● Click the Share button on a Safari web page .
● Then, simply scroll down and select Print .
● This brings up the printer settings on your iPhone or iPad. You must select your printer here (if there’s more than one on your network).
● You can also specify the number of copies to be made and which pages to print. When you’re finished, press the Print button .
Since some iOS apps lack a printing feature, you may need to export the selected content. Save the document to the Files app to accomplish this — AirPrint is supported by the Files app. If you can’t export the content from the original app, you can make a screenshot of it and print it as a picture.
How to Print Pictures From an iPad or iPhone
Printing photos from iPhone’s or iPad’s Photos app is simple. Follow the same steps as above to print a single image. Find the photo you want to print, then tap the Share button , followed by Print .
You can also print a large number of images at once from an iPhone or iPad. To do so,
● Open Photos and click on Select in the upper-right corner.
● Select all of the photos you want to print — check marks will appear beside the ones you’ve added. (Tap them once more if you’d like to deselect them.)
● Finally, tap the Share button, then the Print icon, and then Continue .
How to Connect a Printer to an iPhone or iPad
AirPrint should connect you to your printer if it’s supported, but finding your printer may still be a problem.
If the goal is to AirPrint from an iPhone or iPad on a supported printer and it’s not working, make sure both the printer and your device are connected to the same Wi-Fi network. Some printers use both Bluetooth and Wi-Fi, but AirPrint will not work unless you are connected to Wi-Fi.
How to Print from an iPhone Using a Dedicated App for Your Printer
If you need to connect your iPhone to a wireless printer that doesn’t support AirPrint, your best bet is to check if your printer has its own app.
The majority of printer manufacturers offer apps made to function with their own hardware on the same network, including HP Smart , Canon PRINT , and Epson iPrint . These apps may provide additional features, such as changing the print size to print full pages, that you won’t find elsewhere.
How to Print From An iPhone Using Third-Party Printing Apps
Some of the third-party apps below should be able to help if the options we’ve mentioned above aren’t working for you.
PrintDirect
PrintDirect is an older but dependable app for printers that aren’t supported by AirPrint. It is free to download and test, but full functionality requires an in-app purchase. While it detects printers connected to the same Wi-Fi network as AirPrint, it also works with printers that aren’t AirPrint-compatible.
To print a document from an iPhone or iPad with PrintDirect,
● Open it and tap the Share icon . Then select Save to Files .
● After you’ve saved your file, you can use PrintDirect to print it on your preferred printer.
● Scroll down until you see More under Files > Share .
● Scroll down to PrintDirect and tap More . Then, open the document, set your printer preferences, and print.
UseSmart Air Printer App
The Smart Air Printer App, one of the best printer apps available, has a plethora of features that make printing from your iPhone or iPad simple
After downloading the app, all you have to do is select the file from your device that you want to print or scan. Scanning documents is preferable to photographing them because it makes them printer-ready and uses less ink.
In summary , you can print from your iPhone and iPad in a simple and easy way by using the tips and suggestions we’ve provided above.
Author:Joan Agie
Add MobilityArena as a preferred source on Google
With Android smartphones, flickering on your phone’s screen can occur for a variety of reasons. Most times, it can be fixed quickly, but occasionally, hardware replacement or repair may become necessary.
In this guide, we’ll show you different ways to fix flickering on a phone’s display. Read on to learn how to get your smartphone’s display to work correctly.
- How to Fix Flickering on your Phone’s Display Reboot your smartphone Hard Reset your Device Deactivate Auto-Brightness Turn Off Hardware Overlay Update your Device
How to Fix Flickering on your Phone’s Display
Here are several solutions you can try to fix flickering on your phone’s display.
Reboot your smartphone
To make sure you’re not encountering a short-term problem, first restart your phone before trying other options to fix the flickering on your phone’s display. Any active third-party background processes that typically cause flickering should be terminated by restarting the computer.
If any of your device’s memory components have crashed while performing a task, restarting will also refresh those parts. If the display stops flickering or glitching after rebooting, you should go through all recently installed apps to identify the problem and get rid of it.
Hard Reset your Device
The most fundamental troubleshooting technique you can try to fix flickering on a phone’s display is a reboot, and it usually solves issues. You should however consider hard resetting your phone if our first suggestion doesn’t work to fix your flickering display.
A hard reset will immediately erase any unprocessed data preventing your phone from operating correctly. But, remember to back up your iPhone or Android device before conducting a factory reset.
You can reset your Android phone by following these steps:
● Click on Settings > System > Advanced . You could also look for Reset Options on your device.
● Click on Erase All Data (factory reset) under Reset Options
● Choose the Reset phone option. If you use a PIN, input it.
● Tap Erase everything to complete the action.
If you’re an iOS user, follow these instructions:
● Click on Transfer or Reset iPhone under Settings > General .
● Click on Erase All Content and Settings .
Deactivate Auto-Brightness
Based on information from the light sensor, the auto-brightness (Adaptive brightness) option controls the continuous change of the screen’s illumination.
However, a software upgrade or a hardware flaw could also cause issues, including display flickers. Deactivating the option from the Settings menu is another option to fix the flickering on a phone’s display.
On Android, go to Settings > Display > Adaptive brightness , and on iOS, go to Settings > Display & Brightness to access this function.
If your phone has trouble adjusting to different lighting conditions, there is also the choice to reset the adaptive brightness. Follow these steps:
● Go to Settings on your phone.
● Click on Apps or Apps & notifications .
● Locate and then choose the Device Health Services app.
● Choose the Clear all data option after selecting Manage storage , then press OK to confirm.
Turn Off Hardware Overlay
Your phone typically determines whether to render graphics using its CPU or GPU. Even though most transitions are flawless, a broken or old phone may have trouble with screen compositing (layering images).
So, when the phone has nothing to display, there is a slight delay between tasks which could cause flickering. Not to worry though, you can disable hardware overlays to fix flickering on your phone’s display.
Note that you have to activate Developer settings first. To do this:
● Navigate to Settings > System > About phone . Head to Software information if you’re using a Samsung smartphone.
● You’ll need to click on Build number seven times in a row before you see the message “ You are now a developer! “
Return to your phone’s settings after entering developer mode and scroll down until you see Developer options . Afterward, toggle on Disable HW overlays .
Keep in mind that removing overlays causes the phone to use GPU rendering, so this will result in additional power consumption.
Update your Device
It’s also likely that a faulty software build causes the flickering display issue you’re experiencing on your device.
So, if you’re trying to fix flickering on your phone’s display, check to see if your device has an update available. This is because most issues can be resolved easily with a software update.
Go to Settings > System > System update on Android to view your current software version and update it if necessary.
If you’re using an iOS device, go to Settings > General > Software Update .
If none of the above recommended solutions to fix flickering on your phone’s display works, consider taking the device to a trusted professional for expert help.
