Add MobilityArena as a preferred source on Google
For users whose iPhones use Face ID—all iPhones starting with the iPhone X and omitting the iPhone SE 2020 and iPhone SE 2022, which still employ fingerprint recognition—unlocking an iPhone while wearing a mask has been a problem.
Due to the Coronavirus epidemic, mask use has become widespread worldwide and has been required in many indoor settings for months. Now, one of the main inconveniences of the epidemic, needing to use your pin to unlock your iPhone if wearing a mask, may have taken Apple a little too long to address.
How to Unlock iPhone With Face ID While Wearing A Mask
However, there are some workarounds you should consider trying if you’re ever caught with your mask on and don’t want to unlock your phone by typing in your PIN. We’ve described them in this guide, so pay attention and learn a few helpful tricks.
How Do I Unlock My iPhone If I Have My Mask On?
Apple has provided various solutions throughout the previous two years of the pandemic to try and address the problem of masked unlocking. First, an iOS update (iOS 13.5) in April 2020 made it possible to rapidly ignore the need for Face ID and unlock using the passcode instead, and this seemed to lessen some of the annoyance.
The option to unlock the iPhone using an Apple Watch was added in the iOS 14.5 release in April 2021, which was helpful if you actually owned an Apple Watch. But up until this point, using Face ID while wearing a mask still caused some difficulty for users.
There is a new Face ID with Mask switch in iOS 15.4 thanks to new Face ID & Passcode settings. Below, we’ll describe how that operates. We do, however, have other tricks for people who have an Apple Watch to try since this solution is only compatible with iPhones 12 and newer devices.
Using the Face ID with Mask Setting in iOS 15.4 Devices
You must have iOS 15.4 installed in order to use this new feature. On March 14, 2022, iPhones received iOS 15.4. Go to Settings > General > Software Update and wait as your iPhone looks for the most recent update to determine if you are running iOS 15.4. If you aren’t already using iOS 15.4 or later, download and install it onto your device.
● Navigate to Settings > Face ID & Passcode after installing iOS 15.4
● Type in your passphrase.
● When you do, turn on Face ID with Mask and a few other additional options.
Face ID won’t do full facial recognition once engaged; instead, it will “employ the distinctive features around the eye area for authentication.”
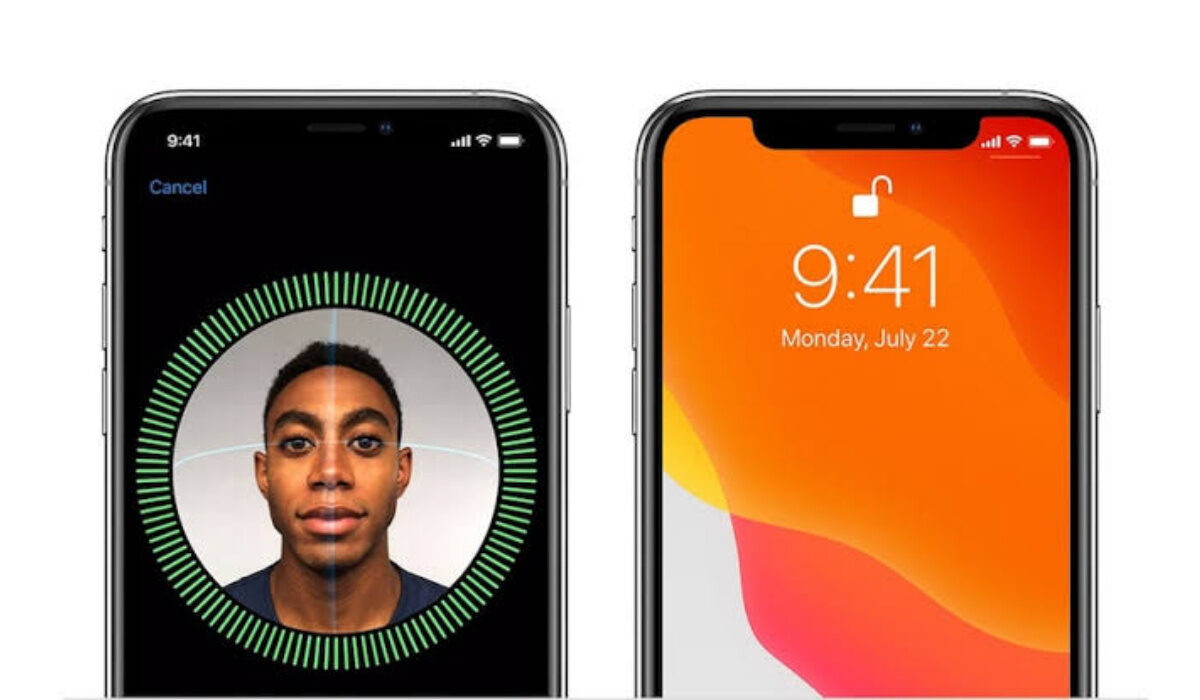
You must repeat the Face ID setup process after turning on the new features. In order to accomplish this, place your face in the center of the circle as shown, and slowly spin your head to fill the circle’s indicators.
The iPhone will also perform a second scan of your face, omitting the bottom portion that a mask would conceal and using additional data points from the upper part of your face and the portion surrounding your eyes.
While a mask is not required for this scan, the scanner will presume that you are wearing one. Additionally, “Add glasses” is another option that will be useful for those who wear glasses.
Unfortunately, the iPhone 12 or a newer device is required in order to unlock the mask using Face ID. As soon as a beta is available, experts plan to test the new feature.
Unlocking your iPhone with Apple Watch
If you want to avoid having to input your passcode each time you need to unlock your iPhone while wearing a mask but don’t have iOS 15.4 or an Apple Watch, there is a workaround.
You can open your iPhone while putting on a mask thanks to the Unlock with Apple Watch feature, which debuted in iOS 14.5 update. You only need an Apple Watch running watchOS 7.4 or later, and that’s it.
You will need:
● An Apple Watch, of course, in order to use the unlock iPhone with the Apple Watch feature. The watch must be powered by WatchOS 7.4 (which launched on 26 April 2021).
● You must have the Apple Watch on your wrist and unlocked.
● You must also have a passcode enabled on your iPhone (to enable a passcode, go to Settings > Passcode > Turn Passcode on if you don’t already have one).
● Wrist Detection must also be on.
● You will require iOS 14.5 on your iPhone.
You must enable the Unlock with Apple Watch function on your iPhone in order to unlock an iPhone using an Apple Watch:
● Go to Face ID & Passcode Settings
● Put in your passcode
● Select Unlock with Apple Watch .
The message “Software Update Required” will appear if your Watch needs to be updated. Now, if you use Face ID to unlock your iPhone and the iPhone notices that you are wearing a mask, it will unlock itself as long as you’re wearing your Watch on your wrist and it’s unlocked.
Your Watch will display a message informing you that your iPhone has been unlocked and alert you that you can lock it once more.
In summary , as long as you follow the instructions in this guide carefully, you should be able to unlock your iPhone with Face ID even if you have your mask on.
- Don’t miss our mobile phone reviews .
- Follow our news on Google News .
- Join our WhatsApp Group , to be notified of the most important articles and deals,
- Follow us on Instagram , Facebook , Twitter , and YouTube .
Author:Joan Agie
Add MobilityArena as a preferred source on Google
If you selected the incorrect language during the original setup or if you’re using a device that has already been set up, you might need to update it on Windows 10. It is possible to adjust the default language on Windows 10 at any moment, regardless of whether you unintentionally selected the incorrect language, merely want to switch to a new one, or your computer was already set up for you.
This process is also not as confusing as some might imagine. If you’d like to attempt changing the system language on your device, you’ll benefit from this helpful guide we’ve put together for this purpose.

How Do I Change the Default Language Settings on My Windows 10 Device?
Without having to reinstall Windows 10, you can change the system settings to configure the correct language if you happen to be using it incorrectly. There are other associated functions you need to alter to make sure the process works smoothly, so make sure to pay attention.
Deactivate Language Synchronization
Some of your choices (including language) on Windows 10 when logged in with a Microsoft account will sync across devices. Disabling the option to sync your language settings can help prevent the same settings from being changed on other devices if you only intend to make changes to a particular computer’s settings.
Follow these steps to stop Windows 10’s language preference sync:
● Launch Settings .
● Toggle to Accounts .
● Then select Sync your settings .
● Turn off the checkbox for Language preferences under “Individual sync settings.”
When you’re done, the other devices linked to the same Microsoft account won’t be affected when you change the language settings.
Change the System Language Settings
The following steps will guide you to change the settings of your system’s language:
● Select the top choice that shows in the search result after typing “Settings” into the Windows start menu.
● Select “Time & Language” from the Settings app, then select “Language.”
● Click “Add a preferred language” under “Preferred Languages,” then type the name of the language you want to use on your computer, starting with “Add a preferred language.”
● Click “Next” to install the language pack on your computer after selecting your favorite language.
● Make sure to select “Set as my display language” from the drop-down menu that appears next to the language you’ve chosen on the “Install language features” screen. The “Install language pack” option should also be checked.
● When done, click “Install,” and the pack will start downloading.
● You’ll be requested to sign out of your Windows 10 account after you’re done. Once you’ve done that, sign in again to see your new language.
The language of Windows 10 will switch once you’ve finished the procedure; this includes the Sign-in screen, Settings app, File Explorer, Desktop, programs, browser, and websites you visit.
Adjust System Region Settings
If you need to update the language settings because you are in a different region, it means that you will also need to change the region settings.
Follow these procedures to modify the Windows 10 local region settings:
● Launch Settings .
● Then select Time & Language .
● Select Region .
● Choose the current location using the “Country or region” drop-down menu under the “Region” section (if applicable).
● Choose the date and time formats for the area from the “Current format” drop-down menu under the “Regional format” section (if applicable).
● Select Language.
● From the “Related settings” column, choose Administrative language settings.
● Navigate to the Administrative tab, then click it.
● Click the Change system locale button located under the “Language for non-Unicode programs” section.
● With the “Current system locale” drop-down menu, choose the new system locale language.
● Choose the OK option.
● In the “Administrative” tab, hit the Copy settings button.
● Check the selections for the Welcome screen, system accounts, and New user accounts beneath the “Copy your current settings to” section.
● Choose the OK option.
● Once more, press the OK button.
● Select “Restart now” from the menu.
The adjustments will take effect once you’ve finished the steps outlined above, and the computer will then use the appropriate region settings.
On Windows 10, you typically don’t need to switch to other languages or install more languages. Changes to these settings might however be useful in businesses that work with people who have varied preferences and need to use different settings. Additionally, if you move to another location or purchase a new gadget that comes from another country, being able to match the locale settings is a useful tool.
Summarily , changing the system language on Windows devices is pretty easy, and the instructions we’ve provided in this guide should help you achieve this easily.
- Don’t miss our mobile phone reviews .
- Follow our news on Google News .
- Join our WhatsApp Group , to be notified of the most important articles and deals,
- Follow us on Instagram , Facebook , Twitter , and YouTube .
