Add MobilityArena as a preferred source on Google
If you want to maximize your Mac’s potential, a Mac RAM boost may be beneficial. Your Mac will be better equipped to handle all the daily tasks you typically throw at it if it has more RAM. As such, if you haven’t already considered this, you should start doing so now.
This simple guide will teach you how to upgrade the RAM on your Mac device if you are unsure how to do so. You can use the instructions in this guide to upgrade the RAM on your MacBook Pro, MacBook, or iMac, so keep reading if you own any of these devices.

To Upgrade the RAM on Macbook Pro and MacBook
Before you begin, you should note that some MacBooks and MacBook Pros do not allow RAM upgrades. You must take off the computer’s back cover in order to reach the memory module and carry out a MacBook RAM upgrade if your model permits RAM upgrades. Unfortunately, RAM upgrades are not available for MacBook Air models.
Adding more RAM to your MacBook Pro or MacBook device is as follows:
● Your MacBook or MacBook Pro should be turned off and left alone to cool. All cables, wires, and accessories should also be unplugged.
● Turn the laptop so that it is facing down.
● Unscrew the bottom case to take it out. In order to avoid confusion, make a note of which screws originate from which ports.
● If you have any static electricity on your body, let it go by touching a metal surface within the computer.
● Use the ejection levers to locate the RAM module and eject it.
● To avoid damaging the gold connectors, pull the RAM module out.
● Repetition is required for any additional RAM modules.
● Put in the new RAM for your MacBook or MacBook Pro, keep in mind as before that you shouldn’t touch the gold connectors.
● Insert the second module after pushing the new one down until it clicks.
● Screw back the bottom case after replacing it.
Only a few older models and all 17″ MacBook Pro models allow for MacBook Pro RAM and MacBook RAM upgrades. Any MacBook Air cannot have RAM added to it.
You can perform DIY RAM upgrades on the following MacBooks at home:
● MacBook: 2008 to 2011 models.
● MacBook Pro: all 13″ and 15″ models from 2009 to 2012, as well as all 17″ models.
ToUpgrade the RAM on iMacs
Every iMac save the most recent 21.5″ models can have memory added to it. For the most part, Apple has made it relatively simple for iMac owners to independently replace Mac RAM at home.
RAM is hidden behind a small door on the back of 27″ iMac models made after late 2012; previous 27″ versions and smaller models store RAM in slots along the bottom edge.
Here’s how to do this on these devices:
● Turn off your iMac and give it time to cool entirely.
● Remove all wires and cords.
● Lay the computer down gently on your work surface after placing a soft towel or piece of cloth there.
● Open the memory storage door by pressing the button underneath it, then take the door off and set it somewhere nearby.
● The memory cage levers and the proper alignment of the RAM modules are shown in a graphic on the bottom of the door.
● To release the memory cage, pull up the two levers after they have been pushed outward. Each module can now be eliminated.
● By pushing a module straight up, you can remove it and then replace it. Make sure to position it correctly for your specific iMac model before pushing it into the slot until it snaps into place.
● Push the memory levers back down until they click once you have done swapping out your old DIMMs (dual in-line memory modules, or RAM sticks) with new ones.
● Reinstall and seal the door of the memory section.
● Reposition your computer so that it is upright, then reattach all of your wires and cables.
● Activate your iMac. It might be dark for at least 30 seconds as its new memory is initialized. It’s natural, so don’t be alarmed.
Upgrading RAM on other eligible iMacs
RAM is kept in slots along the bottom of older 20″ and 15″ and 27″ iMacs, eligible 21.5″ iMacs, and 27″ iMacs from before 2012. While the RAM slots’ precise configuration and alignment vary between models, all of them can be replaced in a similar way.
● Turn off your iMac and give it time to cool entirely.
● Remove all wires and cords.
● Lay the computer down gently on your work surface making sure to place a soft towel or piece of cloth underneath.
● Using a Phillips screwdriver, pry open the memory access door and set it nearby.
● You’ll see either a set of ejector clips or pull tabs, depending on the model of your iMac. Open the clips, untuck the tabs, and pull them out. The existing RAM module will be ejected as a result.
● Insert your new RAM module after removing the old one. It will “click” into place as you wait.
● Pull tabs on your iMac should be tucked back just above the new RAM module. Close any ejector clips if it has any.
● With your Phillips screwdriver, reinstall the memory access door.
● Reposition your computer so that it is upright, then reattach all of your wires and cables.
● Activate your iMac. Some iMacs from before 2017 will make a beep if they find RAM difficulties. Check to see if the new RAM unit is suitable for your iMac if this happens, then try reinstalling it.
Any iMac can have memory added to it, although the following 21.5″ models cannot:
● Retina 4K, 2017 and 2019
● 2017
● Mid-2014
● Late 2013
● Late 2012
In summary , your computer can do more tasks at once or more demanding jobs with less performance lag if you upgrade your RAM. One of the most effective ways to speed up your Mac is with a RAM upgrade, and we’ve shown you how to do this on your MacBook, MacBook Pro, or iMac device.
- Don’t miss our mobile phone reviews .
- Follow our news on Google News .
- Join our WhatsApp Group , to be notified of the most important articles and deals,
- Follow us on Instagram , Facebook , Twitter , and YouTube .
Author:Joan Agie
Add MobilityArena as a preferred source on Google
When you wish to install a new app onto your Android device, it’s not uncommon to find that the app is unavailable on Google Play Store, or it displays an error that says “This item is not available in your country”. This typically occurs as a result of the fact that many programs are available in certain regions exclusively. Additionally, such apps may simply be incompatible with your Android smartphone.
There’s no need to worry, though. If you’d still like to try these programs, there are ways for you to install region-restricted or incompatible apps on your Android smartphone. We’ll walk you through a few of them in this guide, so pay close attention.
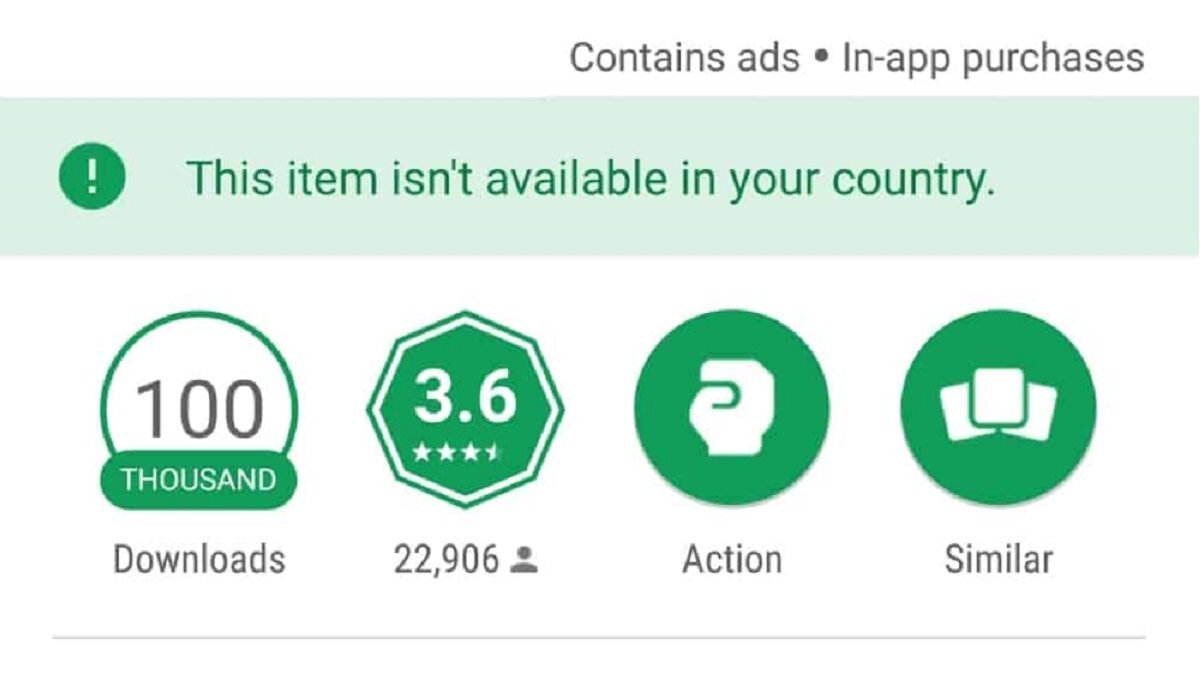
If an app is not available in your country in Play Store, you can still install it on your Android phone in other ways
What Can’t I Install Some Android Apps?
Sometimes you try to install an application but receive the notification “this program is region-restricted,”, “This item is not available in your country”, or “You are not permitted to download this application.” This message means that the program you’re trying to download may not yet be ready to function in the region you live.
These programs are referred to as region-restricted applications, and they were created with specific geographic considerations in mind (most often specific countries). Thus, individuals outside of such regions are unable to download or utilize such applications. Hence, if you are not located in a targeted country, the app store tells you that the app is not available in your country.
Some apps are only available in certain regions due to their services. For instance, an American laundry/tailer app that is available for download in Brazil won’t be able to fulfill its intended function. Additionally, clients could offer it poor reviews.
The majority of developers tend to avoid this by limiting where and when users can download their apps. Sometimes, these limitations are primarily brought on by incompatible hardware, with app developers forbidding the installation of their programs on specific hardware or brands.
A minimum Android version requirement might also exist. There is a minimum Android version requirement for all Android apps. You cannot install an app with a lower Android version if you are using an earlier version of the operating system. However, the advantage of using Android smartphones is that you can still install such apps, so find out how in the next section.
How Do I Install A Region-restricted or Incompatible App?
The following advice will be extremely helpful if you are unable to install a certain application because it is not available in your country. We have a few options for dealing with this issue. One is using a VPN to interfere with the original network configuration. Another is to use the applications’ APK versions, which do not take your region into account.
Keep in mind that despite applying both solutions, there is one crucial point to remember: if the application is still giving you problems after installing it, your only other option is to switch out the device itself. You must realize that your gadget is not capable of supporting the application at all.
Sideload APKs of Incompatible Applications
The practice of sideloading the APKs of incompatible applications is common among Android users. You may always sideload an app’s APK file and install it on your Android device if you come across one that isn’t offered in your area or country.
Google, by default, forbids the installation of APKs from untrusted sources. Therefore, before installing APKs, you must change your settings to allow app installs from unknown sources. A warning will typically appear on Android mobile devices when you attempt to install an APK the first time. For the subsequent APK installation, all you need to do is allow it there.
Please be aware that sideloaded APKs from unreliable sources may put your device’s security at risk. the justification for only obtaining APKs from reputable sources.
Here are a few reputable and secure sources for getting APKs:
● APKMirror
● Aptoid
● APKMonk
● APKPure
Alternatively, you can download APK files straight from the Google Play Store using APK Downloader. You may feel secure knowing that APK Downloader only gets APK files from the Google Play Store, which ensures their security and safety. All you have to do is copy the app’s PlayStore link and put it on the APK Downloader website. Your browser will send you to the website’s download page, where you may download the APK.
Use VPN to Download Region-restricted ApplicationsThat Are Not Available In Your Country
Some geo-restricted applications won’t function even if their APKs are sideloaded. These apps were developed to operate in specific regions. As a result, in order to use such programs, a VPN is required.
Follow these steps:
● Install the most recent APK of the program you wish to use on your Android device first. (To download APK, use the websites provided in the first method)
● Install your preferred VPN from the Google Play Store after that. There are various excellent choices that come with one-time payments, high-speed VPN servers, data encryption assistance, and respect for privacy.
● Now launch the VPN application and join a specific server that you’re certain supports the application you’re attempting to use.
● Once linked, log in to the previously installed app and use it as you wish from your current location.
On your Android smartphone or tablet, you can use the same instructions to install and utilize any geo-restricted apps. Open the VPN app and connect your smartphone to the China server, for example, if a certain app is only available in China. Open the app afterward to quickly access material from that app.
Summarily , you shouldn’t let incompatibility or location-based restrictions stop you from using your favorite apps. Simply take a cue from our suggestions above to work around any restrictions you might encounter. You should keep in mind that sometimes, no matter the trick you try, some apps just won’t work.
- Don’t miss our mobile phone reviews .
- Follow our news on Google News .
- Join our WhatsApp Group , to be notified of the most important articles and deals,
- Follow us on Instagram , Facebook , Twitter , and YouTube .
