Add MobilityArena as a preferred source on Google
If your computer doesn’t have a microphone or maybe it is faulty, you can use your phone instead to participate in Zoom calls, record voice notes, and play games with friends online, among others, with great audio quality.
I will show you two methods you can use to turn your phone into a microphone; either you are an iPhone or Android user.
How to use your phone as a microphone on Windows or Linux
- Download and install WO Mic
You will have to download WO Mic for both your Windows/Linux laptop and your phone.
For your computer, you can get the download link for WO Mic on their official website. You will download the computer client.
For your phone, you can check out the app on the Google Play store or the Apple Store. This app works on both Android and iPhone.
- Check if the WO Mic client works
Launch the WO Mic client you just downloaded, and if it says missing DLL error, you will have to install VC runtime re-distributable (x86) from Microsoft.
Re-launch it now, WO Mic virtual device will automatically be created, and to ascertain this, follow these steps: • Press Windows + X and in the pop-up menu click on Device manager. • Now navigate to Sound, Video, and Game controllers. You should see the WO Mic device there.
- Launch the app
You will launch WO Mic app on your phone. You will see “Settings” at the top right corner of your phone screen. Tap on it.
- Choose a mode of Transport
After tapping on Setting, you will see Transport, tap on it as well. A pop-up menu will appear with three modes of transports — USB, Bluetooth, and Wi-Fi. You can use any of the three. • USB – you will have to connect your phone to your computer with a USB. Make sure you have enabled USB Debugging Mode on your Android phone. You can check your Phone Settings then navigate to Developer Options. • Bluetooth – you can also go to your phone Settings to turn on your Bluetooth. On your computer, go to the Wireless Communication menu or Control Panel to enable Bluetooth. Make the Bluetooth discoverable on both your phone and the computer. • WiFi – you will connect your phone WiFi to your computer WiFi. Make sure both your devices are discoverable. You can check your Phone Settings, then navigate to WiFi, WiFi direct, or Hotspot (depending on your phone), then change the discoverable option to “Open” or “Allow”.
- Choose an audio source
WO Mic has 5 mic modes. It is possible not all modes will work on your phone because there are different Android hardware and OEM customization. Moreover, some of the modes might be supported on your phone but they won’t be as effective as you want. Here are the 5 mic modes: • Default: Phone embedded microphone. • Mic mode 1: This works with an external wired headset. • Mic mode 2: Use this if there are echoes with other modes. • Mic mode 3. Use this if you will be speaking from a long distance or in a noisy environment. • Rear mic: Use this if you want to better capture sound from the back.
- Tap on start
Go back to the homepage of the app. You will see a “Start” icon at the top right corner of the page. Tap on it to start the server.
- Connect to WO Mic computer client
Launch the WO Mic application on your computer. On the top left corner of the application, you will see “Connect”. Click on it.
- Select a Transport mode
You will have to select a Transport mode on your computer as well. A list of Transport modes will appear on a panel, you will choose the connection type you chose on your phone earlier.
- Follow the on-screen instructions
If you’re using USB as your transport mode, you can skip this section. However, if you chose WiFi or Bluetooth as your mode of connection, follow the instructions on the screen to make the connection successfully.
- Click on connect
Click on the Connect bar at the bottom of the screen and tick the Play in speaker box (if it doesn’t appear with the connect bar you’ll have to go to settings to enable it)
The current status of the connection will appear on your screen (Connected or Disconnected) and the connection type you chose will also appear. When the connection is successful, you can start using your phone as a mic. Any noise in the background will be picked up and your computer will receive the transmission.
Alternatives to WO Mic
If you don’t want to use WO Mic, there are other apps you can use — • Microphone for Android • Megaphone Free for iOS
If you opt for these two apps you will have to make use of an audio connection jack.
How to use your iPhone as a mic on Mac
- Download Microphone Live app
Visit the App Store and download the Microphone Live app.
- Connect the two devices
You’ll connect your iPhone to the Mac with a USB. You can use the lightning cable that comes with iPhones.
- Go to Auto MIDI Setup
You will see the Auto MIDI Setup on your Mac computer. If you can’t find it, go to the menu tray and click on the Spotlight icon. You’ll then use the search box to search for it.
Make sure your iPhone is unlocked so that your device will be discoverable in Auto MIDI Setup. You will see your device on the left-hand side of the screen, click on “Enable” to connect the two devices.
- Go to System Preferences
Leave Auto MIDI Setup. On your home screen, you should see the System Preferences icon. If you can’t find it on the home screen, just click on the Apple logo at the top corner of the screen, from the drop-down menu click System Preferences.
- Click on sound
From the list of icons on the screen, look for the one with an icon of a speaker and sound written underneath it. You’ll usually find it at the end of the second row. Click on it.
- Select iPhone
Click on the “Select a device for sound input” tab and click on iPhone. However, if it has already been selected automatically don’t click on anything, just go to the next page.
- Launch the Microphone Live app
Launch the app on your iPhone.
- Turn it on
In the app, you will see a power button at the center of the screen. Tap on it, and it will change from red to grey, indicating that it has turned on.
- Enable Front iPhone Mic
It usually enables this automatically, but if it doesn’t, then check the lower-left corner of the screen and tap on it.
- Manage the volume
To reduce or increase the volume, just swipe your finger down or up until you find the level that suits you.
- Tap on No Output
Most times, the information of your device will be displayed which shows the app is ready to be used as a microphone.
Tap on the Dock Connector. Now you’ll be able to see the sounds picked up by your iPhone.
Make sure you keep the app open so that it can stay connected to your Mac.
Conclusion
Also, make sure where you are doing the recording is a suitable spot because surrounding noise can ruin the audio, such as the sound of passing vehicles, lawnmowers, and even the breeze. Also, don’t record in an empty room because of echoes, instead, stay in a room with furniture and other items because they dampen echoes.
- Don’t miss our mobile phone reviews .
- Follow our news on Google News .
- Join our WhatsApp Group , to be notified of the most important articles and deals,
- Follow us on Instagram , Facebook , Twitter , and YouTube .
Author:Mukhtar Sadiq
Add MobilityArena as a preferred source on Google
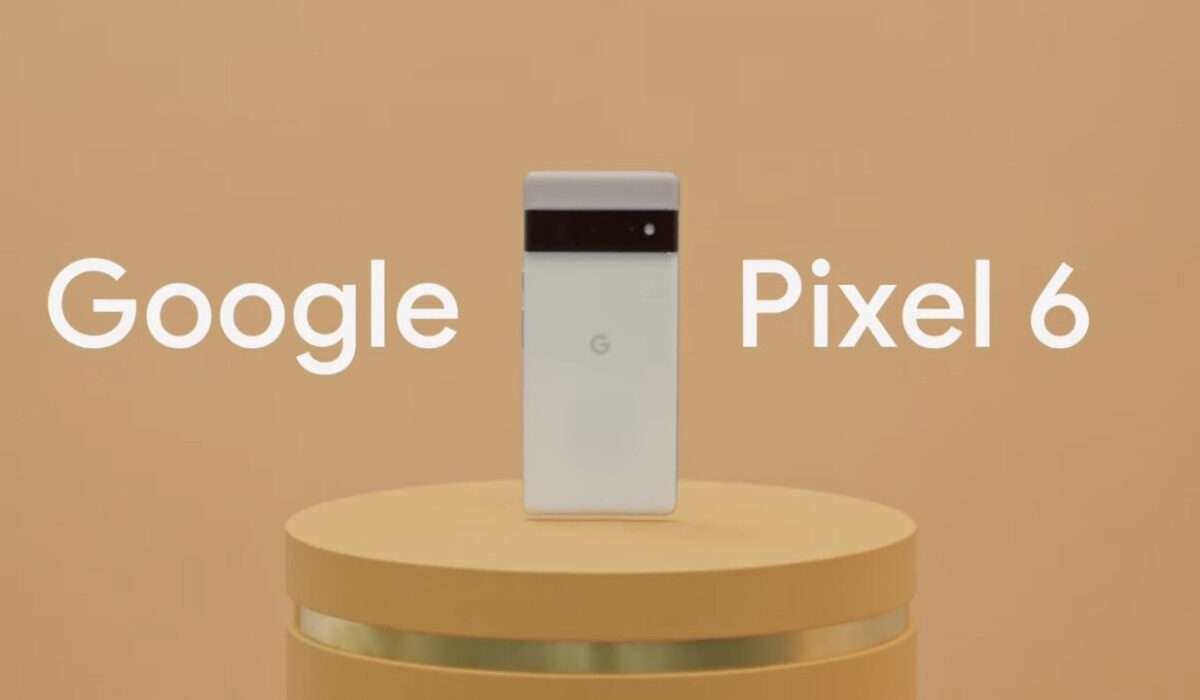
Two of the devices making the rounds for a few months now are the Pixel 6 and 6 Pro , everyone has been talking about it, everyone is expecting it’s arrival and the time it now here. Let us talk about all the goodies we should expect from the Pixel 6.

Google officially announced the launch date for the Pixel 6 and it set the 19th of October to be the day. Like said earlier there has been a lot of hype around this device and I can tell you that it is for the right reasons.
An official launch page was set up to draw awareness to the launch of the pixel 6 and from this we can see the use of Google’s Material You themes as this will be one of the big features of Android 12’s customisation options which we will talk about in a bit. Let us consider a few possible selling points of the Pixel 6 lineup.
Google Tensor Chip.
The Google Pixel 6 and 6 pro will no longer use the accustomed Snapdragon chips as with their predecessor, this time Google is shifting attention to it’s very own chip, the Google Tensor.
We heard rumors of Google working on its own chip for mainstream production and finally the day to really see what it can do is coming closer. I feel that this new chipset definitely holds a lot for Google Pixel devices and also Google’s product line. It is like putting power in Google’s hands.
Will this chipset outperform the already standing flagship chipsets? Will it create a new norm in the world of photography? Will it set a new benchmark for upcoming chips to beat? Get the answers to these questions on the 19th of October 2021.
Google Pixel 6 And 6 Pro New Design Language.
Ever since the conception of the Pixel line by Google, design on every device launched has been kept to the barest minimal. This is something I liked about Pixel devices, they look basic yet pack so much power.
But all of that is going to change with the Pixel 6 and 6 pro, these devices have an altogether new design language. This time Google slapped the main camera module right across the top end of the device hence drawing attention to the cameras. We see a center punch hole selfie camera up front as against the corner cutout and that is not all happening at the front, we also now have a 120 Hz display on the pro model. With these changes there is no doubt that Google is gunning for the flagship tier.
The All New SnowCone! Android 12!
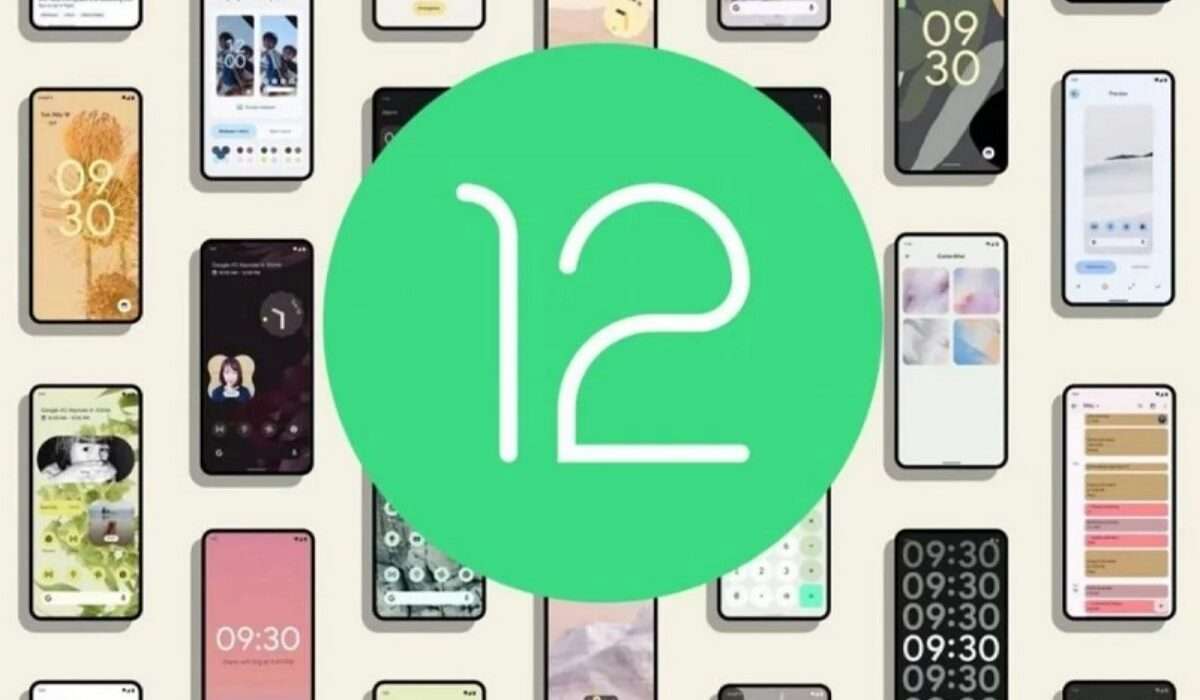
Yes, SnowCone. That is the code name of the Android 12 OS and certainly Google’s Android has not gotten tired of code naming their Operating systems after snacks. We have tried out the Android 12 beta you can check out our review here . The article linked explains the beauty of the Android 12, but the Pixel 6 and 6 pro will take this beauty even further. How? Material You!
This is Google’s way of giving you the key to the castle as it is, hence allowing you to alter how your phone generally looks. You can match your device theme with your wallpaper, brush up certain animations and a lot more. The Pixel 6 and 6 pro will be the first devices to launch with Android 12 out of the box.
At What Price Will The Google Pixel 6 Lineup Start?
At the moment there is no clear price as to the exact pricing of this device, but we sure know that it will be flagship (especially the pro model). A recent leak has suggested that the pricing of this device will be around $800-$750 for the Pixel 6 and even more than that for the 6 Pro.
That price is way above whatever we are used paying for Pixel devices, the Pixel 5a cost just $540 and this is the most recent Pixel device yet. But whatever the price is, the specs should sure justify it, right? So we need to wait to hear the exact specs and pricing of this device from Google on the 19th of October.
Author:KittysTech
Tech analyst, Collins Eshiet, writes about technology. Follow me on Twitter @KittysTech.
