Add MobilityArena as a preferred source on Google
One of the highlights of this year’s Worldwide Developer’s Conference (WWDC) was Apple’s showcase of its latest operating systems for its gadgets. One of the biggest game-changers revealed for those who own both a Mac and an iPhone is the new Continuity Camera.
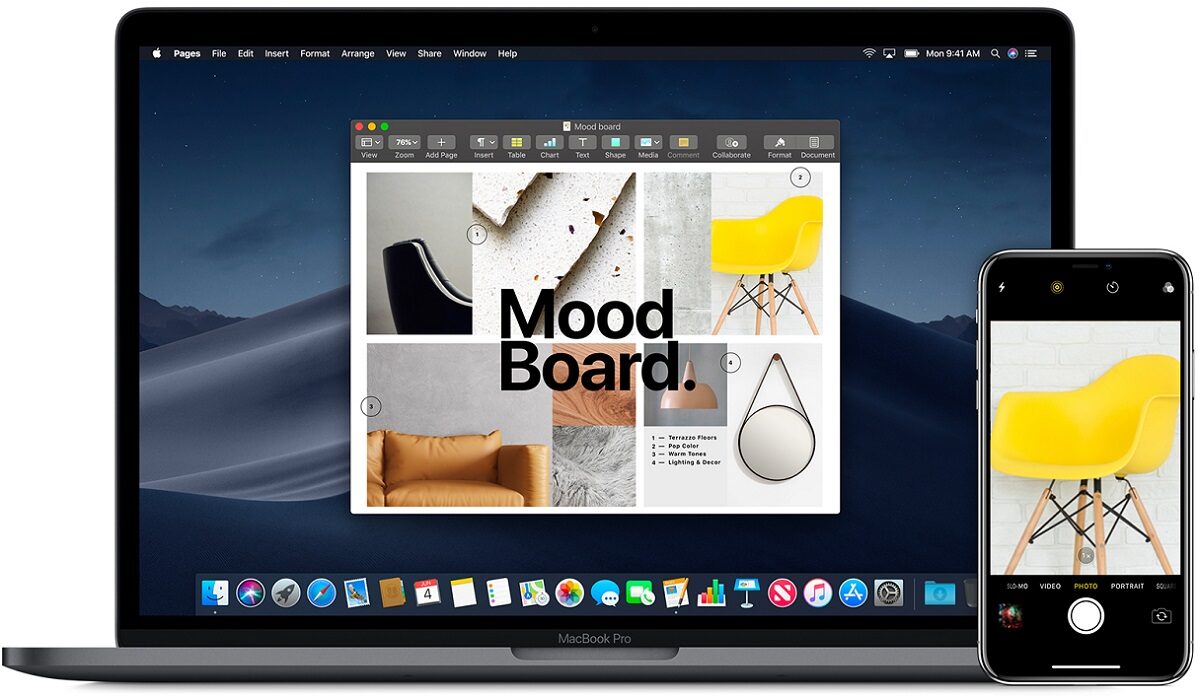
This is yet another continuity feature that Apple has been incorporating into its environment – the Continuity Camera. In essence, it implies that you may now use your iPhone as a webcam if the webcam on your Mac is terrible and you want to appear your best in video meetings.
This guide is divided into two parts, one to show you all the amazing features that the Continuity camera offers and how you can take advantage of them, and the other to show you how to successfully use the continuity camera feature on your iPhone and Mac devices.
What is the Continuity Camera?
Universal Control and Handoff are two continuity features that seamlessly connect all Apple products. Additionally, the Continuity Camera is currently going one step further.
You can essentially use your iPhone as a webcam on your Mac using the Continuity Camera. Everything about the process is simple. It doesn’t require much time to set up. Bring your iPhone close to your Mac, and it will instantly recognize it as an external webcam. All four of the iPhone’s orientations are compatible with the camera. Additionally, you may use the iPhone’s microphone in addition to the camera.
Features of the Continuity Camera
The best feature of this configuration is that it is entirely wireless, though a USB cable may also be used to connect it. This feature will astound you given the dramatic change in the nature of employment, where the majority of people are still employed or enrolled in school remotely.
The continuity camera also offers additional video effects like Center Stage , Portrait video , and Studio Light . Even when you move around, Center Stage keeps you in the picture. There is no need to introduce Portrait mode ; it retains the attention on you while blurring the background. Studio Light gives you a lovely light effect so you can look your best even in dim lighting conditions.
Not every Mac previously supported all of these effects. For instance, the Portrait mode was exclusive to Macs made on Apple silicon. But now even Intel-mac users may experience it thanks to Continuity Camera. These effects can be used separately or in conjunction with one another.
The Desk View is a highly novel and intriguing effect that is also brought by Continuity Camera. The iPhone’s ultra-wide camera is used by the Workspace View to give you a view of your desk. It creates the appearance of an overhead camera system. Additionally, the camera divides the stream between showing your face and the desk, so you are not forced to choose.
Keep in mind that only iPhone 11 and subsequent models can use Center Stage and Desk View , however iPhone 12 and later can use Studio Light .
How Does the Continuity Camera Work?
The continuity camera will operate quite magically anytime you start an app that uses the camera and your iPhone is in the vicinity. Apps like FaceTime can switch to the iPhone camera automatically because its rear camera is much superior to your Mac’s webcam. It will remember your preferences and choose the camera in accordance with them even if you primarily prefer the Mac camera over the iPhone camera.
However, you can manually switch between the cameras at any time. The iPhone will appear in the list of cameras in video conferencing programs alongside all the other webcams since your Mac will treat the iPhone as an external camera.
The majority of the functionality can be implemented by yourself right away. The continuity camera can already be used in apps like Microsoft Teams, Zoom, Google Meet, Skype, etc. since the Continuity Camera registers the iPhone device as a system-wide webcam. In other words, it can be used in any program that allows you to swap cameras. However, app developers must provide automated camera switching depending on user settings in third-party apps.
Requirements to Use the Continuity Camera
You’ll need the following to be able to use the Continuity Camera successfully:
- First, make sure your Mac is running macOS 13 Ventura and your iPhone is running iOS 16. You will have to wait until the fall of this year to obtain the public release or install beta versions of these two pieces of software because they are both in beta at this point.
- Next, sign in to the same Apple ID using two-factor authentication on both devices.
- The iPhone should be linked to the Mac using a USB cable to establish a wired connection. Furthermore, Bluetooth and Wi-Fi must be turned on on both devices for a wireless connection, and the devices must be close to one another.
- Basic continuous camera features are only available on iPhone XR or subsequent iPhone devices, and as was already noted, other effects vary depending on the device.
- Most importantly, you shouldn’t turn off the Continuity Camera on your iPhone. It shouldn’t be an issue because the feature is turned on by default. However, you must enable it if you have previously disabled it.
Here’s how to reactivate your iPhone’s continuity camera if you disabled it previously. Get your iPhone’s Settings app open. Select “General” from the drop-down menu by scrolling down.
- Navigate to “AirPlay & Handoff” in the General settings.
- Then turn on the “Continuity Camera Webcam” toggle.
- Keep in mind that only the iPhone and not the Mac has the capability to enable or disable the continuity camera.
Summarily , the continuity camera promises a lot of amazing features for iOS and Mac users, and this article means to show you all you stand to gain. In the second part of this guide, you’ll learn how to properly use the continuity camera to get the best out of your meetings.
Make sure to recommend this article to your iOS and Mac-loving friends and family so they can also benefit from all the helpful information in it. In the second part of this guide, we show you the different ways to use iPhone as Mac webcam with Continuity Camera .
- Don’t miss our mobile phone reviews .
- Follow our news on Google News .
- Join our WhatsApp Group , to be notified of the most important articles and deals,
- Follow us on Instagram , Facebook , Twitter , and YouTube .
Author:Joan Agie
Add MobilityArena as a preferred source on Google
Apple recently revealed a feature that lets users turn their iPhone into a webcam for their Mac devices to get an even better video quality during video calls and meetings. This promises such a fun, fulfilling, and exciting experience for Apple users, and we’re here to make sure you have all the knowledge you need to take advantage of this.
Use iPhone as Mac webcam with continuity camera
How Do I Use My iPhone As Mac WebcamWithThe Continuity Camera?
Given that your devices comply with the requirements we’ve listed in the first part of this guide, using the continuity camera is a piece of cake. Let’s look at the following steps that will guide you to use FaceTime (for instance) with the Continuity Camera.
● On your Mac, launch FaceTime. FaceTime will automatically recognize and select your iPhone as the webcam if it is nearby. Even without being unlocked, your iPhone can be registered as a webcam on Mac.
Keep in mind that in the future, FaceTime won’t always pick your iPhone as the webcam based on which camera you prefer to use, i.e. if you typically use your Mac camera instead of your iPhone. You can choose it manually in this situation. However, FaceTime will immediately recognize your purpose and pick your iPhone as the webcam regardless of your prior decision if your iPhone is mounted on a suitable stand and connected to your Mac.
● An onboarding dialogue box will show up if this is your first time using the continuity camera on your Mac following the upgrade; select “Continue” from the dialog box.
● Your iPhone will display a “Connected to Mac’s name>” screen while it is being utilized as a camera. Tap “Disconnect” on your iPhone to cease using it as a webcam. Your iPhone will no longer be listed as a camera on your Mac after disconnecting. To utilize your iPhone as Mac webcam once more, you must first disable and then re-enable the Continuity Camera setting in the settings.
● Swipe up on the app thumbnail in the app switcher to quit the Continuity app, which will halt the camera feed from your iPhone without deleting it from the list of cameras. The better choice is to manually switch the camera on your Mac.
Keep this in mind, while your iPhone is being used as a webcam, you’ll not be able to use it. Until you lock your iPhone or go back to the phone’s “Connected to Mac” screen, the video feed will be halted.
● Go to the ‘Video’ option from the menu bar in the top-left corner of the screen to switch between cameras on your Mac during a FaceTime chat.
● Choose your preferred camera from the menu after that. Here, you can also change the microphones. There is no option to swap cameras in the screenshot below because the iPhone camera is the only one that is available. However, a camera option, identical to the microphone one, will be available on your menu.
How Do I Use My iPhone as Mac webcamWithThe Video Effects on a Call?
As we mentioned in the first part of this guide, the continuity camera offers s number of video effects that work together or individually – depending on your preference – to give your video an outstanding quality. These video effects include Center Stage, Portrait video, Desk View and Studio Light. For in-depth information about what these effects do, make sure to see the first part of this guide.
The following instructions will help you use the video effects correctly while using the Continuity camera:
● Click the “Control Center” icon in the menu bar to access the visual effects while you are on a call.
● Then select “Video Effects” from the Control Centre’s menu.
● The menu for video effects will appear. Your device’s available effects will start to show up. Choose the effect that you want to apply. You can also combine several effects. A checkmark will appear next to the effects that have been chosen. To deactivate the effect, click it once more.
The Desk View effect in particular is one of the video effects that can be a little challenging to use. You can however follow these instructions:
● Click the Desk View button in the Control Center to use it.
● An onboarding dialogue will show up the first time you use the desk view. The “Continue” button is located in the bottom right corner.
● A new window will appear with the Desk View. No matter the video conferencing program you’re using, you must share your screen and select the Desk View window to share with the other participants in the conference.
● Using FaceTime as an example once more. In the toolbar at the base of the FaceTime window, select the “Share Screen” icon.
● Then, from the Share Screen overlay window that displays, choose “Window.”
● Your video feed will be visible while the desk view is shared, but you can opt not to share it and turn down your camera from the FaceTime app. The desk view feed won’t be affected by this.
● The Center Stage effect is also automatically activated when you choose “Desk View” to keep you in the spotlight when you share your desk. But from the Control Center, you can turn it off if you like.
Even though we used FaceTime to show how the continuity camera and video effects worked, you may still utilize it in other apps (including Microsoft Teams, Google Meet, Skype and Zoom as of now. Since each app places them differently, the only difference when using it with other apps would be the menus from which you may manually switch the camera or share your screen. However, the fundamental approach to employing the continuity camera will remain the same.
In summary , the continuity camera is a great feature, thank you Apple! It’s highly unlikely that you already know how to use this properly, so feel free to take advantage of the instructions we’ve provided in this article to use the continuity camera successfully.
You should also consider sharing this article so your friends and loved ones can also benefit from the helpful information we’ve provided in it.
- Don’t miss our mobile phone reviews .
- Follow our news on Google News .
- Join our WhatsApp Group , to be notified of the most important articles and deals,
- Follow us on Instagram , Facebook , Twitter , and YouTube .
