Add MobilityArena as a preferred source on Google
The Microsoft HoloLens 2 is hailed as a groundbreaking device in the realm of augmented reality (AR) , giving users a glimpse into a future where digital and physical worlds seamlessly intertwine. With its impressive capabilities, it has found its place in various industries, ranging from healthcare to manufacturing. However, despite its innovative technology, users have reported several complaints that can hinder the overall experience. Let me show you some of these issues and explore practical solutions to enhance your journey with the HoloLens 2.

- Where it all started
- Common Complaints of the Microsoft HoloLens 2 Visual Distortions: The Rainbow Effect Limited Field of View Battery Life Concerns Comfort Issues Intermittent Glitches and Performance Issues
- Conclusion
Where it all started
Think of stepping into a world where holograms float around you, sometimes scary, sometimes fun you know, allowing you to interact with digital content as if it were right in front of you. For many early adopters and professionals, this was the promise of the Microsoft HoloLens 2. However, as they donned the headset, excitement quickly turned to frustration when they encountered various challenges.
Common Complaints of the Microsoft HoloLens 2
Visual Distortions: The Rainbow Effect

One of the most common complaints from users is the “rainbow vision” effect, where colors appear inconsistent across the field of view. Users have described seeing bands of different colors, especially against white backgrounds, which can be distracting and diminish immersion. I recommend you adjust Brightness and Settings. This is how to:
- Users can manually adjust the brightness settings on the headset to find a level that minimizes glare and improves color consistency. Additionally, using the device in well-lit environments can help reduce the prominence of this effect.
Limited Field of View
While the Microsoft HoloLens 2 offers an impressive AR experience, many users have noted that its field of view (FOV) is somewhat limited. This restriction means that holograms can feel confined to a small area, requiring users to move their heads frequently to see everything. There’s a need for conscious Positioning and Awareness:
- To make the most of your experience, be mindful of your positioning when using the headset. Try to center your focus on holograms within your immediate view and adjust your physical space to accommodate better interaction with virtual objects.
Battery Life Concerns
Users have reported that the battery life of the Microsoft HoloLens 2 can be quite limited, especially during intensive use cases like collaborative work or gaming. Many find that continuous use drains the battery quickly, often lasting only two to three hours. Simply optimize the usage patterns:
- To extend battery life, consider using power-saving modes when possible. Additionally, plan your usage around charging opportunities or invest in a portable charger compatible with the HoloLens 2 for longer sessions.
Comfort Issues
Some users have expressed discomfort while wearing the Microsoft HoloLens 2 for extended periods. The weight and design can lead to fatigue or pressure points on the head. I recommend that you adjust fit and take breaks:
- Ensure that the headset is properly adjusted for a comfortable fit. Taking regular breaks during extended use can help alleviate discomfort and allow your eyes to rest.
Intermittent Glitches and Performance Issues

Users have experienced occasional glitches, such as flickering images or lag when interacting with holograms. These interruptions can disrupt workflow and detract from the immersive experience. Software Updates and Restarts will help:
- Regularly check for software updates from Microsoft that may address these performance issues. If glitches persist, try restarting the device to refresh its systems.
Conclusion
While the Microsoft HoloLens 2 is undoubtedly a powerful tool for augmented reality experiences, it’s essential to recognize and address common user complaints proactively. By implementing these practical solutions, users can enhance their experience and fully embrace the potential of this innovative technology. As you embark on your journey with HoloLens 2, remember that every new technology comes with its learning curve. With patience and a willingness to adapt, you can overcome these hurdles and unlock a world of possibilities right before your eyes! Embrace the future of augmented reality with confidence!
Author:Ifeoluwa Adeleke
Add MobilityArena as a preferred source on Google
So, to set up cellular service on your iPhone, you need either a physical SIM card or an eSIM. Your SIM (physical or E) is the gateway that connects your smartphone to your carrier so it can use network services like telephone calls, SMS, or mobile internet connectivity.
A physical SIM card is self-explanatory, and most people are familiar with it. An eSIM, on the other hand, is a virtual SIM card; it isn’t physical. But they have the same function – to connect your smartphone to your wireless carrier so you can use their network services.
- Install a physical SIM card to set up cellular connectivity on iPhone
- Activate an eSIM to set up cellular service on your compatible iPhone eSIM Carrier Activation eSIM Quick Transfer Scan a QR Code provided by your carrier Transfer from a different smartphone Activate service through a carrier’s app
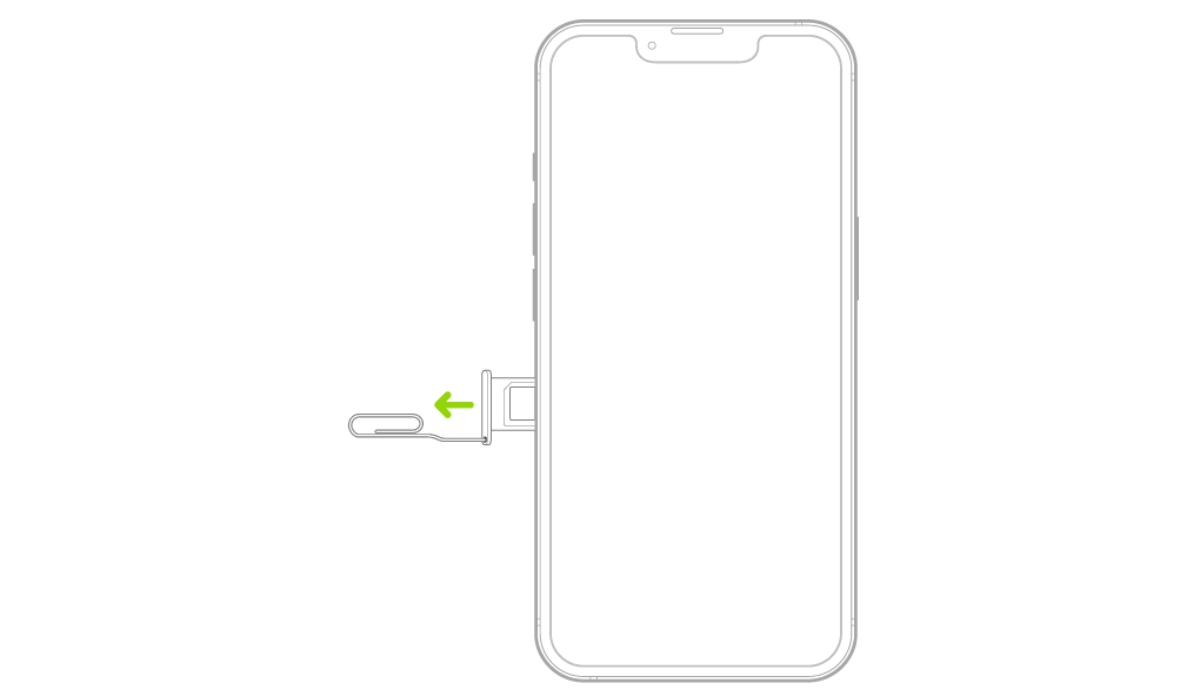
Install a physical SIM card to set up cellular connectivity on iPhone
Once upon a time, all you needed to set up cellular service on your Apple iPhone was a physical SIM card. To do that, you have to use a SIam tray remover to open the SIam card tray and insert your SIM card. Push it back in and on a few moments, your iPhone would connect to your wireless carrier.
That still works today for iPhones that have a physical SIM card slot. However, not all iPhones have a physical SIM slot again. The arrival of eSIM technology has changed that. Some new iPhone models come with both a physical SIM slot and an eSIM. In the United States, all new iPhones sold in the country since the iPhone 14 have eSIM only.
Activate an eSIM to set up cellular service on your compatible iPhone
If you have one of those eSIM iPhones and you are on the US, or you are in any other country where mobile network operators provide eSIM service , detailed below are instructions on how to set up cellular service on your device.
Note that you will need an active Internet connection at any point in time during the process of activating an eSIM. Let’s get started.

eSIM Carrier Activation
If you have never used an eSIM with your mobile number before, an eSIM carrier activation is the main way to set up cellular service on your iPhone.
You need to go to a carrier store or facility to request for an eSIM activation. Your carrier will then assign a new eSIM directly to your iPhone and you will receive a “Finish Setting Up Cellular” notification on your phone, tap it. Cellular service will now be active on your iPhone.
eSIM Quick Transfer
Some carriers support transferring a phone number from your previous iPhone to your new iPhone without needing to contact them. This method requires iOS 16 or later on both the old and the new devices).
On your new iPhone, go to Settings > Cellular, tap Set Up Cellular or Add eSIM, then tap Transfer From Nearby iPhone or choose a phone number. On your previous iPhone, follow the instructions to confirm the transfer.
Note that after your phone number is transferred to your new iPhone, it stops working on your previous iPhone.
Scan a QR Code provided by your carrier
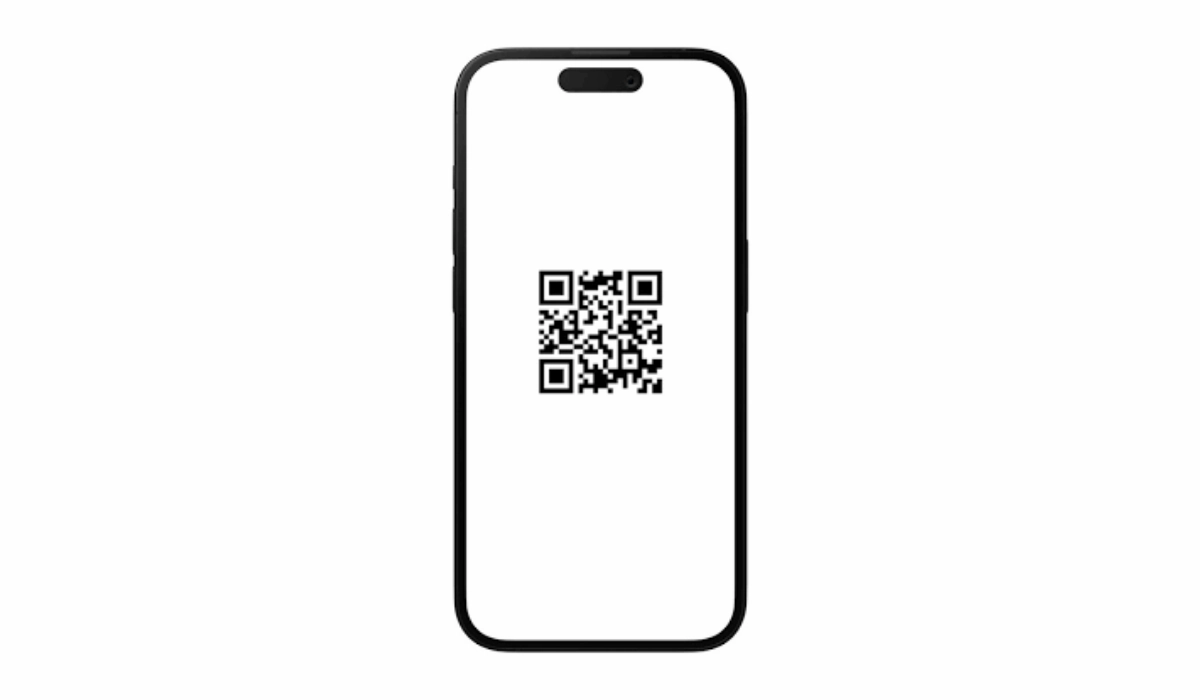
If you have been previously assigned an eSIM by your carrier, usually, you would have been given a QR code that you can use to activate your number on any eSIM smartphone. You can use that QR code to set up cellular service on your new iPhone without having to contact your carrier or mobile network operator.
- On your iPhone, go to Settings > Cellular ,
- tap Set Up Cellular or Add eSIM ,
- tap Use QR Code .
- Position iPhone so the QR code appears in the frame and is automatically scanned by your device.
- You may be asked to enter a confirmation code provided by your carrier.
Transfer from a different smartphone
If your previous phone isn’t an Apple iPhone, contact your carrier to transfer the phone number.
Activate service through a carrier’s app
To set up cellular service using a participating carrier’s app, go to the App Store, download the carrier’s app, then use the app to activate cellular service.
Author:Mister Mobility
Digital Skills and Communication Coach | Mobile Phone Connoisseur since 2001 | Tech Blogging since 2004
